Ultralight Ultralight Rifles

You can easily make your own. Go back just a couple pages and you will see two examples. You can cut the carbon fiber tube to whatever you would like.

Probably $100 in total material and you can have a custom length carbon fiber stock

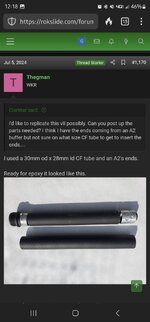
Are you able to order the A2 end pieces or do you just buy a cheap buffer tube, chop and grind until they fit into the carbon tube?
 

Attachments

  • Screenshot_20240714_001851_DuckDuckGo.jpg
    Screenshot_20240714_001851_DuckDuckGo.jpg
    106.1 KB · Views: 36
Are you able to order the A2 end pieces or do you just buy a cheap buffer tube, chop and grind until they fit into the carbon tube?
The latter. However, you could also just do a stock like the second build in this thread that uses a carbine length buffer tube and a CAR15 stock. That's pretty light weight and would allow you to easily adjust the length of pull for your daughter as she grows.

Smoke Composites and Andro Corp also make CF buffer tubes that are a little lighter than a fluted aluminum buffer tube. It's also very easy to add a foam recoil pad to the CAR15 stock to help her with recoil.
 
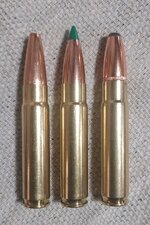
I've got 5 days to hunt some piggies this week & I'm taking the opportunity to, hopefully, do some real world bullet evaluation in the .300 Ham'r & see which of these 3 will be coming west for an elk hunt.

L-R: 125gr TMK, 125GR Nosler BT, 130GR Speer HHC
20240714_131124.jpg

I've had to circumcise the TMK to get it to fit in the mag, but at the ranges I'll be using it, I'm not concerned. All 3 loads are running between 2480 & 2510fps & all 3 group together out to 150yds. At 200, the BT is about 1" higher. They're all grouping around 1½" at 100 for 10 rounds.

Fingies crossed I get to slap one of each through some meat & bone!
 
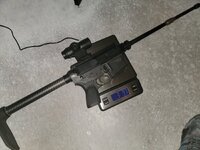
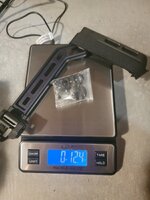
It looks like my buffer tube did not come with castle nut or a flange that would help keep the spring in place for rear takedown pin. Do these need to be purchased separate or am I not understanding something.

I also lost the small pin that goes in the spring for the front take down pin! Damn thing shit across the garage into the abyss!

The safety does not seem to function properly either on this new frontier arms LPK. It's really floppy and will not lock into position.

Actually this post really sums up what I have found so far


Attachments

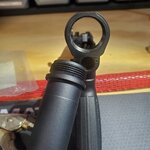
  • 20240717_205931.jpg
    20240717_205931.jpg
    268.2 KB · Views: 21
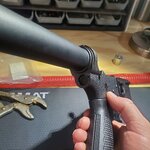
  • 20240717_210004.jpg
    20240717_210004.jpg
    317.7 KB · Views: 21
It looks like my buffer tube did not come with castle nut or a flange that would help keep the spring in place for rear takedown pin. Do these need to be purchased separate or am I not understanding something.

I also lost the small pin that goes in the spring for the front take down pin! Damn thing shit across the garage into the abyss!

The safety does not seem to function properly either on this new frontier arms LPK. It's really floppy and will not lock into position.

Actually this post really sums up what I have found so far

Good news, the farrow tech stock comes with a screw to block the rear spring in! No castle nut or plate needed.

The takedown pins are a readily available part, you are definitely not the first person to “shit one across the garage” 😂 I’ve launched a few myself but I’ve always been able to relocate them. Replacements are a few quarters at gun shops.

I had trouble with my trigger/safety. I had to shave a bit on the trigger to make it fit. It has been a while but it was easy to self diagnose with the upper not attached. Lock the hammer down, try the safety while looking at the trigger and watch for contact. Hold the hammer and pull the trigger. Watch for movement and contact. I can take mine apart tomorrow to send photos of how I shaved it. Being plastic, I used my pocket knife and it didn’t take much.
 
You might need to deburr the safety detent hole. I had to on one of my TNA lowers for the safety to function correctly.
There was just enough swarf in the hole to bind the pin.
 
Hi, I know I'm late to the party, so here's my attempt at a bb gun. The tna lowers, my 2 needed 6/32 grub screws to plug the holes the 4/40 that came with but stock dropped through the hole. The stock insert threads are squeaky tight. Still waiting on carbon tube for the hand guard, and steel lower parts kit installed. Found a faxon barrel on ar15 discounts for 125 to replace the bca tent peg.
 

Attachments

  • 17213029573261308244617029890080.jpg
    17213029573261308244617029890080.jpg
    383.7 KB · Views: 59
Good news, the farrow tech stock comes with a screw to block the rear spring in! No castle nut or plate needed.

The takedown pins are a readily available part, you are definitely not the first person to “shit one across the garage” 😂 I’ve launched a few myself but I’ve always been able to relocate them. Replacements are a few quarters at gun shops.

I had trouble with my trigger/safety. I had to shave a bit on the trigger to make it fit. It has been a while but it was easy to self diagnose with the upper not attached. Lock the hammer down, try the safety while looking at the trigger and watch for contact. Hold the hammer and pull the trigger. Watch for movement and contact. I can take mine apart tomorrow to send photos of how I shaved it. Being plastic, I used my pocket knife and it didn’t take much.
Thanks! Looks like there might be a safety detent? I did not notice one in the video I was watching but other safety kits include one in the part list. I'll check my LPK.
 
Thanks! Looks like there might be a safety detent? I did not notice one in the video I was watching but other safety kits include one in the part list. I'll check my LPK.

Ah. Yes. There is a detent & spring that inserted from the underside of the lower. It mates up with a hole in the top, right side of the pistol grip. Drop the detent into the receiver, put the spring in the grip & then fit them together. The grip screw holds it all together.

Your rear pin detent can either be held in with a blanking screw, threaded into the hole, or you can use an endplate. Personally, with an A2 tube that doesn't require a castle nut, I'd insert a small set screw (I think a #6 is the right diameter, but I've been wrong before)
Thanks!

With all the carbon fiber buttstocks are folks still using the buffer detent and spring? Do you notch the A2 end cap to accommodate the detent?

Sent from my SM-G973U using Tapatalk
 
Thanks!

With all the carbon fiber buttstocks are folks still using the buffer detent and spring? Do you notch the A2 end cap to accommodate the detent?

Sent from my SM-G973U using Tapatalk

Toss it in the trash, it's not needed at all. Just crank the buffer tube in good & tight.
 
Thanks!

With all the carbon fiber buttstocks are folks still using the buffer detent and spring? Do you notch the A2 end cap to accommodate the detent?

Sent from my SM-G973U using Tapatalk
If you mean the buffer retainer and spring that drop in the hole at the bottom of the buffer tower on the lower...(?)....no, no need to install them at all since there's no buffer to retain.

Your LPK bag can still hold your buffer retainer/spring and bolt catch/roll pin/spring when you're finished. Those parts aren't necessary for these.
 
It looks like my buffer tube did not come with castle nut or a flange that would help keep the spring in place for rear takedown pin. Do these need to be purchased separate or am I not understanding something.

I also lost the small pin that goes in the spring for the front take down pin! Damn thing shit across the garage into the abyss!

The safety does not seem to function properly either on this new frontier arms LPK. It's really floppy and will not lock into position.

Actually this post really sums up what I have found so far


Ah yes, a right of passage. Theres a couple pins lodged somewhere in the roof of my gameroom I'm sure.

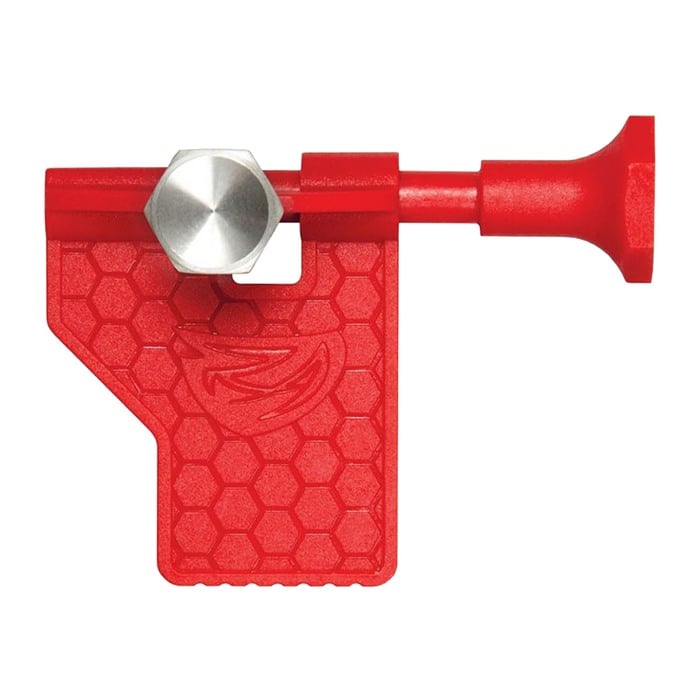
For anyone who builds ARs fairly often, this thing is awesome:

 
Got the safety figured out. There was a little nub on the middle of the barrel body of the safety, I cut it off and now all works well!

Guess now I just wait for my CF tube to show up and for the solo 300 to get back into stock.
 
Ah yes, a right of passage. Theres a couple pins lodged somewhere in the roof of my gameroom I'm sure.

For anyone who builds ARs fairly often, this thing is awesome:

I used a 1/4 clevis pin. Worked pretty good I think. That tool looks handy also
 
image0.jpeg

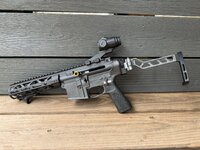
Here is it in its final form. I was interested in using 300bo as a hunting round, especially with the fast twist and new ammo that's been coming out that opens up at subsonic velocities so unlike you heathens I kept with the Solo300 naming! My goal here was short barrel, lightweight, suppressed, compact and simple. I could pull more ounces out of it but there were a few things I didn't want to skimp on like the Larue Trigger. As pictured this is 3lbs 11oz. Suppressor should kick that to 4lbs 6oz or so.

I took the upper out a few weeks ago and dialed in the prism. Minus the action being stiff, it shot great. Too bad my wife tossed the evidence. Time to take her out for the paper plate test!

Build List
Solo300 with Faxon 7.5 1:5t barrel
KVP Konza Handguard
Primary 3x prism
TN Arms lower
Larue MBT2
Hogue grip, some AT3 stock knockoff my buddy gave me.
 
View attachment 611753

I went a little heavier on this one. Partly because it was on hand, and partly because it's a larger chambering with more recoil.

As pictured, this was a 30HRT (6.8 SPC brass sized in a 30 Herrett die and trimmed). The barrel is an X-Caliber 16" spaghetti contour. Weighs 19.5 oz. Has a lot of potential for an ultalight. Can push a 155 ELDM at about 2,450 fps...but, I haven't been able to get this chambering to extract reliably in a straight pull bolt. Since the AR has no real primary extraction, it seems this can be a problem. Still thinking about that one, but if the 77TMK keeps working like it did on the black bear, the 30 HRT may be a moot point.

Extraction has not been a problem at all with any 223 based cartridges, so I put on a Wilson Combat 300 HAM'R ultralight barrel, which weighs the same and isn't far behind the HRT. I've taken coyotes, deer, black bear, moose and grizzly with the HAM'R. So far it has worked really well.

View attachment 611754

Parts are similar. Differences:
Kaw Valley PCC carbon fiber handguard. A little heavier than the Jag Composites, but less than 1/2 the price. Since there's no gas tube to cover, this kind of handguard works.

PSA fluted buffer tube.
B-5 CAR 15 Stock
Buffer tube and stock only weigh about 7.5 oz together, so not as light as the A2 setup, but still pretty light, and more convenient to carry and more comfortable to shoot.
grate build love your setup..
 
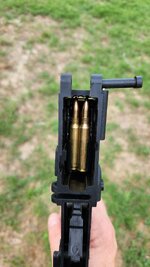
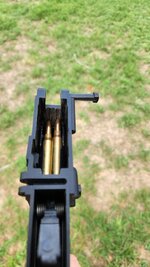
Cut a few grooves in my NFA lower to allow 2.400" OAL with my windowed mags. Hello, 88 ELDM! Could maybe get a little more OAL but the NFA is getting thin on material up there. I think 2.45" would punch through the lower. How does the TN Arms compare?

The upper and barrel extension will take a little massaging but should be good after that.

According to GRT, I should be able to push the 88s to 2650 with my 20" barrel, keeping things above 1800 fps at 5000' out to 675 yds. Not that I'm shooting that far on game...
 

Attachments

  • 20240720_114831.jpg
    20240720_114831.jpg
    153.2 KB · Views: 32
  • 20240720_114850.jpg
    20240720_114850.jpg
    161.8 KB · Views: 32
Back
Top