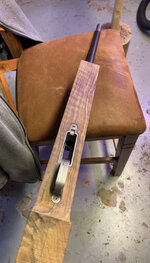
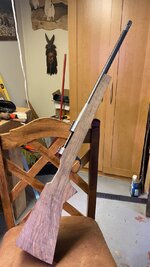
Rifle stock build progress thread

OP
Decker9

Decker9

WKR
Joined
Apr 10, 2015
Messages
854
Location
BC goat mountains
It’s a great time to start with the cold season upon us CB!

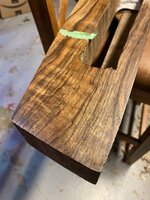
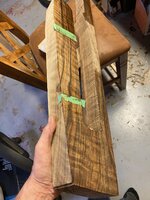
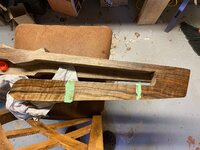
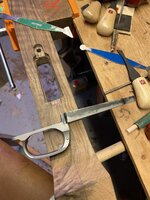
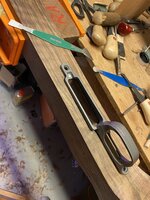
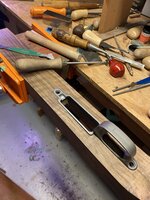
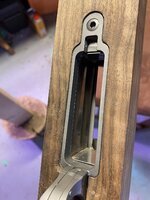
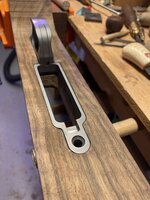
I flipped it over and am doing some eyeballing, checking a few times before digging in to far. If my measuring is correct, I should have about .100” to shave off the bottom after the metal is sunk in. The lineup pins hold everything perfectly in line so it goes straight in and straight out.
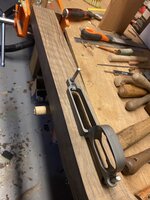
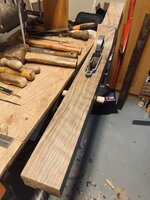
DD5A1E46-B2CE-4C77-A986-281850FD9055.jpeg0B70D515-AAF0-4CD4-BBC0-CDDDBA54D03F.jpeg

Another couple coats of oil on the test pieces. I added a few drops of spar varnish to the tung oil this morning (the top finish). I think I’ll pick up some danish oil to test as well. Also thinking of ordering some alkenet rood powder to try out. A little reddish brown may help the dark mineral lines stand out more, maybe. Trial and error lol.
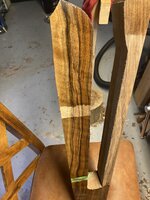
9C2A3C28-256C-438F-AB84-B6556EC57FAC.jpeg
 
Joined
Feb 2, 2020
Messages
1,990
It’s a great time to start with the cold season upon us CB!

I flipped it over and am doing some eyeballing, checking a few times before digging in to far. If my measuring is correct, I should have about .100” to shave off the bottom after the metal is sunk in. The lineup pins hold everything perfectly in line so it goes straight in and straight out.

View attachment 478104View attachment 478105

Another couple coats of oil on the test pieces. I added a few drops of spar varnish to the tung oil this morning (the top finish). I think I’ll pick up some danish oil to test as well. Also thinking of ordering some alkenet rood powder to try out. A little reddish brown may help the dark mineral lines stand out more, maybe. Trial and error lol.

View attachment 478106

I have a suggestion you should try on a small piece of scrap. It is supposed to make the grain really pop and some of the pictures I've seen are awesome. It is what I'm going to do on mine.

Put a coat of sealer on. Don't fill the pores. Let cure. Spray the whole thing with matte black spray paint so it's solid black. Rub back the paint with maroon or gray 3m pad, or 320-400gr paper to bare wood. It should leave the paint in the grain and pores. Then put on the alkanet oil, other sealer, and finish.
 
OP
Decker9

Decker9

WKR
Joined
Apr 10, 2015
Messages
854
Location
BC goat mountains
Ooh, alkanet root. Have you tried it before? Ever used any of the aniline or other dyes?

I never have no. Iv read a little and seen some photos, that’s about my experience with any kind of colouring. Iv only used Circa tung oil, and have added a small % spar varnish a couple times. I do like the reddish brown that Alkenet can add to some woods, something I’d like to experiment with.
 
OP
Decker9

Decker9

WKR
Joined
Apr 10, 2015
Messages
854
Location
BC goat mountains
I have a suggestion you should try on a small piece of scrap. It is supposed to make the grain really pop and some of the pictures I've seen are awesome. It is what I'm going to do on mine.

Put a coat of sealer on. Don't fill the pores. Let cure. Spray the whole thing with matte black spray paint so it's solid black. Rub back the paint with maroon or gray 3m pad, or 320-400gr paper to bare wood. It should leave the paint in the grain and pores. Then put on the alkanet oil, other sealer, and finish.

That’s a interesting concept!
 

Macintosh

WKR
Joined
Feb 17, 2018
Messages
1,934
The black can look good, although would test on a scrap. Bone black powder is the traditional way to do that, basically you make a slurry with black and finish and rub it into the pores As a filler. It can look good on wood without much color where sanding in finish to fill would be kind of bland, but I dont think it adds anythhing on a really nice piece of wood. If you are sanding in a slurry to fill pores that,ll darken the pores anyway.
thats a very, very nice piece of wood with plenty of color so Id be tempted not to color it much if at all, but many people really like it with some color. Alkanet is kind of a witches brew, takes a long time and hard to duplicate it from batch to batch. Last few stocks I did I used some techniques borrowed from steve hughes. Basically you seal and fill the stock, then wet sand with water to take all the finish off the surface, then use a dye, and then topcoat over that. Its a lot of prep work, but looks great and is very repeatable and doesnt obscure the wood grain the way stains do. Ive used behlens solar-luxe american walnut with good results. but try the alkanet! Its the real thing.
 

30338

WKR
Joined
Jun 2, 2013
Messages
1,862
I have absolutely no desire to do this myself but can't stop looking at your pictures. Really fascinating to me watching that come together. I'll be tagging along. Much respect to those that can do this. And those blanks look fantastic too.
 

Wrench

WKR
Joined
Aug 23, 2018
Messages
5,596
Location
WA
I've had great luck with truoil and believe it or not... armorall. There's plenty of details available on the internet if you want one more option. The cool part about it is the speed it dries.

Tock-o gave solid advice on the rear tang. I made the mistake once of bedding that tight. I did the entire action in devcon and it was a 100% solid bed job. The rear blew a chunk out of the stock where the action met.

I have no idea how it could do that....but it sucked. You must have relief at the rear.

Looks great, rock on.
 
OP
Decker9

Decker9

WKR
Joined
Apr 10, 2015
Messages
854
Location
BC goat mountains
I've had great luck with truoil and believe it or not... armorall. There's plenty of details available on the internet if you want one more option. The cool part about it is the speed it dries.

Tock-o gave solid advice on the rear tang. I made the mistake once of bedding that tight. I did the entire action in devcon and it was a 100% solid bed job. The rear blew a chunk out of the stock where the action met.

I have no idea how it could do that....but it sucked. You must have relief at the rear.

Looks great, rock on.

Thanks Wrench, that’s what I’m afraid of. On the other stock I did, I used a piece of masking tape on the rear edge of the tang before bedding. I’m hoping it’s enough clearance to avoid a chip out.

Was it on a Remington style action that chipped on you?
 

Wrench

WKR
Joined
Aug 23, 2018
Messages
5,596
Location
WA
It was a Remington 700 sa in 260 at about 8# all up. Blew out in the first 100rds. Bedding was as you'd expect if you paid top dollar and it did have pillars.

My guess is not that the Bedding yielded but the action vibration and/or elongation at firing was too much. I have to think .015" would be plenty. I use 20mil tape now....but I feel its overkill.
 

Macintosh

WKR
Joined
Feb 17, 2018
Messages
1,934
…I've had great luck with truoil and believe it or not... armorall. There's plenty of details available on the internet if you want one more option. The cool part about it is the speed it dries….
At the risk of taking this off topic, how on earth does the armorall fit into your finish? Pretty sure if there are a million people into making stocks, there are 11-teen million ways of finishing them. I’ve tried a lot of em, but this is a new one for me!
 

Wrench

WKR
Joined
Aug 23, 2018
Messages
5,596
Location
WA
I'm not a chemist and called 100% bs on it until I tried it. It reacts almost like a catalyst. The truoil is ready to work in less minutes than typically hours required.
 

Macintosh

WKR
Joined
Feb 17, 2018
Messages
1,934
Huh. I’ll have to try that. I dont particularly love truoil, but its so similar to other polymer finishes I bet it would work with others as well. Do you mix it with finish and then apply, or do you finish with TO and then spray on top, or?
What do you suppose was going through the mind of whoever tried that first??
 
OP
Decker9

Decker9

WKR
Joined
Apr 10, 2015
Messages
854
Location
BC goat mountains
Iv read about tru oil and armorall a few times. Iv never seen a finished stock with it, but are some guys that use it. It’s suppose to leave a pretty solid finish from what I understand.

I only used tru oil once many years ago, I think actually the first stock I ever tried finishing. It looked pretty bad, mind you it was before internet, so there wasn’t much learning before applying.

I picked up that can of Danish oil yesterday and got a second coat on this morning. I think I found what I’ll use :). It adds a hint of dark compared to to the Daly’s and tung, and isn’t as shiny as the tung/varnish.

I’m not sure on its durability in the long term, but seems like it would be an easy finish to touch up from time to time.

6A3B5A97-B7B6-4C27-AF63-A65DCB51CD69.jpeg5BC620F5-919F-416F-AF45-05370CBD4CC4.jpeg

Left to right,
tung with about 5% varnish
Daly’s ship’shore
Danish oil.

BA822501-8225-4532-8E1B-65B04E936A7F.jpeg
 
Joined
Feb 2, 2020
Messages
1,990
Beautiful.

You can also cut tru oil 50/50 with boiled linseed oil (I'd probably use an artist quality one and not one available at the hardware store). It will give it a longer working time, cut down on the shine in a built up finish, and look more similar to a rubbed oil finish.
 
Joined
Feb 2, 2020
Messages
1,990
Looking great! That barrel kills me. But I'm excited to see your finished project and it's looking great so far. Are you going to do any checkering?
 
OP
Decker9

Decker9

WKR
Joined
Apr 10, 2015
Messages
854
Location
BC goat mountains
Looking great! That barrel kills me. But I'm excited to see your finished project and it's looking great so far. Are you going to do any checkering?

I’ll be sending this one out for checkering after it’s finished. I’m not quite up to par yet to hit a stock with the checking tools, hopefully one day though.

Iv been trying to convince my lady to take up checkering, she’d be great at it I think.
 
Top