Custom Carbon Fiber Stock

OP
R

RepeatPete

Lil-Rokslider
Joined
Aug 13, 2023
Messages
171
what Repeat is trying is way more ambitious than what I do. carbon fiber, vacuum bagging and starting from complete scratch. But, they build swimming pools and high performance boats with fiberglass laid in normal conditions, so it is good enough for me.

^^^ I posted what you do not necessarily for how you do it but more for why you do it. Mainly ideas on stock ergonomics which is what I think he was seeking from the two he listed above.

I saw that thread! I’m kicking myself a little - I bought the takeoff Tupperware stock off eBay, and then read about how nothing sticks to that material and how they are so flimsy. If I had seen that thread before I would have just gone that route instead of carving my own out of foam. Oh well, I guess I’ll do both!
 
Joined
Jan 26, 2017
Messages
3,233
Location
PA
lol i'm watching your thread kicking myself for effing with the tupperware stock to begin with. hadn't thought of using greenboard for a form and laying over that
 

wind gypsy

"DADDY"
Joined
Dec 30, 2014
Messages
10,040
This is awesome, thanks for sharing the process.

I like a little chunkier grips with short reach to trigger and a good place to put your thumb on the back side. Yours looks nice without some of the chunk. I would definitely go the manners LRH or grayboe trekker style barrel channel for ease of build and flexibility with future barrel contours.
 

Gobber

FNG
Joined
Aug 8, 2023
Messages
47
For resin I was going to use West System 105-A with the slowest hardener, although I still need to look up the approximate cure time. I chose this because it’s easily available, and relatively cheap.
With you on this, that's the same stuff I typically use. On a summer evening, work time is about 40 min before you need to have it in the bag and pulled down in order for the excess resin to wick out through the peel ply. YMMV, IMHO. Cure time is typically stiff yet pliable the next morning and then full on rock hard within a few days depending on temperature. One trick I like is in the summertime, set your stock in a hot car for a few hours to give the resin a good post cure.

The CF material I’m using is 3k, which is why I think I may need more.. The sleeve expansion/thinning is why I want to reinforce the wrist/grip area with extra layers as that’s where the sleeve will be stretched the most.
Yes, you will need more CF in load bearing areas. Best to put down an initial CF skin to stiffen up the surface of your plug and let it cure overnight. That will show you where to add reinforcing elements and do shape corrections as needed. I would figure this build would see at least 3 separate bagging stages- Initial skinning, addition of structural supports & fillers to smooth out the surface, then final skin. This way you see what you need where you need it and additionally you don’t consume all your supplies if there is a problem.

Bear in mind that in fabricating a prototype stock, it’s not using custom aluminum molds, specialty vacuum infusion rigs, and fitted foam plugs that have been refined over hundreds of copies costing tens of thousands of $$. That's for wimps! We are winging it big time using low tech gear on a shoe string budget. Might not be the prettiest or the lightest, but it’s how you get a stock that fits exactly the way you want it to.

As to your vacuum source, remember it should be able to run for several hours continuously. My vacuum rig is a salvaged refrigerator compressor with a few additions. It may look like a moonshiner's still, but it can pull down to 28.5+ In Hg which is more than enough. Ole Dusty can run continuously for days if needed and has worked for years. If you are looking for a vacuum pump, you don't want it rated for high CFM - we're not evacuating an HVAC system. Slow is good - Better to have a slow draw down so you can adjust your bag as it tightens up. I will turn the pump on and off several times, release a bit of vacuum, adjust for wrinkles & filler blocks before cranking it down all the way tight.

Here you can also see a simple bagging set up - Stretchlon Green 200 bag, black sealing tape on either side, the blue part at the bottom is a two part re-sealable strip that allows the bag to be used multiple times. The vacuum line is simple Homedepot clear tube that is run through the back of the bag with about 12 extra into the inside. Pro Tip - use a paper towel as an internal vacuum flow channel to disburse the air pull.


You definitely want a vacuum gauge in your plumbing so you know what’s really going on. My rig has a threaded pin valve that allows me to create a controlled leak that fine tunes the vacuum force level. I’ve crushed a few projects early on using too much vacuum. Yours will be fine as it doesn’t have any internal voids. A shop vac should generate a good draw down, but test it out on some scrap to watch for compression.

As to supplies, it’s good to check around for pricing. Some of the big suppliers I’ve used in the past don’t sell by the yard any more, but there are those that do. Not sure where you got your CF fabric, but Amazon is not your friend. Take a look at https://sollercompositesllc.com/. They are great to work with but only stock certain items. Definitely worth it to shop around for bagging supplies.

TaperPin is dead on with his points. There are several ways to do this type project and being ready for leaks is a biggie. Little tabs of Gorilla tape pre-cut are good to have at the ready and very good idea to have a separate bag ready if needed.

Sorry for the avalanche of info, but its best to take composites one step/layer at a time initially in a project.
 
Last edited:

Gobber

FNG
Joined
Aug 8, 2023
Messages
47
Someone please bring a DIY kit to market.
Another route is a checklist of items needed to do a project. That way you can pick what you need from current vendors and hopefully get better pricing.
I‘ll refresh a list from a previous project, tailor it toward a rifle stock build and post it for reference.

As a side note- some really clever CF fabricators are in the remote control glider community. These guys know how to squeeze a nickel and get things done. Conversely- the videos with the Brits from EasyComposits are really entertaining to watch but not so easy to replicate without access to all their products and gear.
 

Formidilosus

Super Moderator
Shoot2HuntU
Joined
Oct 22, 2014
Messages
10,541
@Formidilosus @Lawnboi any stock design input?

You’ve got the overall idea. Negative comb, no drop at heel, vertical grip with about a 1.5 to 1.75” trigger reach, scalloped behind the grip, parallel toe line, parallel forend. I wouldn’t do the cut out in the forend for the Arca rail that you have because that’s where I carry it, however I understand why you did.

This is the closest stock to an ideal all-around field rifle as has been made so far, with only the trigger reach being a bit longer than optimum.
IMG_9828.jpeg
 
OP
R

RepeatPete

Lil-Rokslider
Joined
Aug 13, 2023
Messages
171
You’ve got the overall idea. Negative comb, no drop at heel, vertical grip with about a 1.5 to 1.75” trigger reach, scalloped behind the grip, parallel toe line, parallel forend. I wouldn’t do the cut out in the forend for the Arca rail that you have because that’s where I carry it, however I understand why you did.

This is the closest stock to an ideal all-around field rifle as has been made so far, with only the trigger reach being a bit longer than optimum.
View attachment 591053

Thanks for the validation - just wanted to make sure I wasn’t missing anything.
 
OP
R

RepeatPete

Lil-Rokslider
Joined
Aug 13, 2023
Messages
171
Edit: I noticed that this thread got stickied - I am by no means a pro, and essentially have no idea what I’m doing. This is my first stock, and am chasing something functional and built to my measurements, rather than to optimize weight and surface finish. The finished product will probably be a bit rough.

A bit more progress:
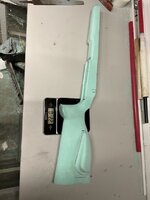
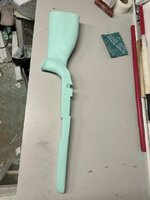
I decided (going against much smarter people) to keep the Monte Carlo cheek piece. It just feels so good when shouldering this stock, and I don’t shoot >500yds. I’m already planning on making some more stocks, and I can also just cut it off and repair if I notice any sideways muzzle movement/ trouble tracking shots.

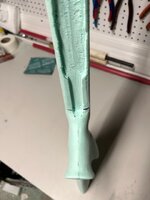
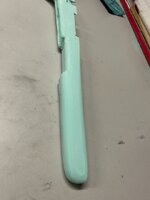
I’m not sure that 3 layers of this 3k CF is enough, so I decided to augment with some (readily available) fiberglass. I haven’t fiberglassed in quite a few years and this will also serve to get me back into it before screwing up the CF. I finished my final sanding and the foam blank came out to 2.2 oz.
D8D32EEF-D631-44D7-9450-5DDC193F57FB.jpeg
7F68658A-941F-49EE-8397-0B8EDE6950D8.jpeg
4C78C934-8F54-499D-BE60-05EED5D8F37A.jpeg
6125A516-2853-44D4-9EF1-18E3C4895724.jpeg
After laying down some rectangular patches (roughly!) of fiberglass in the more structural regions, we are at 4.5 oz.

7949783D-7ADF-4C88-9DED-4E0EEDC9C518.jpeg
68BF7728-E7A1-427F-AB8A-DCBE86745224.jpeg
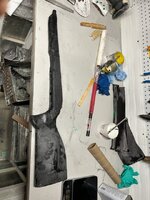
Next, I laid out my 3 passes of CF sleeve and had a small amount of leftover material. I decided to do 1 more hand layup to add strength. I did three patches: 1 long skinny rectangle on either side of the rear action running down across the grip into a little of the rear buttstock, and a larger patch wrapping around the grip back about 2/3 towards the butt. I definitely did a bit too much resin, and was working to figure out the twill weave, especially around the edges. All the strings will get sanded/blended out. I’m already impressed with how stiff just one layer is. Rough weight (not cleaned up yet) is 5.8 oz.

5CF79A28-6868-4BD1-8CA4-25C3C0723D20.jpeg
A830EC5E-CEF4-417E-96A8-9F2F8708F1A5.jpeg
B395274E-C78D-450D-989B-43FC38206686.jpeg
 

TaperPin

WKR
Joined
Jul 12, 2023
Messages
3,677
Don’t sell yourself short - we all appreciate you thinking out loud as it progresses, and just how the foam core came out speaks to your attention to detail.

If the cheek piece fits and feels good it seems you made the correct choice in keeping it - customizing it to fit is a nice benefit to this process.
 

Gobber

FNG
Joined
Aug 8, 2023
Messages
47
Edit: I noticed that this thread got stickied - I am by no means a pro, and essentially have no idea what I’m doing. This is my first stock, and am chasing something functional and built to my measurements, rather than to optimize weight and surface finish. The finished product will probably be a bit rough.

This is the Way.

The hardest part of making a prototype personalized stock is laying down the first layer or making the first cut. After that, the journey begins. R-Pete - you have my respect!

The first version should be rough with mistakes (aka lessons learned) that allows exploration of ideas that you want to try. Some of the best ideas out there came from a creative state of mind where you
essentially have no idea what I’m doing
This is where you "Make it happen, Capt'n" and end up with something that fits specifically what you are after. BTDT.

There are many ways to make a highly personalized stock and R-Pete's method is how I would recommend going about it. After looking online at numerous 'how to' videos on various CF stock builds, so many involve making a mold from an adapted plug and working from the outside skin of the stock inwards. This is a good method if you have the form of the stock exactly how you want it and are looking to make multiple copies. Personally, I have never reached that stage of fabrication because I go about my next stock project from a list of requirements and those requirements are always changing. I also realize that a gun stock is a group of trade offs. Functionality, toughness, weight - they are all at odds. What fabrication tooling do I have at hand, what budget of $$ & time can I afford? All that equates to me, simpler methods with a more unrefined outcome, but they scratch my itch, so I'm happy. Anyway....

I go for more of the Rapid Prototyping methodology that builds the structure of the stock from the inside out. In other words, I work from an internal form or plug that gets layers added that typically uses simple vacuum bagging or often times (like R-Pete is doing) basic wet layups. This means I can refine/modify aspects of the build as I build it out.

R-Pete is taking care of the important part first - stiffen up the plug and reinforce the load bearing areas. Mixing fiberglass and CF is really smart and done all the time. I have salvaged CF hockey stick shafts that are blends of both glass and carbon to capitalize on the advantage of each component. More important - glass is cheaper and easier to work with. Good call.

Once cured, you can sand down what you have to get to where you want to be next. You will inevitably 'burn through' a new layer, and that's ok. Another layer will go over it. For filling in low spots and building areas up, I highly recommend this Epoxy Dough over the use of polyester Bondo. It has a slower work time (good thing), can be shaped easily by smoothing with water and does not use solvents that will eat up your foam. It dries very rigid, is quite light and sands down very nicely. I love it as a thin filler over imperfections and minor build up for areas because it doesn't add significant weight.

As mentioned earlier, here is a listing of items needed to begin work on a CF project:

Vac Bagging Supplies
Stretchlon Vac Bagging Plastic
Peel Ply
Breather/Absorbant Cloth 60in, 4oz (400 deg)
Sealing Tape
Quick Lock Seal for Vac Bags
Mold release paste or liquid
Sources:
www.fibreglast.com
https://store.acpsales.com
www.cstsales.com/

Carbon Fiber & Resin
12K 2x2 50" twill (19.7oz/sq yd) - Very good for structural areas
6K 2x2 50" Twill (11 oz/sq yd) - Great for overall outer skin layer
820 Resin Gal, 824 SLOW Hard 0.2 Gal, Pump KIT (this or West System Resin)
Source:
www.sollercomposites.com - Really like this site. Limited selection, good price, very helpful

Tools
CF Shears - Claus - You will need a set of CF specific shears as it dulls regular scissors really fast!
Dremel type tool with various diamond cut off wheels & diamond burrs
Note - Carbon fiber needs to be cut and shaped abrasively. Drill bits just make a mess.

Vacuum Pump
As mentioned before, for vacuum bagging, an improvised rig using a salvaged refrigerator pump works very well. The low flow rate is ideal to allow time to work the vacuum bag.
Vacuum tubing is available at HomeDepot
Vacuum gauge
Needle valve to introduce a precise leak to control the vacuum level

PPE
Disposable Gloves, respirator, glasses
 
Last edited:

PNWGATOR

WKR
Shoot2HuntU
Joined
Oct 14, 2014
Messages
2,758
Location
USA
I’ve decided to jump into the deep end and make my own carbon fiber stock. This will be going on a M700 7mm Rem mag, which currently wears a wood stock.

I did a ton of research here, read a lot of @Formidilosus posts, and decided I wanted a vertical grip, negative comb stock. I’m taller, so I’ve always added spacers to get a proper LOP and have recently added spacers under a stock pack to be a proper check weld. A custom stock would solve both of these, and cut some weight from a pretty heavy gun as well. My main influences were the first gen Gunwerks Magnus and the Peak44 Bastion.

My wish list was a 14 3/8” LOP (1” longer than stock M700), negative comb, trim forend for weight and carrying (I rarely shoot off bags or front rests other than tree branches), relatively straight toe line, and flush mounted Arca rail close to the central balance point.
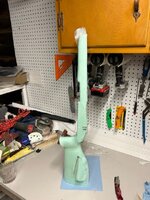
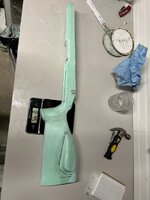
I started out with an $8 takeoff stock from eBay for a good pattern, and laminated polystyrene insulation board for my mold. I cut and carved it most of the way before realizing it was too soft for my vacuum bagging process. So I repeated the process with green insulation board from Lowe’s, which is stiffer and finishes much nicer.

I also bought a bare long action bedding block from Stocky’s, the Arca balance rail from SRS, and a Microcell recoil pad. The skin will be carbon fiber, the aluminum bedding block will be bonded in place with Marine Tex with two carbon fiber rods as cross bolts through the bedding block.

View attachment 589633
View attachment 589632
View attachment 589634
View attachment 589635
View attachment 589636
I am going to use a low budget vacuum bagging setup (vacuum storage bag from Harbor freight) with peel ply and a breather layer. The shell will be from a carbon fiber sleeve, like the “sock” in the infamous Sako video.

I was going to wait until I had a successful layup before posting, but I want to ask: any input on stock design or build process?

View attachment 589637
View attachment 589638
View attachment 589639
View attachment 589640
View attachment 589641
Appreciate your ambition, but if you’re embarking on this journey based on any of @Formidilosus posts, what is your rational for choosing a 700 based platform?
 
OP
R

RepeatPete

Lil-Rokslider
Joined
Aug 13, 2023
Messages
171
Appreciate your ambition, but if you’re embarking on this journey based on any of @Formidilosus posts, what is your rational for choosing a 700 based platform?
Haha, fair question. The Remington 700 I have was given to me by my grandfather and he killed all of his elk and many more of his other big game animals with it, so it has a ton of sentimental value.

I also was somewhat unaware of the 700 issues when I started this process - I thought an aftermarket trigger solved the problem. I’ve now read a bunch of Form’s threads and am looking for a Geissele Super 700 trigger to make the best use of the platform I have.
 
OP
R

RepeatPete

Lil-Rokslider
Joined
Aug 13, 2023
Messages
171
For anyone following this thread with the purpose of making their own stock - listen to the input from @Gobber . He has been a wealth of knowledge already, and definitely outlines the ideal way to do this. My method is more budget and impatient tinkerer oriented, and just honestly documenting what I do, even if it’s not the best way.

I added one more hand layup in the form of two rectangular strips of fiberglass at the mid-forend. I wanted to further reinforce the front cross bolt, which will be close to the front action screw, and the Arca rail section, as its cross section is thinner. The latest glass patches run from the carbon fiber up to the small black tick mark in the photo. Just for documentation, after cleaning up the rough CF edges, and before this latest layup, weight was at 5.7 oz.
64FC32B7-C8B6-4EB1-B86A-B8E49EC267CE.jpeg
 

PNWGATOR

WKR
Shoot2HuntU
Joined
Oct 14, 2014
Messages
2,758
Location
USA
Haha, fair question. The Remington 700 I have was given to me by my grandfather and he killed all of his elk and many more of his other big game animals with it, so it has a ton of sentimental value.

I also was somewhat unaware of the 700 issues when I started this process - I thought an aftermarket trigger solved the problem. I’ve now read a bunch of Form’s threads and am looking for a Geissele Super 700 trigger to make the best use of the platform I have.
🤷‍♂️
 

atmat

WKR
Joined
Jun 10, 2022
Messages
3,277
Location
Colorado
There is no rifle immune to wanky behavior in freezing conditions. Not a single person has been shot with a malfunctioning trigger since the beginning of time unless the rifle was pointed at them.

This entire anti Remington trigger issue is pretty silly to most of us who have been using them for decades in all kinds of weather.
Ah, yes, the “safe triggers are unnecessary” argument — classic.
 

Gobber

FNG
Joined
Aug 8, 2023
Messages
47
Aaaanyway - back to the subject of the post.

R-Pete's use of an inner layer of fiberglass is a great way to stiffen up the core plug. Combining layers of fiberglass with CF is common practice where some 'tempering' is needed. CF is a very rigid component and fiberglass adds a bit of flexible 'give' to the mixture. Much like differential heat treating of folded steel, layering fiberglass in with CF gives an element of give where needed. In this application it is desirable because it's an inexpensive material that will lay down without the need for compression- vac bagging or compression binding with a shrink wrap. Either way, it will give a good foundation on which to build the rest of the structure. It will add a bit of weight, but for a first prototype, it's more about learning the process than worring about fractions of an once.

At this point it's good to wait for a good solid cure (day or two) before sanding and smoothing. That way you don't clog up your sandpaper with soft resin. Pro Tip - an afternoon in a hot car helps speed up the catalyzing of the resin.

Looking good (y)
 
OP
R

RepeatPete

Lil-Rokslider
Joined
Aug 13, 2023
Messages
171
More progress.
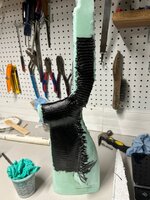
The CF sleeve that I bought is 4” diameter, which shrinks if you pull longitudinally and expands if you open it up. I thought it was an awesome idea. I’m sure it works great for straight projects, but is not as great as I expected for a stock. The height at the butt pad is 5.75”, with the front of the forend at around 2”. These changes, combined with the two curves at the grip and the extra thickness from the cheek piece makes it hard to get the sleeve to conform perfectly.
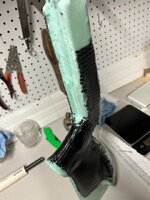
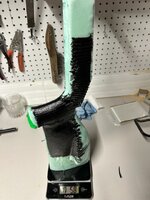
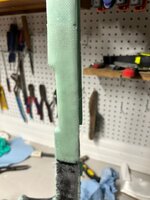
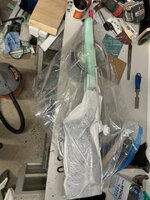
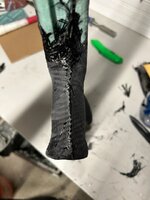
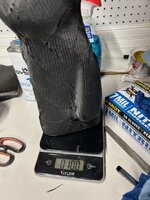
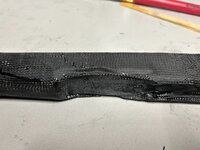
So I decided to work in halves, overlapping at the grip which needs extra reinforcement anyway. I vacuum bagged the butt side first. 2 layers of CF, then peel ply and breather, and into the large vacuum bag from Harbor Freight. It worked okay, but I ran out of time quickly (I hoped to get 3 layers down), and ended up with quite a few ripples. The stock was at 6.1 oz before, and 10.0 oz after.
BA4EC870-FF09-44A1-9894-BC821F3B5861.jpeg
AF595328-87B3-4DD8-AFCB-DDC50746C7E5.jpeg957CED3D-D5F1-462A-88B8-6922BBD7D725.jpeg


D42CB664-A74B-4C93-899B-9C2CEDA5F547.jpeg
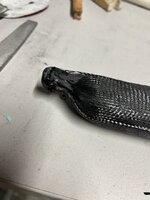
Thankfully, the ripples and imperfections cleaned up pretty easily, and I was down to 9.6 oz. But I had filed all the way through to the foam core in two small spots. I think 2 layers is probably strong enough, but my surface was rough.
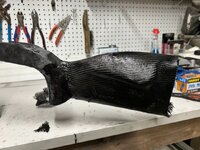
Then I vacuum bagged the forend side, with similar results. It worked okay, but ran out of time way too fast, had trouble conforming as well as I wanted, and the end result seemed a bit thin on resin. We are at 13.3 oz after cleaning it up some.
19A82875-2EDB-4972-B7B6-A605F7FA061B.jpeg
2B5A62E1-EEE0-4F7E-B910-393EA9C894BA.jpeg
6FCF2275-A455-4A66-8F16-653532BC117C.jpeg
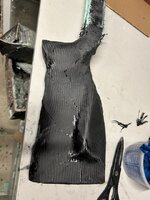
I decided for the 3rd layer that I was planning on and already had the material for I would do another wet layup, with no vacuum bagging. With my beginner skills and equipment, I can get a better surface finish without vacuum bagging, as well as seemingly better resin distribution and CF placement. Go with what works.
E4485E2A-5CCA-4498-81F7-B12078C9CFF9.jpeg
I just laid it up tonight, so no results yet. I cut the sleeve lengthwise to essentially make a normal CF sheet. I’m definitely learning a ton, and don’t think I’ll use sleeve material again. This was the first layup (besides the simple rectangle patches early on) that I’m happy with right away.

Edit: wow, this post turned out crazy long, I’ll try to break it up next time
 

Gobber

FNG
Joined
Aug 8, 2023
Messages
47
R-Pete - Looking really good! They always look rough as a cob coming out of the bag with all the ripples and inevitable wrinkles. Minimizing those imperfections takes experience but they will always be there and simply need to be smoothed out. After a few bagging iterations, you will better see how to position the wetted fabric onto the plug and how the use of clay 'contour blocks/shapes' really help push the fabric down into the negative contours. The prep work really pays off and the only way to know what to do is by doing it. And don't worry about the end of the forearm section. That end as well as the base of the grip and the back of buttstock are typically finished with secondary applications. There are a couple of ways to skin that cat to make it work.

The videos that use the highly polished negative molds make it look sooo easy, but that is after all the work (and $$) of making the mold. Making a one-off starting from a core shape and working the layers out is where the real 'fun' is... sort of. Pro Tip for stretching out the work time of your resin is to only mix what you need for the sheet you are working, mix the resin in a wider flat container and set it in an ice water bath to slow the catalyzation a bit.

After some surface sanding of your last layer, you should have a pretty solid outer shell to work with. The cross pin method of anchoring the bedding block to the outer skin should work well so long as you have good, wide reinforced anchor points inside the shell to help dissipate the recoil impulse. Don't worry if you need to do a vacuum bagging to a section that is inside the inlet hole of the stock - there's a way to do it if needed.

Great project! And the hickeys along the way are what make it interesting.
 
Last edited:
Top