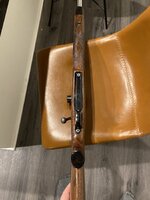
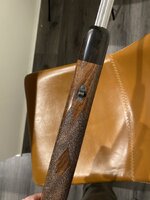
Another stock build thread

Joined
Oct 1, 2013
Messages
915
Location
Northern California
Been having fun following along Decker and others stock building posts. Being the restless tinkerer/diy guy that I am I thought I’d give it a shot.
I always thought about getting some blanks from CalicoHardwoods (they made all the high end weatherby stocks) as it’s like five mins from my house. Of course as soon as I committed to going over there I found out they went out of business.
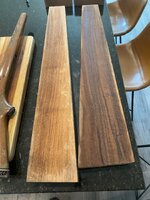
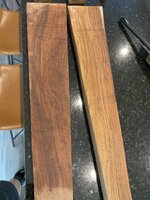
Luckily I found a local ish guy on Instagram who sells all sorts of milled walnut. He dug me up some old blanks left over from the by gone days. Got what I consider a great deal on them.
 

Attachments

  • 6CDEBD94-D4A0-40FC-9575-F4D4BB2F1FAD.jpeg
    6CDEBD94-D4A0-40FC-9575-F4D4BB2F1FAD.jpeg
    406.3 KB · Views: 42
  • F6F8ECDB-0E16-4588-BC72-34DBA6A252E3.jpeg
    F6F8ECDB-0E16-4588-BC72-34DBA6A252E3.jpeg
    451.4 KB · Views: 41
OP
E
Joined
Oct 1, 2013
Messages
915
Location
Northern California
Not pictured is the blank I’m actually working on. So I ended up getting three claro blanks and two English blanks. Not sure what I’ll do with the others yet, definitely a tikka stock at some point.

I recently inherited some of my dads guns, (none were anything interesting) but one was a Sears model 53 30-06. To make it interesting it will need a new stock and barrel so that’s where I’m at. Ordered a blank from PBB, going to have kampfield chamber it up to a 6mmAI. Posted a wtb add here on the slide for brass and scored a healthy supply.
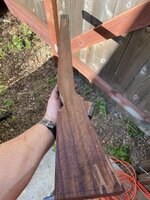
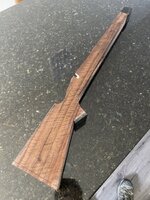
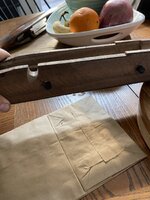
Now for the stock I wanted the traditional look. I did make the comb higher than the factory relic though. The bolt barely clears. Traced the shape out with a sharpie and brought it to work to use the band saw. I didn’t get any pics.
Next I squared up the forend and grip cap and glued some ebony on useing the two dowel method(also no pics).
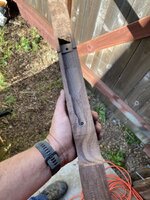
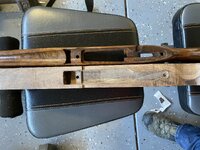
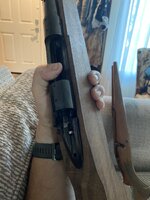
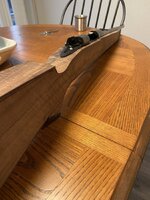
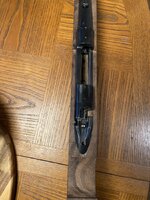
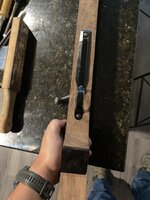
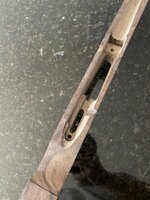
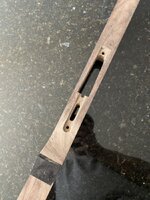
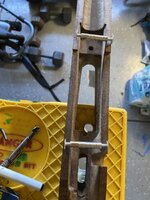
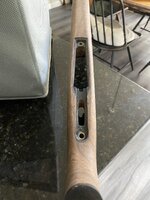
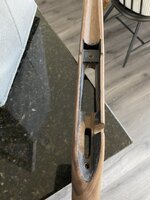
Pretty much used my eyeball to lay things out and a caliper helped make sure the measurements were right. Without an existing stock to measure from this would have been 10x harder to do. I’ve basically done the inletting with a palm router, a 1/2” chisel, a 1/2” gouge, and a dremel with a 5/8” sanding drum. Once I could drop the action in I used dychem blue grease to coat the barreled action and locate the high spots. I’m just about done with the inlet and read to begin shaping.
 
OP
E
Joined
Oct 1, 2013
Messages
915
Location
Northern California
Pics
 

Attachments

  • 23BA17C3-06A2-4A05-AA39-21B9DF5B0A30.jpeg
    23BA17C3-06A2-4A05-AA39-21B9DF5B0A30.jpeg
    359.5 KB · Views: 58
  • 38782EB6-D7AD-404E-B218-8828E201CE27.jpeg
    38782EB6-D7AD-404E-B218-8828E201CE27.jpeg
    407.8 KB · Views: 59
  • A118DE74-2418-4435-9038-B890A17100DB.jpeg
    A118DE74-2418-4435-9038-B890A17100DB.jpeg
    388 KB · Views: 59
  • 2707B0B9-4871-41A7-8425-603CA937195E.jpeg
    2707B0B9-4871-41A7-8425-603CA937195E.jpeg
    272.1 KB · Views: 59
  • 2267E79A-C81C-4CDA-9AD4-21C16F9011E8.jpeg
    2267E79A-C81C-4CDA-9AD4-21C16F9011E8.jpeg
    355.7 KB · Views: 56
  • 9884566C-0BEA-4C7F-B5F1-159FF37097F5.jpeg
    9884566C-0BEA-4C7F-B5F1-159FF37097F5.jpeg
    489.2 KB · Views: 56
OP
E
Joined
Oct 1, 2013
Messages
915
Location
Northern California
More
 

Attachments

  • BCA693BC-F25E-44AF-9319-00D906841E03.jpeg
    BCA693BC-F25E-44AF-9319-00D906841E03.jpeg
    274 KB · Views: 48
  • 4002554D-D9C3-4A81-8226-27012DE5DC48.jpeg
    4002554D-D9C3-4A81-8226-27012DE5DC48.jpeg
    346.5 KB · Views: 43
  • B3E551C8-4028-4848-9FCE-3574838687EB.jpeg
    B3E551C8-4028-4848-9FCE-3574838687EB.jpeg
    380.3 KB · Views: 46
  • 82D661CB-CCA2-44D9-B65E-FFE83D4CA96B.jpeg
    82D661CB-CCA2-44D9-B65E-FFE83D4CA96B.jpeg
    443.4 KB · Views: 51
  • 048DBA17-306A-430C-B43E-F70C1ADB3F89.jpeg
    048DBA17-306A-430C-B43E-F70C1ADB3F89.jpeg
    316.5 KB · Views: 51

Decker9

WKR
Joined
Apr 10, 2015
Messages
1,030
Location
BC goat mountains
This is awesome! I’m diggin these build threads, some nice work being put out! Makes me want to dive into a blank I have here, but my summer chore list is just to big lol.

I’m a sucker for the classic stock style, and am excited to see yours take shape. Nice choice on the Ebony too! Can tell already it’s going to look great with that nice piece of walnut.
 

Macintosh

WKR
Joined
Feb 17, 2018
Messages
2,868
Love it! Bummer calico went out of business, they were a go-to for good quality but reasonably priced blanks. I was actually trying to get ahold of them recently and suspected as much. Now I gotta find another source I guess!
 
Joined
Dec 16, 2021
Messages
614
Location
Larkspur, CO
That's some beautiful wood! I've done several ebony tips on stocks I modified but have always been too intimidated to try a grip cap. How did you make sure you had the surfaces flat enough to glue it up with no gaps? Did you freehand it with a sanding block? I saw a Larry Potterfield video where he used a mill but I don't have one of those. Love the ebony grip cap!
 
OP
E
Joined
Oct 1, 2013
Messages
915
Location
Northern California
That's some beautiful wood! I've done several ebony tips on stocks I modified but have always been too intimidated to try a grip cap. How did you make sure you had the surfaces flat enough to glue it up with no gaps? Did you freehand it with a sanding block? I saw a Larry Potterfield video where he used a mill but I don't have one of those. Love the ebony grip cap!
Luckily I made a pretty dang flat cut from the get go with the band saw. Then cleaned it up with a sharp chisel. From there some 200 grit sand paper on a flat block. Kept sanding it flat till the gaps were all gone. Any micro gaps that might have existed were squeezed out while clamping. Whole process probably only took 15 minutes.
 
OP
E
Joined
Oct 1, 2013
Messages
915
Location
Northern California
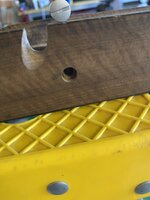
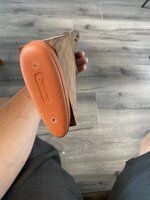
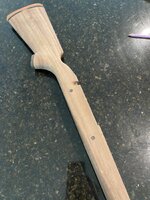
Added the butt pad to get an idea of what I need to shape off. Also put in two recoil cross bolts that I fashioned out of some door Hw parts from work. Used a plug cutter to make ebony plugs and glued em in. Everything fit nice and tight.
 

Attachments

  • 88A7656C-1130-4372-BB33-C50E2231B896.jpeg
    88A7656C-1130-4372-BB33-C50E2231B896.jpeg
    297.5 KB · Views: 38
  • 3682FB94-ACEE-45EF-8EF9-D04D649AA037.jpeg
    3682FB94-ACEE-45EF-8EF9-D04D649AA037.jpeg
    258 KB · Views: 40
  • 01F8CC92-E519-43F0-B5A0-EE730A853343.jpeg
    01F8CC92-E519-43F0-B5A0-EE730A853343.jpeg
    250.9 KB · Views: 38
  • 1677C3B5-2303-4FDC-AA62-20FF899AC851.jpeg
    1677C3B5-2303-4FDC-AA62-20FF899AC851.jpeg
    345.9 KB · Views: 40
OP
E
Joined
Oct 1, 2013
Messages
915
Location
Northern California
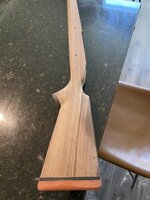
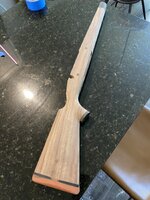
Finally started knocking the corners off. Took a bit of courage to get at it. Just been using a super course wrasp and 80&120 grit sandpaper. Still super rough but it’s taking shape.
 

Attachments

  • 8596324A-306A-4C40-A853-C3F6A5AD191F.jpeg
    8596324A-306A-4C40-A853-C3F6A5AD191F.jpeg
    337.5 KB · Views: 44
  • EB7390E1-E175-4E43-8F3D-BF9CC17F4BAD.jpeg
    EB7390E1-E175-4E43-8F3D-BF9CC17F4BAD.jpeg
    407.6 KB · Views: 43
  • 53C1BD30-C2DD-4854-802A-D774A53E8F67.jpeg
    53C1BD30-C2DD-4854-802A-D774A53E8F67.jpeg
    402.7 KB · Views: 41
OP
E
Joined
Oct 1, 2013
Messages
915
Location
Northern California
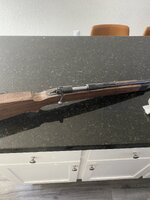
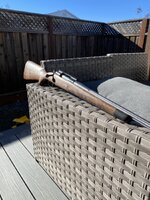
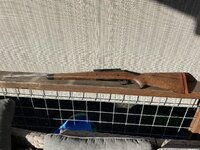
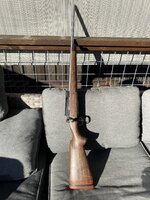
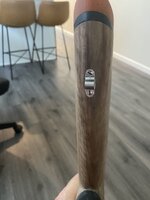
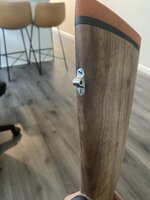
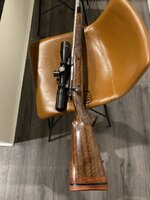
Got my barreled action back a couple weeks ago. With a new baby in the house I’ve slowly been working on the stock again lot bit by bit when the baby sleeps. Haven’t really taken pics of the work I’ve done. But I had to open up barrel channel for clearance/floating the new barrel. Done lots of sanding and some reshaping of the forend. Routed out a channel in the forend to embed a carbon fiber tube. That was to lighten and stiffen it up. Filled the grain and put the first couple coats of tru oil on. I still plan to lay out a point pattern on the grips and forend and stipple them. I don’t have the tools for checkering yet. Hopefully it will look good.
 

Attachments

  • IMG_4596.jpeg
    IMG_4596.jpeg
    433.4 KB · Views: 27
  • IMG_4597.jpeg
    IMG_4597.jpeg
    569.5 KB · Views: 27
  • IMG_4598.jpeg
    IMG_4598.jpeg
    524.8 KB · Views: 27
OP
E
Joined
Oct 1, 2013
Messages
915
Location
Northern California
Also realized the original stock I copied from had a LOP that was too short. Stupid me for not measuring before I cut the blank. I used a reddish piece of walnut burl I had laying around to make a spacer. Lessons learned for the next one. Still I think not too bad for my first go at this. Next project will either be restocking my Marlin XLR 30-30 or building a walnut/maple laminate rokstock for tikka.
 
OP
E
Joined
Oct 1, 2013
Messages
915
Location
Northern California
Some other older pics I dug up
 

Attachments

  • IMG_4281.jpeg
    IMG_4281.jpeg
    183 KB · Views: 15
  • IMG_4280.jpeg
    IMG_4280.jpeg
    212.2 KB · Views: 15
  • IMG_4273.jpeg
    IMG_4273.jpeg
    323.3 KB · Views: 14
  • IMG_4272.jpeg
    IMG_4272.jpeg
    305.9 KB · Views: 15
Top