Modified my Tikka stock

mddat

Lil-Rokslider
Joined
Oct 20, 2014
Messages
125
Location
BC Canada
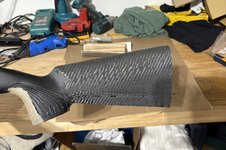
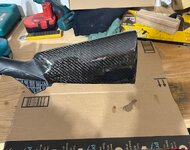
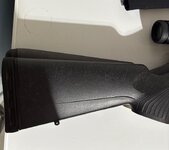
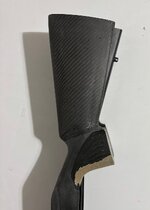
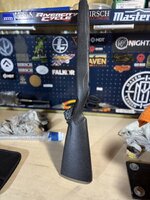
With lots of time on my hands this summer recovering from injury I decided to mess around and modify a tikka factory stock I’ve had laying around for a while. I’ve seen a bunch of the DIY stock build threads and figured I’d give it a go and see if I could accomplish this with the info found in those threads. Only stuff I purchased was a cheap carbon fibre kit from amazon, some peel ply and some spray paint, all other materials I had laying around the garage already and wanted to keep this project cheap as possible. The goal was to give the stock a negative comb, slightly flatten out the toe line, as well as shorten the fore end. I’ve never done any sort of work with carbon fibre or altering a stock so it was all new to me and figured this would be a fun learning project incase I feel up to building a complete stock one day.


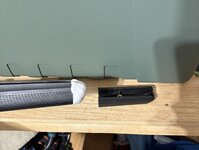
First I lopped off a few inches of the fore end and used some JB weld marine putty to cap the end.IMG_5750.jpeg
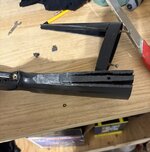
Then I cut apart the butt end with a hacksaw and Dremel
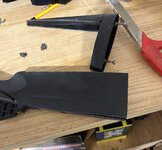
IMG_5754.jpeg
IMG_5753.jpeg
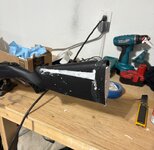
Next I used some JB quick weld to attach things back together and filled with spray foam
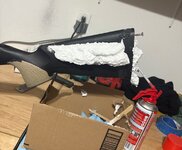
IMG_5755.jpeg
IMG_5757.jpeg
Then put a bit of JB plastic weld on the bottom cause I ran out of the normal stuff.
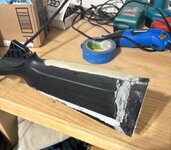
IMG_5760.jpeg
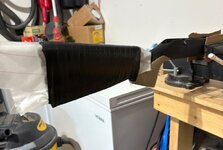
I then sanded and smoothed everything out as best I could and got to the carbon fibre. Decided to just lay a half layer over the cut out and foam, figured doing a small part would be easier to start and see how it goes. I mixed up some resin and brushed it on, let it tack up a bit, then laid down the carbon. Wetted it out and covered in peel ply and wrapped with electrical tape. Waited 24hrs and removed the tape and peel ply, turned out ok, I sanded it down and prepared for the next full layer.IMG_5766.jpeg
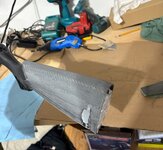
 
Cleaned everything up and followed the same steps as last time, definitely a bit harder doing a full wrap, especially trying to get a clean looking joint, wasn’t really able to but didn’t really care because I know I’m painting it. IMG_5772.jpeg
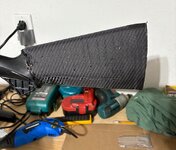
Again waited 24 hours then removed tape, I was a little light on resin in a few spots but this is how it turned outIMG_5773.jpeg
Cleaned up and sanded everythingIMG_5775.jpeg
On the third layer I overlapped the tape more and pulled at bit tighter to get more compression which I think helped. After the last layer I mixed up some resin one more time and did a top coat, more so just to see how it would turn out than anything else.
IMG_5784.jpeg
Here is a picture for comparison of factory stock vs changes I madeIMG_5788.jpeg

IMG_5789.jpeg
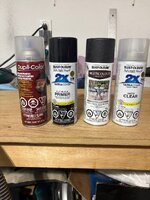
Next I shaped and sanded the fore end and gave the whole stock a sand with 320 grit sand paper. Wiped everything clean and sprayed a couple of light coats of adhesion promoter, then primed it with Rust-Oleum primer. Let it cure for a week then hit it with some Rust-Oleum multicoloured textured paint and some clear coat.
IMG_5811.jpeg
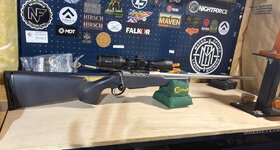
And here is the final product
IMG_5805.jpeg

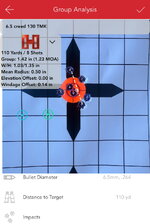
It’s sitting in a tikka Superlite in 6.5 creedmoor

IMG_5806.jpeg

I picked up a .243 take off barrel that I’ll be chopping to 18” and installing on this one for a nice short little package for a truck gun, but that will wait till after hunting season. I definitely made lots of mistakes but learned a ton. I’m glad I started out with a small project and all in all I’m pretty happy with how it turned out. I might try vacuuming bagging the next project but still undecided. I’ve already ordered some better materials and will be doing a complete build for the next one.
 
Looks great. What would you say your total time / cost was?
Probably about $90 in stuff I had to buy, not including the spray foam, JB weld, or sandpaper I already had

Amazon carbon fibre kit was $35, peel ply from amazon was $21 and another $30 in spray paint. As far as time, it took a while but I was going slow and making mistakes and learning the whole time, if I did the same thing again I could probably do it in a week, the longest part is the cure times in between layers put down
 
Looks alright. I found though 55 inchLbs crushed my factory stock over time. It would lose torque the i realised the rear "bedding had collapsed a good 2 or 3mm
I also torque to 55 inch lbs, haven’t noticed any crush or my action screws loosen with nail polish on the threads but will take a note of that if accuracy changes
 
I also torque to 55 inch lbs, haven’t noticed any crush or my action screws loosen with nail polish on the threads but will take a note of that if accuracy changes
My action screws didn't loosen/move just they would continue to move at the same torque. When I removed it finally to clean shot of the shot I noticed the rear had collapsed. This is over 18 months of being kept at 55 inch pounds. It was worse on the bottom metal side by quite a bit.
 
Probably about $90 in stuff I had to buy, not including the spray foam, JB weld, or sandpaper I already had

Amazon carbon fibre kit was $35, peel ply from amazon was $21 and another $30 in spray paint. As far as time, it took a while but I was going slow and making mistakes and learning the whole time, if I did the same thing again I could probably do it in a week, the longest part is the cure times in between layers put down
Could you link up which carbon fiber kit and peel ply kit you ordered please? This looks like the exact route I need to go for modifying my factory stock.
 
Back
Top