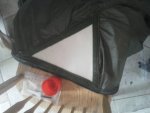
Mcr-85 copycat tent

mcr-85

WKR
Joined
May 28, 2014
Messages
1,125
Location
Southern Utah
Looks like its coming along great with a few mods i haven't added to mine yet. Glad you like the design and hope you enjoy the tent as much as i do when you get it finished. There is satisfaction in building something yourself.

I used to have a small shop and build coyote duck and elk calls. It is more of a rush to me to call a coyote or bull elk in with a call i built over any other call.

Let me know if you have any other questions.

Thanks
Marcus
 

Stid2677

WKR
Joined
Sep 13, 2012
Messages
2,346
What brand did you use? Think some of that 3m spray glue would help. Just holding it in the right spot until stitched would be real handy. I tried goop and e6000 my go to but both peeled away pretty easy after they dried

I don't remember exactly, bought it at Jo Anne's to was a spray and is temporary. It helped, but that stuff is still slippery. Are you using a walking foot?
 
OP
realunlucky

realunlucky

Super Moderator
Staff member
Joined
Jan 20, 2013
Messages
13,108
Location
Eastern Utah
I don't remember exactly, bought it at Jo Anne's to was a spray and is temporary. It helped, but that stuff is still slippery. Are you using a walking foot?

No just standard foot. My machine really doesn't seem to have much drama sewing two pieces together if I go slow and add light tension. Probably should have gotten one there are some long lines that have to be sewn three times on these plans could have saved some time. Its trying to sew a different fabric that seems to add additional drama to the feeding of the machine. Been using plenty of pins also guess we'll find out how all those extra holes effect it's performance.
 
Last edited:
OP
realunlucky

realunlucky

Super Moderator
Staff member
Joined
Jan 20, 2013
Messages
13,108
Location
Eastern Utah
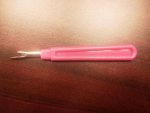
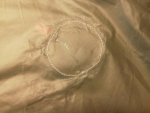
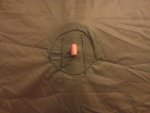
Well it was bugging me with that material bunched up like that and started looking at it more and the hyplon had moved.uploadfromtaptalk1414629658168.jpg had to break this out again and unstitch the circle. I've used this sucker a lot on this project just take your time and pick every stitch out if you try and pull it really opens up the needle holes. uploadfromtaptalk1414629871038.jpg looks much better now and its center lol
 
OP
realunlucky

realunlucky

Super Moderator
Staff member
Joined
Jan 20, 2013
Messages
13,108
Location
Eastern Utah
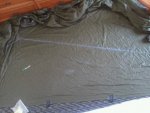
uploadfromtaptalk1416261118764.jpg laying out the line for the guyouts. Chalk line really handy but still a pain to ensure is correctly placed before snapping with just one person
 
OP
realunlucky

realunlucky

Super Moderator
Staff member
Joined
Jan 20, 2013
Messages
13,108
Location
Eastern Utah
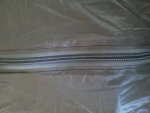
Went back and forth with myself if weather flaps were necessary for the zipper.uploadfromtaptalk1416263447878.jpg Without won out because I didn't want to chance the flap getting into the zipper and jamming it up
 
OP
realunlucky

realunlucky

Super Moderator
Staff member
Joined
Jan 20, 2013
Messages
13,108
Location
Eastern Utah
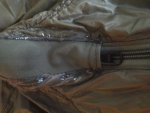
I did install a zipper garage at the top hopefully help direct water away from the center of the zipper and having it leak in. Also it strengthened the top of the zipper and where all five pieces connect togetheruploadfromtaptalk1416263725505.jpg I also installed dual zippers so I could close the door but vent it top and bottom if needed
 
Last edited:
OP
realunlucky

realunlucky

Super Moderator
Staff member
Joined
Jan 20, 2013
Messages
13,108
Location
Eastern Utah
Allot of this project I'm just winging having never seen a tent tarp like this in person and also trying to think what features need adding during its construction period.
 

colonel00

WKR
Joined
Jun 19, 2013
Messages
4,769
Location
Lost
Obviously your first tent will be experimental and have many learning mistakes. I think you should just send it to me once you are done for evaluation and you can take the knowledge that you have gained through this project to make an even better one for yourself :D
 
OP
realunlucky

realunlucky

Super Moderator
Staff member
Joined
Jan 20, 2013
Messages
13,108
Location
Eastern Utah
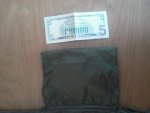
I installed a pocket on the side I'm installing the stove jack on.uploadfromtaptalk1416264405584.jpg I'm sure the original idea was to keep fire starting stuff there, my purpose was more along the lines of having some extra material around if a patch is needed in the back country.uploadfromtaptalk1416264479865.jpg the pocket was built triple folded so has plenty of material in case of large tear or small hole can be repaired just by cutting a patch from the third fold material and not removing the whole pocket
 

aron

WKR
Joined
Dec 27, 2012
Messages
536
Location
North Dakota
Went back and forth with myself if weather flaps were necessary for the zipper.View attachment 20916 Without won out because I didn't want to chance the flap getting into the zipper and jamming it up

Keep us updated on the no flap for the zipper. They are always a pain in the ass and snag on the zipper. Is the zipper you ised water resistant or proof?
 
OP
realunlucky

realunlucky

Super Moderator
Staff member
Joined
Jan 20, 2013
Messages
13,108
Location
Eastern Utah
No standard coil zipper. With the angle of the door and the stove being opposite I don't really think anything will be under the zipper even if it drips. Be interesting to see how much draft is blown through though. I looked hard at the weather proof zippers and price plus ease of use is why I chose a standard coil. I wanted a larger zipper and used a number 8 for the door.
 
Last edited:
OP
realunlucky

realunlucky

Super Moderator
Staff member
Joined
Jan 20, 2013
Messages
13,108
Location
Eastern Utah
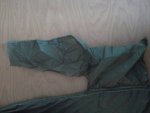
Built the guy outs with hyplon and 1/2 strap. View attachment 20926 after sewing it together it seems little over kill. But since I made all six already I'll forge ahead.uploadfromtaptalk1416270625347.jpg not the prettiest job but it holds it in position. I left some room at the edge of the circle so I could use the silicon adhesive and I may add another piece on the outside when I seam seal it. Hey even pigs need lipstick sometimes.
 
OP
realunlucky

realunlucky

Super Moderator
Staff member
Joined
Jan 20, 2013
Messages
13,108
Location
Eastern Utah
Tent is pretty much sewn together now but didn't bring the center pole so be awhile yet to see standing by its self
 
OP
realunlucky

realunlucky

Super Moderator
Staff member
Joined
Jan 20, 2013
Messages
13,108
Location
Eastern Utah
Question on stove jack should the cover be fully removable or attached at the top like the sawtooth? Pros cons to either? Thoughts thanks
 

mcr-85

WKR
Joined
May 28, 2014
Messages
1,125
Location
Southern Utah
Hey haven't been on in a while. It looks like you are about done. Nice job on sewing this thing up. I am lucky to have had my mom help me out. On my stove jack I left the cover removable. I don't know if this is the best way but I figure if I am using the stove I can just pull it off and put it in the stuff sack the tent goes in so I don't lose it. I put it back on when taking the tent down. I think you got the same one as me with the velcro around all 4 sides. Looking forward to seeing it completed. Again, nice job.
Marcus
 
OP
realunlucky

realunlucky

Super Moderator
Staff member
Joined
Jan 20, 2013
Messages
13,108
Location
Eastern Utah
Thanks I ordered the bulk stove jack without any Velcro. Didn't know what shape I would need. I built a bbrown stove yesterday so hopefully get the jack installed today and get it seam sealed today if weather warms up.
 
OP
realunlucky

realunlucky

Super Moderator
Staff member
Joined
Jan 20, 2013
Messages
13,108
Location
Eastern Utah
uploadfromtaptalk1416930431250.jpg stove jack installed finally. Hopefully sealing it today if sun will ever shine here today
 
Top