DIY Pullouts, pouches and pockets

OP
colonel00

colonel00

WKR
Joined
Jun 19, 2013
Messages
4,769
Location
Lost
Heh, that was actually pretty simple. If I can get around to it, I will do an updated thread with a couple tricks I have found.

For the flap, essentially start as you normally would. Do that first stitch along the zipper. Then, instead of just folding the material all the way over and doing the second stitch, I actually pulled it to the other side of the zipper. I used clips to hold it in a straight line along the opposite side of the zipper and then did the second stitch on the zipper. You can then unclip the flap and iron it so it has a nice crease. If you desire, you can also run a stitch along the edge to give it some rigidity. Finally, continue on as normal. I hope that makes sense.

Take this photo below, instead of folding it over as shown, just run the material to the opposite edge of the zipper tape and clip.
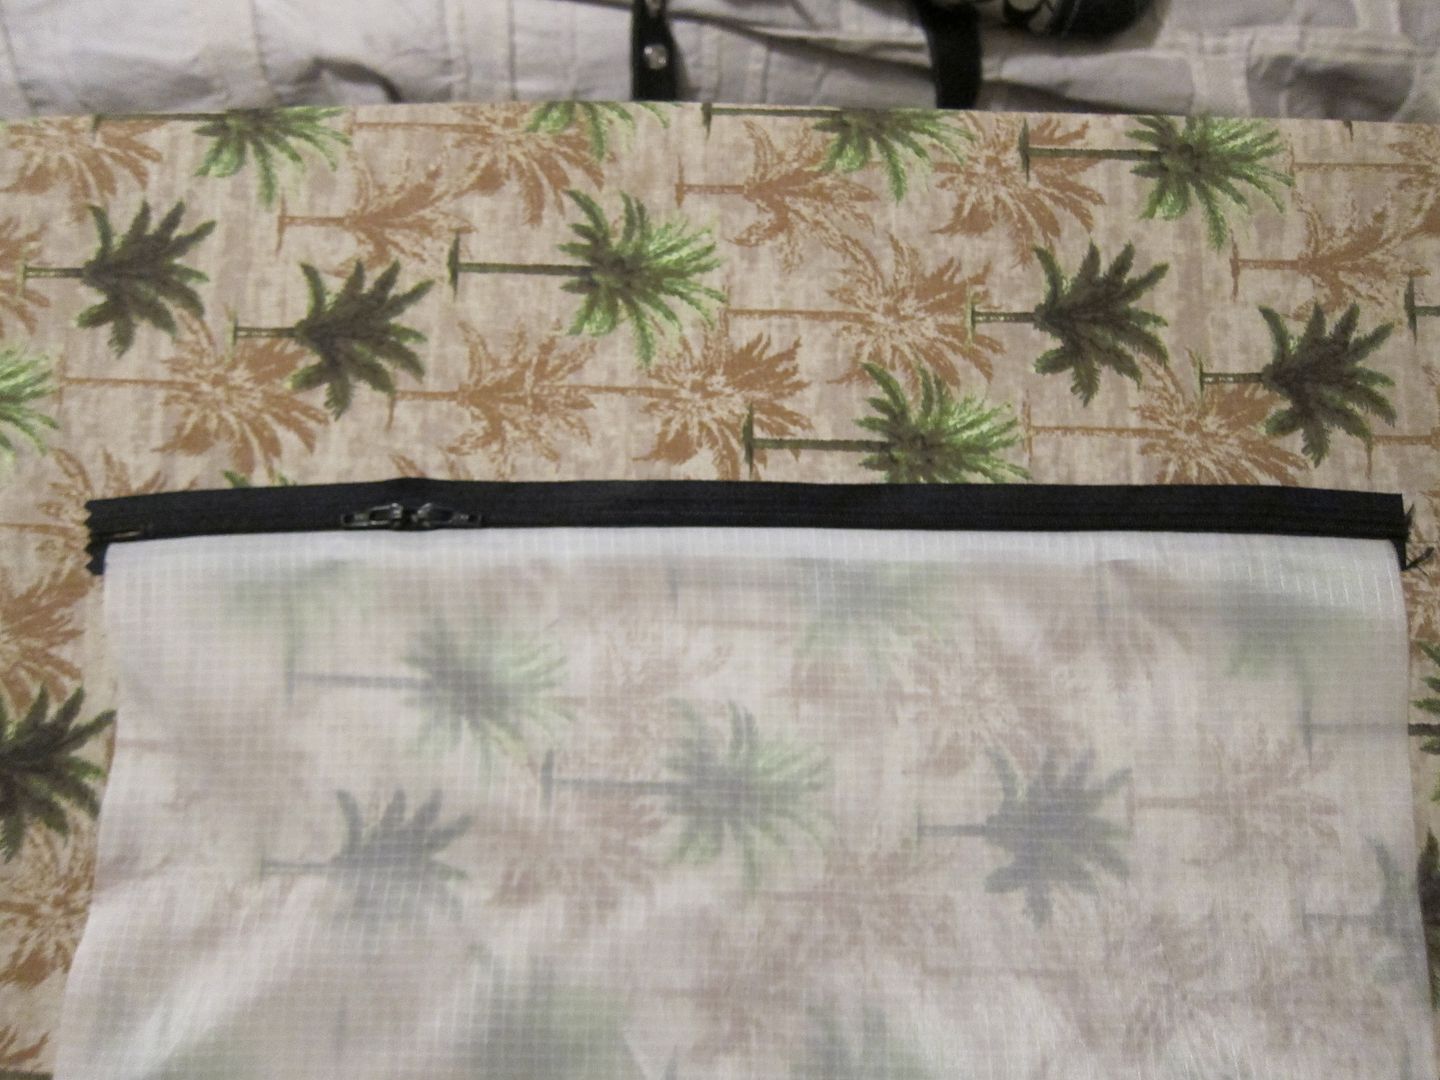
IMG_2239_zps2517ed12.jpg


I was just rereading my instructions here and I think I can make the process a little easier so I will try to get an updated thread going here soon. I was planning to make another one of these big bags so that will be a good project to illustrate the process.
 

William Hanson (live2hunt)

Super Moderator
Staff member
Joined
Nov 17, 2013
Messages
4,869
Location
Missouri
Heh, that was actually pretty simple. If I can get around to it, I will do an updated thread with a couple tricks I have found.

For the flap, essentially start as you normally would. Do that first stitch along the zipper. Then, instead of just folding the material all the way over and doing the second stitch, I actually pulled it to the other side of the zipper. I used clips to hold it in a straight line along the opposite side of the zipper and then did the second stitch on the zipper. You can then unclip the flap and iron it so it has a nice crease. If you desire, you can also run a stitch along the edge to give it some rigidity. Finally, continue on as normal. I hope that makes sense.

Take this photo below, instead of folding it over as shown, just run the material to the opposite edge of the zipper tape and clip.

IMG_2239_zps2517ed12.jpg


I was just rereading my instructions here and I think I can make the process a little easier so I will try to get an updated thread going here soon. I was planning to make another one of these big bags so that will be a good project to illustrate the process.

I understand, thanks. By the way the paper clip idea is genius, they work fantastic.

Did you make the compression straps on that stuff sack too?
 
OP
colonel00

colonel00

WKR
Joined
Jun 19, 2013
Messages
4,769
Location
Lost
Nah, that is a Sea to Summit compression dry sack with my XLite and quilt in it. It just happened to be in the picture.
 
OP
colonel00

colonel00

WKR
Joined
Jun 19, 2013
Messages
4,769
Location
Lost
Oh, possibly I guess. I think it would matter more if you were sewing a tarp or tent where you needed strength. I use 100% polyester thread but I can't remember much else about it. I did just order some of this thread though that I will probably use from here on out.

http://diygearsupply.com/product/gutermann-mara/
 

William Hanson (live2hunt)

Super Moderator
Staff member
Joined
Nov 17, 2013
Messages
4,869
Location
Missouri
The fabric I was working with is terribly sensitive to needle size in that if your use even one size to large then it snags and runs and gathers up. Does thread type have any influence on the workability of the fabric is what I meant?
 

realunlucky

Super Moderator
Staff member
Joined
Jan 20, 2013
Messages
13,084
Location
Eastern Utah
Are you using the standard foot? I have use both hands to keep my material feeding properly but only use the same heavy duty needle and upholstery thread for everything.
 
OP
colonel00

colonel00

WKR
Joined
Jun 19, 2013
Messages
4,769
Location
Lost
Oh, so it's not silnylon then. Cut it with a hot knife or soldering iron
 
OP
colonel00

colonel00

WKR
Joined
Jun 19, 2013
Messages
4,769
Location
Lost
Yeah, I am on my phone right now but I will post up some pictures later. I use a chisel top on a soldering iron for fabrics that want to fray and it works great.
 

William Hanson (live2hunt)

Super Moderator
Staff member
Joined
Nov 17, 2013
Messages
4,869
Location
Missouri
It was kind of a 2 fold question. I had problems with the material I was using because of the needle size and I was wonder if thread type was going to cause issues with silnylon or should I order something different with the silnylon?
 
OP
colonel00

colonel00

WKR
Joined
Jun 19, 2013
Messages
4,769
Location
Lost
Ah, well if you are already having issues then it might be a good idea to order stuff that is proven to work. Also, what size needle are you using?
 
OP
colonel00

colonel00

WKR
Joined
Jun 19, 2013
Messages
4,769
Location
Lost
Yeah, 70-10 is what I used for the silnylon. I could use slightly larger for regular ripstop though. I looked at the thread I have but it is just the 100% polyester Coats & Clark from JoAnn Fabric. I have some of the thread I linked before on order and I will probably use it from now on.
 
Joined
Apr 13, 2013
Messages
1,109
Location
Beaverton, Oregon
The fabric I was working with is terribly sensitive to needle size in that if your use even one size to large then it snags and runs and gathers up. Does thread type have any influence on the workability of the fabric is what I meant?
Thread size can and usually has an impact on bottom bobbin thread tension. Usually as you go up in thread size, bottom bobbin tension increases and the bottom thread starts wanting to gather up the material as you sew. Normally you can just back off the bobbin tension to match top tension and the stich/material begins to flatten out. I don't like to switch threads much, I just grab a different machine setup w/ that thread. (Used machines are cheap enough to have one for each thread/need. Saves time, hassle & setup frustration.)

70-10 works anything larger caused little runs like in women's nylons
Needle might be dull and not separating material threads as it pierces through.
Also there are different needle points for different materials. The ones I use for thin nylon have a microtex point.
Hunt'nFish
 
Last edited:

William Hanson (live2hunt)

Super Moderator
Staff member
Joined
Nov 17, 2013
Messages
4,869
Location
Missouri
Thread size can and usually has an impact on bottom bobbin thread tension. Usually as you go up in thread size, bottom bobbin tension increases and the bottom thread starts wanting to gather up the material as you sew. Normally you can just back off the bobbin tension to match top tension and the stich/material begins to flatten out. I don't like to switch threads much, I just grab a different machine setup w/ that thread. (Used machines are cheap enough to have one for each thread/need. Saves time, hassle & setup frustration.)


Needle might be dull and not separating material threads as it pierces through.
Also there are different needle points for different materials. The ones I use for thin nylon have a microtex point.
Hunt'nFish
thanks. I'm very new to this so trying to figure it all out.
 
Top