Navigation
Install the app
How to install the app on iOS
Follow along with the video below to see how to install our site as a web app on your home screen.
Note: This feature may not be available in some browsers.
More options
Style variation
You are using an out of date browser. It may not display this or other websites correctly.
You should upgrade or use an alternative browser.
You should upgrade or use an alternative browser.
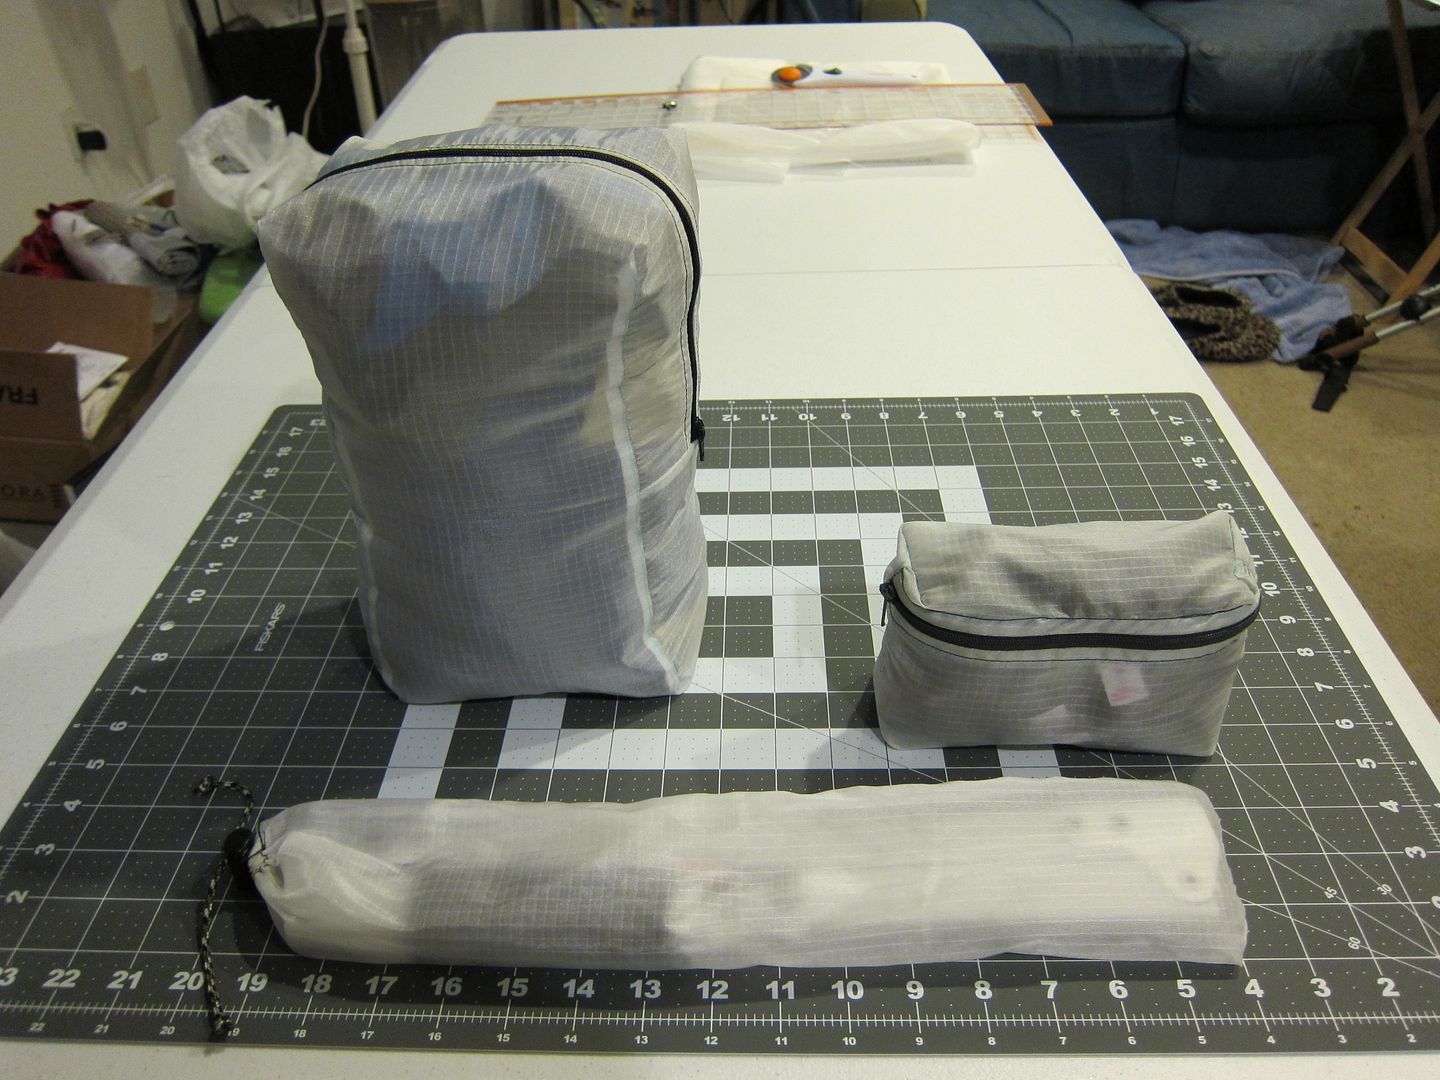
DIY Pullouts, pouches and pockets
- Thread starter colonel00
- Start date
Where's Bruce?
WKR
- Joined
- Sep 22, 2013
- Messages
- 6,387
Nice work and excellent looking bags. Question: have you given these sacks the dunk test? I took a fall that had me neck deep in cold water. Since that day I have employed dry bags and plastic bags to store everything in my backpack. I wonder how these sacks do when held underwater as zippers seem like a potentially leaky proposition. I have packed a variety of plastic bags in varying sizes and thicknesses from heavy trash can liners down to dry cleaning bags (doubles as emergency water condensation/dew still) and are nice and light. I tie an overhand knot to seal em...so far no leaks doing dunk tests in the pool. Have you tested your sacks? What was the result?
You make this look sew easy. Well I guess I know what the wife needs for Christmas.
Exactly!
Nice work and excellent looking bags. Question: have you given these sacks the dunk test? I took a fall that had me neck deep in cold water. Since that day I have employed dry bags and plastic bags to store everything in my backpack. I wonder how these sacks do when held underwater as zippers seem like a potentially leaky proposition. I have packed a variety of plastic bags in varying sizes and thicknesses from heavy trash can liners down to dry cleaning bags (doubles as emergency water condensation/dew still) and are nice and light. I tie an overhand knot to seal em...so far no leaks doing dunk tests in the pool. Have you tested your sacks? What was the result?
These are just for practice and demonstration. The material is regular old ripstop nylon so no, they have absolutely no water resistance. Now, I do have some DWR ripstop and some silnylon that I will make some stuff out of but my goal is not 100% waterproofness. If I had that concern then I would be using dry sacks. In theory, you could use a water resistant zipper and tape/seal all of the seams if you used silnylon and it would be fairly waterproof I guess. My main goal is to have pullouts that I can take out of the pack when it is a little rainy and set them on wet ground and they won't immediately soak up tons of water. For me, a decent level of water resistance should be fine.
BackpackHunter
FNG
Very nice work.
Manosteel
WKR
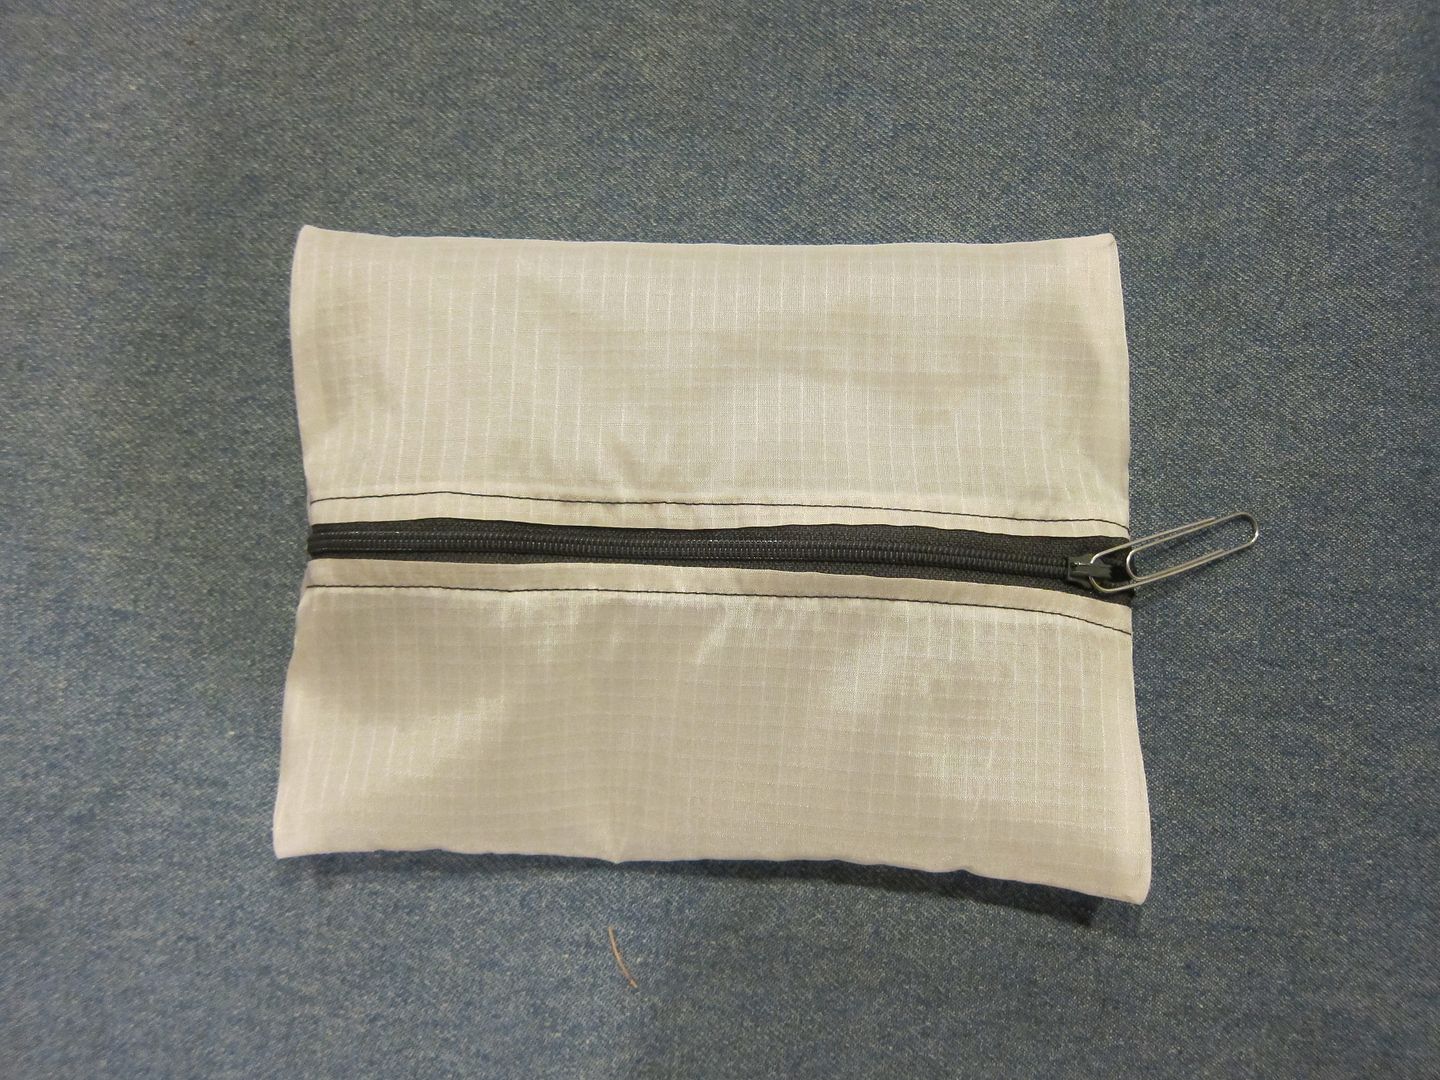
Excellent job! Everything looks awesome! How did you make the small belt pouch with the side zipper? My wife and I couldn't figure that one out.


Short answer: offset the zipper before you sew the sides. In the photo below, just move the zipper more towards the top rather than square in the middle. I need to work out the calculations and make a spreadsheet. On that one I made, I was basically winging it so the final depth of the pocket was simply a function of how far the zipper was from the top.

I started playing with some DWR ripstop so I will probably work on making up a pocket of some sort and I will try to document the process.

I started playing with some DWR ripstop so I will probably work on making up a pocket of some sort and I will try to document the process.
Hunt'nFish
WKR
Brad, excellent tutorial! Very well done.
Hunt'nFish
Hunt'nFish
Thanks. I have been playing a little more and I will put up a follow up thread here at some point.
Here are a couple notes to make things a little easier that I don't think I mentioned yet.
1. Use a hot knife or carefully melt the edges of the material when you cut it to keep it from fraying. If you are just practicing then it doesn't matter but it can be annoying. You don't have to worry about this with silnylon though.
2. Put little strings or other zipper pulls on the zippers at the beginning. This really helps when you are trying to get the zippers under the presser foot during the sewing of the zipper.
3. It is a bit tricky but if your zipper is longer than you need, you can actually take it completely apart and sew the sides on individually. This avoids the issues with moving the zipper pulls and those last two stitches of the zipper that are tricky. With that said, make double sure you have everything lined up correctly. It can also be a trick to get the zipper back together but it isn't impossible.
I picked up this little gem today and it is perfect for cutting nylons that want to fray.
http://www.homedepot.com/p/Bernzoma...sory-Kit-328630/100585921?N=bqmd#.UqJikdJDt6I
http://www.homedepot.com/p/Bernzoma...sory-Kit-328630/100585921?N=bqmd#.UqJikdJDt6I
elkeaterco
WKR
Brad, great stuff. Thanks for the ton of time you put into this forum. The wife and I take our first sewing class next week. If all goes well, we'll be looking to buy a machine and take more classes. Thanks much!!!
Jake
Jake
you are inspiring me to take over the wifes sewing machine..
ridgefire
WKR
looks like I may have to make a visit to the local goodwill, wife wont be to happy though
Wow! Incredibly informative. Thanks for this thread. This helps a lot.
Thanks to your tutorial I made my first pullout.


Not as pretty as yours but its the first time I've really sewn since Junior high school and the first time ever on a sewing machine, took me an hour just to kinda figure the thing out (never really did but I think it just felt pity on me so threw some stitches in).
Are the height stitches necessary? It seems like you lose a slight amount of volume with them and the pull out would lay flatter while empty without them. Are you planning more tutorials?
IrishnId
WKR
Awesome. I'd like to make a few of these myself.
That one is really just for practice, as will the next few probably, until I get better at it. I use some cheap dollar a yard material I got from Walmart that's not very tough and will undoubtedly tear and snag easily. I didn't want to jump in with expensive material without having any practice.
Looks great! Now get some material and get creative!


How do you do the zipper flap on the big bag?
Similar threads
- Replies
- 52
- Views
- 2K
- Replies
- 8
- Views
- 1K
Featured Video
Latest Articles
- TT#64 Josh Boyd Elk Hunting Strategies for Every Season
- Aaron Davidson of Gunwerks
- TT#63 Dirk Durham’s Art of Elk Calling
- BIG Buck Stories with the Dirty Giants Podcast
- TT#62 Brian Barney Hunting Bulls without Calling
- Hoyt Alpha AX-2 SD Review
- Kuiu Kenai vs Outdoor Vitals Vario Hooded Jacket Review
- Hoyt RX-9 Ultra Review
- Hunting Vampire Bucks & Building an Optics Kit
- Darton Sequel ST2 35 Review
