Carbon fiber stocks - DIY tinkering

Mt Al

WKR
Joined
Dec 16, 2017
Messages
1,262
Location
Montana
Thank you! And sorry if I come off as arrogant calling it low tech. The purpose of the thread was to show what can be done with relatively basic equipment, and with no prior skills or experience with resin and carbon fibers - but lots of patience, trying and failing... Especially carbon fiber skinning in a nice entrance into this game. Similar to other threads on this topic, this one hopefully might inspire some of out the starting blocks :)

I had to do some adjustments to the last stock after this hunting season, meaning I also have to re-do the finish. I'll try to post some pictures of the process as it progress.

Not arrogant at all and definitely inspiring. Jumping into carbon fiber often seems like a bridge too far but threads like this make it seem in the reach of more of us.

Really appreciate the time you took sharing the story, materials, process, etc..
 
Joined
Mar 6, 2024
Messages
60
Location
Alberta
Or for anyone else who has done this, you're more than welcome to chime in. I have experience with fibreglass and resin, and am just wondering how the cost to work with carbon compares.
 
OP
hpmr

hpmr

FNG
Joined
Dec 21, 2021
Messages
24
Location
North
Bra gjort @hpmr , det ser flotte ut!

What did those projects end up costing you in the end?
Takk :)

As always, a project gets more expensive than first estimated… New project = justification to buy new tools. :cool:

The stocks however aren’t that expensive thou, and you’ll get a long way with hand tools. Material costs are; core material $50, carbon fiber cloth $30 (1sqm is enough for 1 stock), resin $35, paint(s) $30, (breather/peel ply/vacuum bag $25) + misc for bedding, sling studs/sockets and recoil pad. So somewhere between $150 and $200 will get you close to a finished stock. And of course, lots and lots of hours and elbow grease… 😅
 
OP
hpmr

hpmr

FNG
Joined
Dec 21, 2021
Messages
24
Location
North
Or for anyone else who has done this, you're more than welcome to chime in. I have experience with fibreglass and resin, and am just wondering how the cost to work with carbon compares.
I recon it should be pretty comparable.
 
Joined
Mar 6, 2024
Messages
60
Location
Alberta
Takk :)

As always, a project gets more expensive than first estimated… New project = justification to buy new tools. :cool:
Ha! Always love a good reason to buy new tools! (As a mechanic I can always a come up with a "good" reason for new tools) LOL
The stocks however aren’t that expensive thou, and you’ll get a long way with hand tools. Material costs are; core material $50, carbon fiber cloth $30 (1sqm is enough for 1 stock), resin $35, paint(s) $30, (breather/peel ply/vacuum bag $25) + misc for bedding, sling studs/sockets and recoil pad. So somewhere between $150 and $200 will get you close to a finished stock. And of course, lots and lots of hours and elbow grease… 😅
Beauty, thanks! So $200 US is like.... $400 Canadian.. LOL. I might do a little looking around to see if I can find some deals or cheap suppliers up here.
 
OP
hpmr

hpmr

FNG
Joined
Dec 21, 2021
Messages
24
Location
North
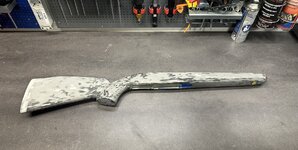
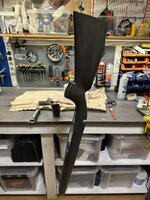
Its closing in on hunting season, so I figured I had to get this rifle ready again. I've made some small adjustments from last season; tweaked LOP, pillar bedded and added a second spartan mount. Doing this also ment I had to give it a new finish. I tried to take some pictures of the process.

Sanded down and cleaned, ready for the first layer.

IMG_6832.JPEG

I used an epoxy paint (kinda similar to the paint used for garage floors etc.) It gets super hard once it is cured. It is kinda thick, so I applied it with paint roller and a small brush. Once it "settles", it gets pretty even with minimal structure and it has a matte finish. (The NCS color code is S 7500-N).

IMG_6840.JPEG

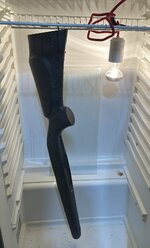
In order to cure the paint layers a bit faster, I turned the garage beer fridge into a temporarily "baking oven" with a 75 watt bulb.

IMG_7173.JPEG

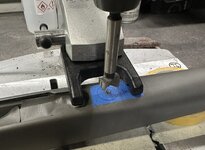
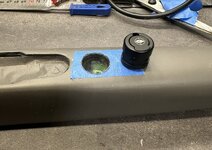
Installing a second spartan gunsmith adapter for tripod shooting.
IMG_7069.JPEG
IMG_7073.JPEG

To make it more grippy I used a webbing/marble spray and sealed it with a two component matte clear coat.

IMG_7222.JPEG
 
OP
hpmr

hpmr

FNG
Joined
Dec 21, 2021
Messages
24
Location
North
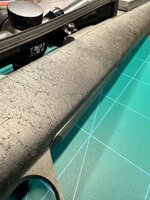
The texture turned out pretty good, making sure its grippy even when its wet (which I'm pretty sure it is atleast 50% of the days out hunting).

IMG_7218.JPEG

IMG_7215.JPEG
IMG_7213.JPEG

And some bling:
IMG_7210.JPEG

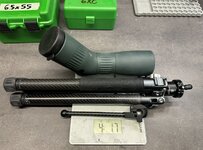
Gonna try out a new spotter/tripod/head combo this season. The tripod might be to light (=flimsy?), but I've gonna give it a try. It has enough height for me to glass or shoot standing up, and I really want the spartan setup to work (but im not sure before some field testing...)
IMG_7232.JPEG

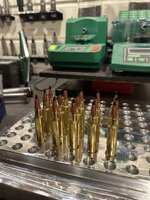
Going back to lead bullets again this season. I prefer bonded bullets over match bullets, as the red deer hunting sometimes can get really up close. Thin jacket, non-bonded core and shoulder hits isn't always the best combo. I'm trying out Scirocco II in my 280 ai. The load looks good at 100, so I'm gonna do some testing and verification further out.
IMG_7356.JPEG
 

Stocky

Lil-Rokslider
Joined
May 8, 2019
Messages
166
After the initial attempt (with the failed bedding) I decided to do some changes. The first rifle I was bulding a carbon fiber stock for was a Blaser R8 straight pull. The action on that rifle somewhat special, as the barrel is fixed to a small "chassis", and the bolt locks directly to the barrel.

View attachment 668417

I found it hard to bed this "action" to the stock, especially making the sidewalls stiff enough.

View attachment 668419

A solution and work-around for me was to sacrifice the original stock, which was kinda rough, worn down and ugly anyway. I cut out the section that holds on to the action, and joined it to the carbon fiber reinforced foam core. The foam (white) I used on this stock is called Bonocell. I would not recommend it, as it is a bit to soft. I later switched to Divinycell PVC (green) which is a whole different league.

After I glued together the foam and the stock middle section, I began take two on the design:
View attachment 668434
View attachment 668435

When I was happy with the stock design, it was time for carbon fiber cloth. I brushed resin on the foam core, waited a couple of hours for it to become sticky, and then wrapped the cloth on the core. This was then wrapped in peel ply and breather, before everyting got tucked into a vacuum bag and sealed off.

View attachment 668445

I wasn't sold on the grip area, so this needed some modifications (excuse the mess):
View attachment 668446

After I was done with the adjustments, it got a couple more layers of carbon fiber:

View attachment 668452

I gave this stock a finish of epoxy top coat, some sponge camo and matte clear coat. I probably could have / should have done some more work on the finish, removing some dings and scars, but I was to eager to finish it up and go shooting. The grip areas was done by mixing epoxy and blaster sand.

View attachment 668453

Here it is dressed up with a Krieger 280AI barrel:

View attachment 668454
For your Vaccuum bag is that just your typical food vacuum sealer roll? and stupid question but i take it you just throw away the peel ply after you use it?
 
OP
hpmr

hpmr

FNG
Joined
Dec 21, 2021
Messages
24
Location
North
For your Vaccuum bag is that just your typical food vacuum sealer roll? and stupid question but i take it you just throw away the peel ply after you use it?
Yeah, just the regular roll I use for food. Both the peel ply and the breather is use and discard. It soakes up the excsessive resin and can’t be used again.
 
Top