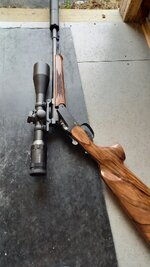
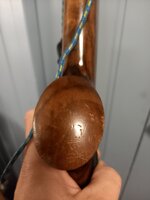
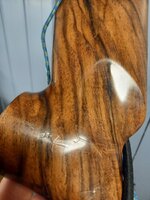
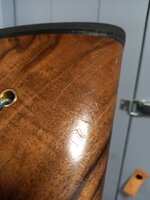
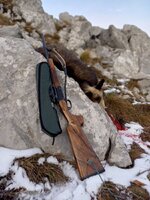
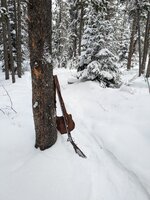
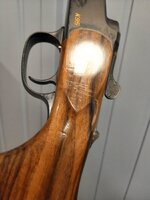
My mountain rifle is getting walnut…

Joined
Oct 2, 2016
Messages
2,857
Location
West Virginia
I do piller bed it, that’s coming up pretty soon here :). Gotta love a finish that’s easy to touch up. I usually keep things pretty touched up, but this one, im kinda looking forward to putting it through its paces. Iv come to terms with, it will get scars lol.
I was wandering about that. A hunting rifle in the mountains shows it. But, I never thought about an oil finish. What a brilliant idea for touching up the scars a rifle gets hunting it. That alone has kept me from doing this. After this thread, that might change.

You are very meticulous and it shows in your work. The craftsmanship is top shelf. And that piece of wood is figured up beautifully. That’s going to be a jewel of a rifle there. Great work man
 
OP
Decker9

Decker9

WKR
Joined
Apr 10, 2015
Messages
1,022
Location
BC goat mountains
I was wandering about that. A hunting rifle in the mountains shows it. But, I never thought about an oil finish. What a brilliant idea for touching up the scars a rifle gets hunting it. That alone has kept me from doing this. After this thread, that might change.

You are very meticulous and it shows in your work. The craftsmanship is top shelf. And that piece of wood is figured up beautifully. That’s going to be a jewel of a rifle there. Great work man

Thanks a bunch! Oil finishes are definetly easy to touch up the blemishes and rubs, scars and dents a little tougher. If a guy handles his rifle like he does his sweetheart though, they’ll stay gorgeous forever!
 
OP
Decker9

Decker9

WKR
Joined
Apr 10, 2015
Messages
1,022
Location
BC goat mountains
I'll give a +1 to that.
Getting a nice piece of wood on my mountain rifle has been a very enjoyable experience.

For sure, more "initial rubbing" but finding the waxed London oil finish easy to maintain.

View attachment 760769

That there is one beauty of a rifle THLR!! Love everything about it, that wood and finish looks outstanding!!

If you don’t mind, could you explain a little on London finishes? Iv heard the term before and looked it up a little, but I’m still not sure on its process.

Waxing, how do you find it for grip? Iv never tried a wax, though I have a couple kinds in my cabinet here. My grandad use to use a wax he would make, but I don’t remember much about it.

Stock making is fun and all, but I’m really enjoying learning the finishing. So many ways to go about it!!
 

THLR

Lil-Rokslider
Joined
Mar 6, 2020
Messages
293
I have a "semi-London" finish ( a term I just made up) as you're supposed to go back to bare wood whereas I applied mine above the factory finish (which doesn't go as deep). The internet doesn't really seem to have a lot of info on that "trade secret", but a lot of confusing terms and "non-explanations" like slacum and rubbing oil. But a London Gunsmith who works on the expensive Purdey/ Holland&Holland etc best guns (they start at $30K?) instructed me and assured me there's nothing to it other than trusting the procedure and not rushing it - any mistake can easily be rubbed down:

"Ok, so I do a lot of traditional best
London

oil finishes which Is a blend of Alkanet root, boiled linseed oil, beeswax and terebine driers. This does a great finish over many applications however this will fill the chequering unless covered and require it to be re-cut. If you don’t want to have to cover the chequering or re-cut it then I’d recommend something like this. Doesn’t fill the chequering, is absorbed by the wood to protect it and is no risk as in you can’t leave it on too long/doesn’t matter if you don’t cut it back as doesn’t go hard…"

I cheated with an "abridged" version with Osmo hardwax oil (used on wood floors, I couldn't be arsed to make the oils), but applied with the same technique meaning a lot of thin layers buffed back with 0000 steel wool to fill pores. After perhaps 7 weeks I had the smooth, "non-orange skin" dimpled surface and I topped that with neutral Liberon Black Bison Wax. I tried Renaissance Wax for the foreend, but a few months later I must say the Liberon looks much better. The Renaissance wax gave me no control over the surface, it was either clouded or high gloss and quite smelly. The Liberon gave me much more precise control and I left the surface a rich silky matte. With the summer passed and the rifle used a bit, the foreend (Renaissance) has lost much of its gloss but the rear remains the same. As I understand it, the wax is mostly to have the water run off. All metal-wood contact points were finished with white lard, which does nothing to either surface but adds a seal.

This is the basic procedure I repeated for 7 weeks

 
Last edited:
OP
Decker9

Decker9

WKR
Joined
Apr 10, 2015
Messages
1,022
Location
BC goat mountains
I have a "semi-London" finish ( a term I just made up) as you're supposed to go back to bare wood whereas I applied mine above the factory finish (which doesn't go as deep). The internet doesn't really seem to have a lot of info on that "trade secret", but a lot of confusing terms and "non-explanations" like slacum and rubbing oil. But a London Gunsmith who works on the expensive Purdey/ Holland&Holland etc best guns (they start at $30K?) instructed me and assured me there's nothing to it other than trusting the procedure and not rushing it - any mistake can easily be rubbed down:

"Ok, so I do a lot of traditional best
London

oil finishes which Is a blend of Alkanet root, boiled linseed oil, beeswax and terebine driers. This does a great finish over many applications however this will fill the chequering unless covered and require it to be re-cut. If you don’t want to have to cover the chequering or re-cut it then I’d recommend something like this. Doesn’t fill the chequering, is absorbed by the wood to protect it and is no risk as in you can’t leave it on too long/doesn’t matter if you don’t cut it back as doesn’t go hard…"

I cheated with an "abridged" version with Osmo hardwax oil (used on wood floors, I couldn't be arsed to make the oils), but applied with the same technique meaning a lot of thin layers buffed back with 0000 steel wool to fill pores. After perhaps 7 weeks I had the smooth, "non-orange skin" dimpled surface and I topped that with neutral Liberon Black Bison Wax. I tried Renaissance Wax for the foreend, but a few months later I must say the Liberon looks much better. The Renaissance wax gave me no control over the surface, it was either clouded or high gloss and quite smelly. The Liberon gave me much more precise control and I left the surface a rich silky matte. With the summer passed and the rifle used a bit, the foreend (Renaissance) has lost much of its gloss but the rear remains the same. As I understand it, the wax is mostly to have the water run off. All metal-wood contact points were finished with white lard, which does nothing to either surface but adds a seal.

This is the basic procedure I repeated for 7 weeks


Thanks a lot! I never seen Andy’s video before, I follow him on IG, super great fellow and a master at the art!

My grandad use to make his own finishes on the stovetop, Iv never came across any notes left over though. I bought some of that renaissance wax, the stuffs pretty ronchy for sure lol. Iv been playing with the alkanet root a bit, it defiantly can be powerful stuff Iv found.
 

Macintosh

WKR
Joined
Feb 17, 2018
Messages
2,774
Them are character marks. I'll take that over a spanking new never used stock 10 days a week. Also, when they get really noticeable or go through the finish, marks like those can easily be steamed out and finish applied over and very few people will even be able to see it.

Now get some checkering on that wood asap, will ya? It looks naked!
 

THLR

Lil-Rokslider
Joined
Mar 6, 2020
Messages
293
Sorry, can't afford chequering and don't gave the skills for it.

I'll refinish the wood this winter; the marks will just add a nice patina. I really enjoy "learning wood", so looking forward to the process.
 

Pclaunch

FNG
Joined
Jun 1, 2022
Messages
11
What Ana amazing piece of art. Thank you for sharing this journey!!! I wish I had just a fraction of your skill and patience.
 
Joined
Oct 30, 2024
Messages
7
Another lesson learnt. DO NOT start cutting out the layout until the action holes are drilled.

I hand planed the top and one side to make it perfectly square and straight, the proceeds to lay out the metal onto the blank. I got rammy, and started cutting out the inlet, then when I drilled my holes, my rear was off just a touch, which threw my whole layout out a hair. I had to hand plane the top down again and re lay out the metalwork. Quite a hickup that won’t happen again.

View attachment 651805View attachment 651806View attachment 651807View attachment 651808
Nice work! That is quite the undertaking to make your own stock.
 
Top