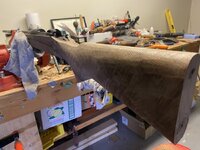
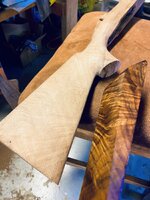
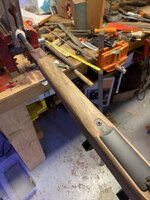
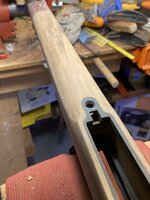
My mountain rifle is getting walnut…

Joined
Feb 2, 2020
Messages
3,063
I do piller bed it, that’s coming up pretty soon here :). Gotta love a finish that’s easy to touch up. I usually keep things pretty touched up, but this one, im kinda looking forward to putting it through its paces. Iv come to terms with, it will get scars lol.

In the world of traditional muzzleloaders, a lot of guys will order their custom built Flintlock or cap rifle from the builder to be artificially aged, so it looks old and has its dings and scratches and scars and a bit of rust, and then they don't have to worry about that happening to it as they use it out in the woods. The one that I built though, I am just letting it age naturally with all of the scars it gets from hunting. It's a little painful, but I am excited to see what it looks like in 30 years after being used hard and not babyed
 
OP
Decker9

Decker9

WKR
Joined
Apr 10, 2015
Messages
1,058
Location
BC goat mountains
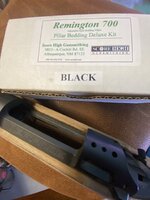
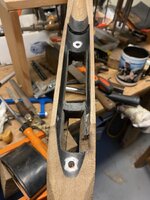
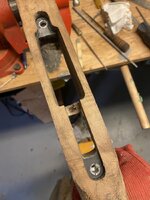
Actually looking at photos, bedding was what came next. To start working the wood around the metal, I needed the bedding to be finished up.

I ordered a score high kit with pillars locally, can’t say I was the least bit impressed with it, maybe it was old stock? (Marine Tex is still my fave). The adjustable pillars were sure nice though.

IMG_3848.jpegIMG_4060.jpegIMG_4069.jpegIMG_4089.jpegIMG_4092.jpeg
 

RepeatPete

Lil-Rokslider
Joined
Aug 13, 2023
Messages
171
I was hoping there would be another one of these - I must have read through your last stock build almost half a dozen times. Amazing work! I look forward to following along this time also!
 
OP
Decker9

Decker9

WKR
Joined
Apr 10, 2015
Messages
1,058
Location
BC goat mountains
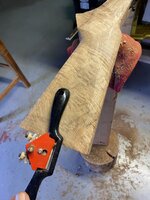
Being new still, I like to practice with the tools, while the wood is still there. I bought a cheap spokeshave which Iv found pretty useful, but not very, accurate. It was good to learn the tool though and the places it’s handy in. For Christmas I got a Veritas spokeshave, super excited to try it out on the next build coming up.

IMG_3780.jpeg

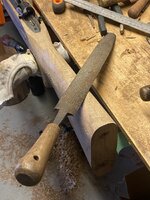
A lot of my tools are leftovers from my grandads gunshop, probably me favourite file of them all.
IMG_3810.jpegIMG_3782.jpeg

A big mistake here. I should have drawn out lines to keep things, symmetrical. Iv done pretty well with eyeballing and straight edges, but a lesson learnt that won’t happen again.

Testing sone more finish, this is Danish oil soaked in Alkanet root.
IMG_7200.jpeg
 
OP
Decker9

Decker9

WKR
Joined
Apr 10, 2015
Messages
1,058
Location
BC goat mountains
I was hoping there would be another one of these - I must have read through your last stock build almost half a dozen times. Amazing work! I look forward to following along this time also!

Happy to share!! After this is finished, I believe I have another stock to start right after. As long as the owners ok with it, I’ll share it here as well.
 
Joined
Oct 19, 2012
Messages
1,903
Location
Western Montana
That's going to turn out to be an outstanding rifle! I cannot wait to see it completed and shot at the range so we can see how it does and how it feels to you shooting it. Slow and careful is the way to go, and you have done that in spades. Nice work.

Beautiful wolf your wife got also!
 

Firehawk

WKR
Joined
Jan 29, 2014
Messages
802
Location
Northern Utah
I love this. So impressive to have the forethought to go through the steps properly and yield a beautiful result. I have one beautiful Walnut stock on a Model 70 that I refinished years ago. Made me love it even more. But boy my patience wore thin on that project. I can't imagine doing what you are here. It looks great. I can't wait to see the finished stock, but will thoroughly enjoy the stories and steps along the way. Thank you for sharing it with us.
 
OP
Decker9

Decker9

WKR
Joined
Apr 10, 2015
Messages
1,058
Location
BC goat mountains
Cheers everyone!

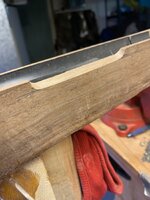
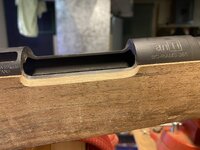
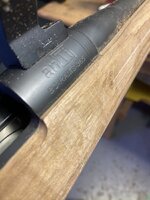
Starting to work into the ejector port here. I did the bolt notch at the same time but unfortunately didn’t take photos of the process. It is pretty straight forward though, but super important to go slow. An ugly bolt handle notch can turn into quite an eyesore.

I stayed about a 1/16” proud for now in the ejector port, I’ll take down the rest when I get to the final sanding. Small files and/or a sharp scraper works great here.

IMG_4122.jpegIMG_4121.jpeg
IMG_8106.jpeg

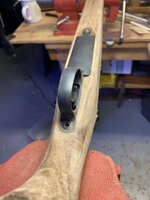
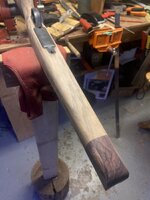
It’s important (for me anyway) to not work on the same section for to long, I tend to get a bit rammy if I do. Good time to flip it over and start thinking about the underside.

IMG_8105.jpeg
 

grog24

Lil-Rokslider
Joined
Dec 10, 2020
Messages
135
Looking fantastic! You should try pure tung oil on a sample on the side. I've moved over to that for all my finishing and love it. I do multiple coats and then hand buff at the end to whatever finish I desire. I think it gives a "deeper" look to the wood and shows off that grain that we're all into. Keep up the progress!
 
OP
Decker9

Decker9

WKR
Joined
Apr 10, 2015
Messages
1,058
Location
BC goat mountains
I love schnabel forends, I think it stems from my grandad, lots of his builds sported a schnabel. Not the easiest thing to get perfect, but with a few under my belt now Iv got a good handle on them, I think.

The transition from the front of the action down to the schnabel needs to be 100% symmetrical, especially if a guy plans to checker it after (I think I’ll send this out for checkering). Being a lightweight, I spared no wood up here.

IMG_8113.jpegIMG_8143.jpegIMG_8178.jpeg

I kept the belly side a little proud as well, being able to sand down the bottom (and/or top) really helps define the sharp edges and lines.
 
OP
Decker9

Decker9

WKR
Joined
Apr 10, 2015
Messages
1,058
Location
BC goat mountains
Looking fantastic! You should try pure tung oil on a sample on the side. I've moved over to that for all my finishing and love it. I do multiple coats and then hand buff at the end to whatever finish I desire. I think it gives a "deeper" look to the wood and shows off that grain that we're all into. Keep up the progress!

Most of my experience is with Tung oil, it’s probably my favourite finish as well. For this particular project though, moisture is a big concern. Tung ime doesn’t block out moisture to well, and on this piece, the wood is actually quite, white. I’m finding that the tru oil along with my mixture, brings a bit of a darker hue to the wood, which I prefer. I believe it does a better job of sealing the wood vs Tung oil as well (unless tung is mixed with a varnish, which is essentially tru oil).

The tru oil idea comes as a recommendation from one of the finest stockmakers around, based off of what this stock will be used for.

But yes, tung oil is a tough one to beat in most instances I find.
 

grog24

Lil-Rokslider
Joined
Dec 10, 2020
Messages
135
Most of my experience is with Tung oil, it’s probably my favourite finish as well. For this particular project though, moisture is a big concern. Tung ime doesn’t block out moisture to well, and on this piece, the wood is actually quite, white. I’m finding that the tru oil along with my mixture, brings a bit of a darker hue to the wood, which I prefer. I believe it does a better job of sealing the wood vs Tung oil as well (unless tung is mixed with a varnish, which is essentially tru oil).

The tru oil idea comes as a recommendation from one of the finest stockmakers around, based off of what this stock will be used for.

But yes, tung oil is a tough one to beat in most instances I find.

Makes perfect sense. You're doing all the good. Keep it up! Makes me want to finish the Remington 700 stock I started. (Kind gave up when I didn't like the grip angle I landed on). Can't wait to see finished product.
 
Top