hunthikecamp
Lil-Rokslider
I wanted to get a thread going for my build up of my next hunting rifle, and I say 'build up' instead of 'build' because there's a lot of really cool builds on here but I'm not going nearly that custom. But I plan to do all the work and assembly on this rifle myself and take it from off the shelf to a solid mountain hunting rifle.
The Old: My current hunting rifle is a sporterized Springfield M1903, .30-06, manufactured in 1905 and sporterized sometime in the 70s for use as a hunting rifle. Equipped with a 3-9x40 Bushnell Scope that works, but runs out of light well before legal shooting light. It was passed down to me from my stepfather and I've enjoyed a lot of good hunts with it. I've taken my first whitetail buck as an adult, my first bull elk, and my first mule deer buck with it. It's old, but it works, and it'll certainly hold it's spot as my backup if I ever need it but I'm ready to sink my teeth into something newer, learn a few things, and make something that's my own.
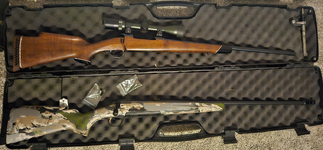
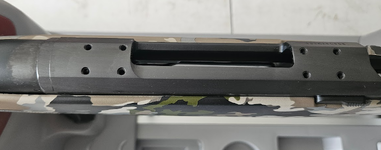
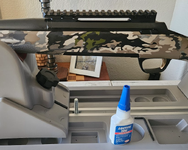
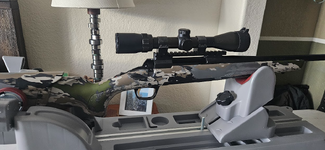
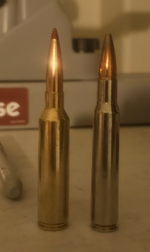
The New: Browning X-Bolt Western Hunter in 7 PRC, 24" barrel w/ Recoil Hawg Muzzle Break. I picked this up recently for $800, and while 7 PRC wasn't exactly a caliber I was after, after reading up on it I'm pretty excited about the potential for it and couldn't pass it up at the price point.
This will be my do it all rifle, at least until I get to a point in my life where I can afford to build up another. But for now, I'm going to focus on putting the best components I can afford into this rifle to make it more than capable of any hunt. Not to mention up until now I've been pretty much a 1-2 box/year shooter, so as it is this rifle can outshoot me, heck so can that old 30-06. Part of this process for me is also to make that jump to shooting a lot more and being a lot more comfortable and confident behind the gun.
My goal with this thread is just to document all of my decisions, questions, answers, and just the overall process of assembling, breaking in, shooting, and hunting with this rifle. A lot of this is gonna be new to me so I'm sure I'll learn a ton along the way.
Initially the only question I'll throw out there to see if anyone has some input (with the caveat that I just haven't had the time to do a ton of research yet) is about suppressors:
-this barrel is threaded for M13-0.75, not 5/8-24. I'll see how it goes with the RH brake but something that is appealing to me is threading a suppressor on if possible. Looks like Hughes Precision and Silencer Central (and i'm sure more) offer an adapter but the idea of tolerance stackups and things not being perfectly flush worries me a bit, hoping to find some more folks with experience with these. Or is there an M13 threaded suppressor out there? Sure seems like there'd be a market if there's not some unavoidable dimensional issue...
The Old: My current hunting rifle is a sporterized Springfield M1903, .30-06, manufactured in 1905 and sporterized sometime in the 70s for use as a hunting rifle. Equipped with a 3-9x40 Bushnell Scope that works, but runs out of light well before legal shooting light. It was passed down to me from my stepfather and I've enjoyed a lot of good hunts with it. I've taken my first whitetail buck as an adult, my first bull elk, and my first mule deer buck with it. It's old, but it works, and it'll certainly hold it's spot as my backup if I ever need it but I'm ready to sink my teeth into something newer, learn a few things, and make something that's my own.

The New: Browning X-Bolt Western Hunter in 7 PRC, 24" barrel w/ Recoil Hawg Muzzle Break. I picked this up recently for $800, and while 7 PRC wasn't exactly a caliber I was after, after reading up on it I'm pretty excited about the potential for it and couldn't pass it up at the price point.
This will be my do it all rifle, at least until I get to a point in my life where I can afford to build up another. But for now, I'm going to focus on putting the best components I can afford into this rifle to make it more than capable of any hunt. Not to mention up until now I've been pretty much a 1-2 box/year shooter, so as it is this rifle can outshoot me, heck so can that old 30-06. Part of this process for me is also to make that jump to shooting a lot more and being a lot more comfortable and confident behind the gun.
My goal with this thread is just to document all of my decisions, questions, answers, and just the overall process of assembling, breaking in, shooting, and hunting with this rifle. A lot of this is gonna be new to me so I'm sure I'll learn a ton along the way.
Initially the only question I'll throw out there to see if anyone has some input (with the caveat that I just haven't had the time to do a ton of research yet) is about suppressors:
-this barrel is threaded for M13-0.75, not 5/8-24. I'll see how it goes with the RH brake but something that is appealing to me is threading a suppressor on if possible. Looks like Hughes Precision and Silencer Central (and i'm sure more) offer an adapter but the idea of tolerance stackups and things not being perfectly flush worries me a bit, hoping to find some more folks with experience with these. Or is there an M13 threaded suppressor out there? Sure seems like there'd be a market if there's not some unavoidable dimensional issue...

