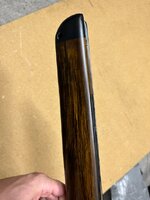
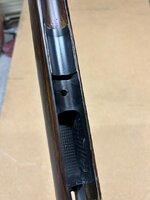
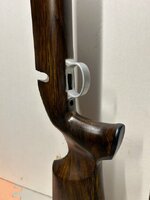
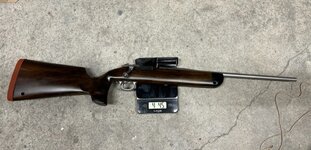
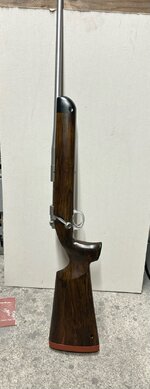
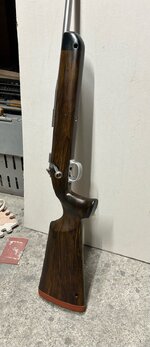
Lightweight Kimber Build with Custom Carbon Fiber Stock

OP
R

RepeatPete

Lil-Rokslider
Joined
Aug 13, 2023
Messages
166
RPete - Wow - what a build!

Your technique improved by an order of magnitude on this second round. I am loving your inlet section build - using CF tube is really good in a lot of ways. It contours nicely to your rifles action and the arc of the tube adds a lot of extra strength. The multi-directional fiber orientation adds even more. Plus CF tube is relatively cheap and best of all - you don't have to fabricate it - win win.

Do you plan to leave the exterior CF surface 'raw' or seal it with something? One option that has worked really well for me is automotive clear coat applied with a Preval spray bottle. If done, make sure it has UV protection additive. Easy to apply, seals in all the stray fibers and cures rock hard.

Don't see any mention of bedding the action. Are you planning to do any? The action on my little Izhmash 7-2 .22lr is designed with bedding ridges cut into the steel of the receiver, so it's a given for my application. A bit of a apples to oranges comparison, but similar in a few ways. One main advantage I have found is bedding gives you some adjustment capability to set the barreled action dead center of the forearm slot. Doesn't really impact functionality, but it's visually nice to have the barrel dead center of the groove.

That sling looks really cool. Initially curious of the integrity of that loop over the monkey's fist closure staying put but a great ultralight + tough solution.

Designing and building from the inside (inlet box, recoil lug, sling & bipod mounts) out is the way to address such a project. Get the internals properly addressed and it's much easier to layer the outer skin around them. Dude - your weave alignment on that forearm is outstanding!

Pretty amazing how the second (and subsequent 😉) builds come together after some lessons learned. Biggest step is starting the first one,

Love your use of varied compression methods - haven't tried electrical tape as I thought it would leave winding lines in the cured CF, but yours looks great. Another option is window film shrink plastic from HD. Cut in long strips, wrap item and hit with blow dryer level heat to increase the compression strength. Stuff has surprising tensile strength and pulls down nicely. As you have shown, these are very doable without a vacuum setup.

You really have me thinking about a new build.

The carbon will be sealed, I have an idea for paint, but still waiting to see if it’s actually going to work. That Preval bottle looks pretty cool - I’ll have to give it a try for the clear coat after the paint.

Funny you mention bedding - I actually did that today. I used Marine-Tex gray and bedded just the chamber section of the barrel and the recoil lug as the rest of the inletting section fit very tightly already. And I don’t actually need the barrel-centering capability of the bedding, as I put in quite a bit of work previously by centering the barrel channel section of CF tube that I made, and got lucky and the barrel is dead nuts in the center.
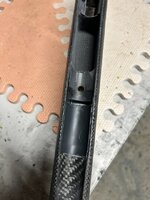
7C277136-B191-4BDB-940D-3D3D013E0BDC.jpeg

The electrical tape does leave lines if it’s placed directly over the carbon (as my recent grip layup proved), but the peel ply and breather add enough of a cushion to spread out the compression and leave the surface even. A vacuum bag setup is definitely in the future - the pros are too hard to ignore, but I’ve been surprised how well the electrical tape works. And I’ll definitely have to try the window film - that’s genius!

Wow. Super cool.
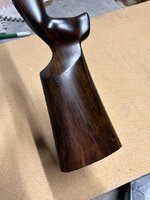
Thank you!
 
OP
R

RepeatPete

Lil-Rokslider
Joined
Aug 13, 2023
Messages
166
Awesome build! Definitely something to be proud of with all the work you are putting into it
Thanks!

I created a trigger guard by shaping a foam mold and then wrapping with CF. Then cut out the foam and bonded it onto the stock skin with a few overlapping layers of carbon. Way tougher than it needs to be, but I wanted the extra thickness for aesthetics.

13F5A226-D6BB-4B76-A80B-F02D08CE5E18.jpeg
 
OP
R

RepeatPete

Lil-Rokslider
Joined
Aug 13, 2023
Messages
166
Title changed from “Custom Carbon Finer Stock around 2” to “Lightweight Kimber Build with Custom Carbon Fiber Stock” as I want to document some other details relating to the action/magazine and not just the stock build.
 

Gobber

FNG
Joined
Aug 8, 2023
Messages
47
That trigger guard is a great addition. I ran into the issue of needing a trigger guard that was different from the OEM and tried a few different model guards I thought I could modify. None of them worked, so I made a block with the proper inner dimension and built up the CF around it to give a usable blank. After some cutting and shaping, had just what was needed. Yours came out great and it looks as good or better than OEM. One extra advantage I’ve found is that it’s nice to have the trigger guard and ‘lower metal’ section simply built into the stock. For me it’s simpler to remove the barreled action and less screws to loose.

If you’re looking to give it a paint job, looking forward to the look you are going for. I really like the blended look of sponged splotches that let the pattern of the CF show through, but it depends on the purpose of the color coat. Automotive clear coat has always worked really well for me.

Just as an aside, working on a cocking arm handle for my little .22 plinker that is showing some potential. It really is pretty cool what can be done with pretty basic methods.
 
OP
R

RepeatPete

Lil-Rokslider
Joined
Aug 13, 2023
Messages
166
That trigger guard is a great addition. I ran into the issue of needing a trigger guard that was different from the OEM and tried a few different model guards I thought I could modify. None of them worked, so I made a block with the proper inner dimension and built up the CF around it to give a usable blank. After some cutting and shaping, had just what was needed. Yours came out great and it looks as good or better than OEM. One extra advantage I’ve found is that it’s nice to have the trigger guard and ‘lower metal’ section simply built into the stock. For me it’s simpler to remove the barreled action and less screws to loose.

If you’re looking to give it a paint job, looking forward to the look you are going for. I really like the blended look of sponged splotches that let the pattern of the CF show through, but it depends on the purpose of the color coat. Automotive clear coat has always worked really well for me.

Just as an aside, working on a cocking arm handle for my little .22 plinker that is showing some potential. It really is pretty cool what can be done with pretty basic methods.
Yeah, I’m very happy with the trigger guard and it is a quick and easy affair to bolt the barreled action in, which is good because I do it a lot!

That cocking arm looks great, and highlights the amount of work for a small but complex piece. I’m constantly impressed by how useful, strong, cheap, and available in pretty much any diameter CF tube is. I also used a similar method of a CF and resin “slurry” to fill some bigger voids - just thin 3k CF shaved really thin with a sharp pair of shears into the resin and it worked great.

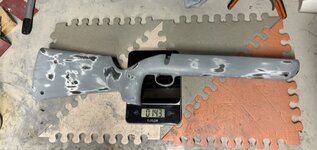
I did some final sanding to get the stock ready for paint.

FA9A3A79-CBE8-468A-8131-0CBE528783F8.jpeg

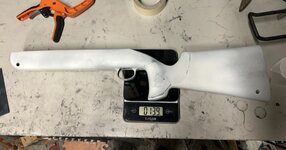
Then a white base coat which didn’t spray great (I always seem to have problems when I try Krylon, Rustoleum always works for me) and highlighted all my surface imperfections.

A50548FD-993E-4DA1-A53B-7E21988F0A1E.jpeg

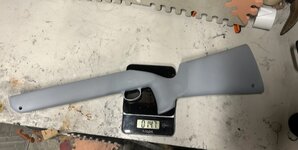
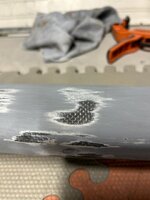
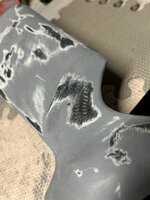
Then a whole can of filler primer followed by block and hand sanding at 120 grit, then wet sanding with a 220 grit sponge pad. The surface isn’t perfect, but it’s much better.

8B19F0DA-B3D1-461D-81A5-C179984BA50E.jpeg
924539BC-D7BE-41CA-AEB3-46528A7D7A1F.jpeg

I agree about the paint jobs that let some of the carbon show through. If I wasn’t so excited about the paint idea I’m working on, I would just leave it like this. I think the battleship grey with the “tear outs” of Carbon look really cool.

6F6C5635-B315-4B0A-9080-4FE058D04CD9.jpeg
068AA592-772E-4377-B748-5C0BE3216E2A.jpeg
 
OP
R

RepeatPete

Lil-Rokslider
Joined
Aug 13, 2023
Messages
166
"RepeatPete Pattern"

Love it! Looking great so far!
Man, that thing looks badass and you've done a fantastic job!
Impressed!
Holy cow this is some impressive DIY!

Thanks!

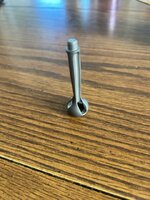
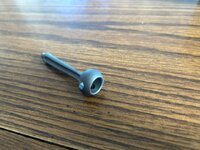
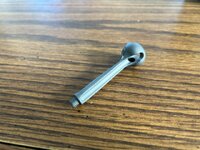
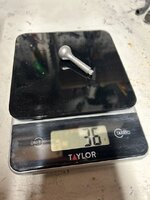
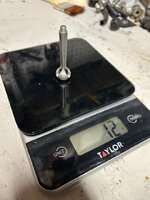
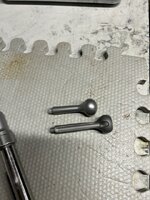
I picked up a titanium bolt handle from Chris over on 24hourcampfire. I really wanted the extra length of the tactical style handle to gain some clearance to the scope body, but liked the classic look and lower weight of his ascent-style handle. The day I was ordering, I found a post that he was making a run of longer ascent-style handles, and I was sold.

The extra length is perfect and serves to lighten the bolt lift and allow thumb clearance between the bolt handle and the scope.

29DD649E-F2F8-4AA5-8D46-1B8BC63B7C55.jpeg
4B66AB4A-CA5F-4A2D-AE4E-96CF03CE7C4F.jpeg
D32867A7-2148-45C0-98D3-7FE18E8CE8DF.jpeg
77D87926-7803-4B08-964B-BCF5E524C312.jpeg
3AE9CA12-30E9-4031-8CCD-D33D58DC97B9.jpeg
5A9FAFC8-8987-4AA3-A828-736C3C9189DC.jpeg
 
OP
R

RepeatPete

Lil-Rokslider
Joined
Aug 13, 2023
Messages
166
Paint:

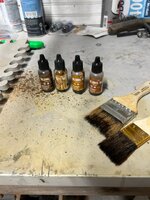
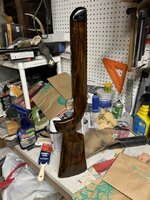
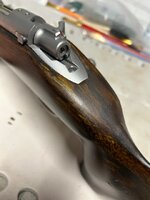
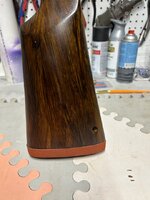
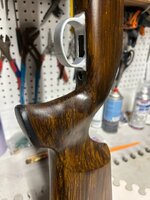
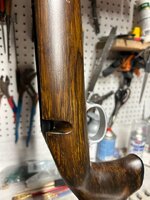
From the beginning I wanted this to be my interpretation of the perfect eastern whitetail gun. Short, light, and handy, and equally capable at 20 yard snap shots in timber as 200 yard shots across a field at dusk. A classic wood stock fit with that vision. So I researched how to paint a synthetic stock like wood and found one person on a different forum that had done it, and done a good job. I did more research on the technique and found it’s pretty commonly used to paint wood grain on drink tumblers. So I got some brown shades of alcohol ink and got to work.

36B481CC-E3CF-4ADC-B1EE-7543922C0547.jpeg

Most tutorials directed a white base coat, then starting with light and progressively using darker inks. The inks have an annoying tendency to take off all previous layers of ink at random times. Not sure why it happens; maybe the brush gets too sticky and stiff, or I didn’t let the preceding layer completely dry, not sure. The nice thing is that the alcohol inks wipe off with some isopropyl alcohol. Either way, it was a pain to work with, but I finally got decent results by using a darker base coat before the ink.

F4598E25-E866-4906-80B1-903DB9FEA7B7.jpeg

Then I added a traditional black forend and grip cap, and painted the trigger guard to look like stainless. (It turned out way more sparkly than I would have picked, but I was extremely sick of painting and my daughters loved it)
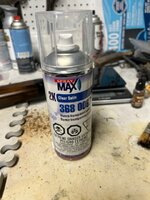
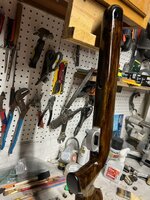
Then a bunch of coats of this two-part epoxy-like clear and she’s done! (Excuse the trashed shop, I tend to get pretty focused on a single project)

5044549E-00D0-4225-BAA1-5A31F472007D.jpeg
08F8E3DC-7EDF-4C51-9D78-84422006A651.jpeg
1C095985-DE5F-45C1-93E0-F25D8A1D65F4.jpeg
9CC3F557-17ED-4BAB-8FA4-04A711D31A78.jpeg

I’m happy with the pattern, but not the durability. It seems like every time I touch it I scrape off a little bit. I think the culprit is the base coat under the alcohol ink didn’t harden fully/properly. Oh well, I’ll use it for a while and then maybe get it cerakoted.
Right now the recoil pad is just hot glued on, as I’m going to decide between the 1” thick pad to give a LOP of 14.25” or switching to the 1/2” pad for a reduced LOP.
 
OP
R

RepeatPete

Lil-Rokslider
Joined
Aug 13, 2023
Messages
166
Overall:


  • Forend is 2” shorter than factory stock
  • ~6 degree negatively sloping comb
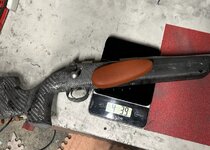
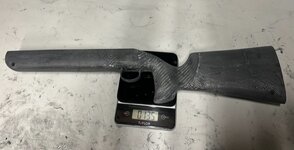
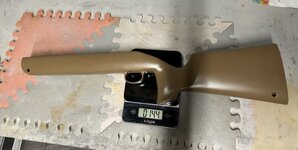
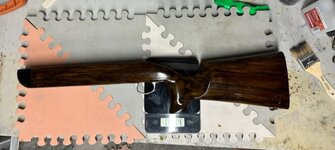
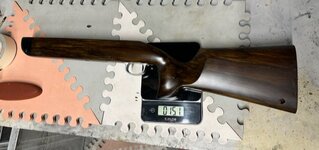
  • 15.1 ounces, 17.1 oz with recoil pad
  • 1.7” trigger-to-grip distance. It’s a touch on the short side, but doable
  • Top of the recoil pad is ~ 5/16” above the bore line
  • Bottom of the forend is parallel to bore
Pretty happy with it and can’t wait to shoot it. It fits amazing and is lighter than anticipated. The paint job is far from perfect, but overall I’m happy with it.
Now I just need to decide on a scope!

B97E7157-659E-4537-B144-3FDEDC7087D5.jpeg
13F1CF5B-2451-463A-BB9C-5644204FBD5E.jpeg
1CFB4EB7-C60F-490A-9EB7-E160E1687955.jpeg
491A7AC7-6582-4862-8C49-C593E842136D.jpeg
D3AC4C1D-4501-4365-83C1-B4710A86C460.jpeg
275E79B8-37F9-4446-AC25-2F9B47578ECA.jpeg
D9690706-E4D1-44AD-BFD9-57BDA82954C8.jpeg
1934DA29-2CBE-49E6-9EE4-D44499A10726.jpeg
 
OP
R

RepeatPete

Lil-Rokslider
Joined
Aug 13, 2023
Messages
166
Could you go over how many layers in what sections you ended up using?
Absolutely! I’m putting this out there to encourage others to try it too. I’m no composites engineer, just going for it and seeing what happens.

Overall, the whole stock has at least two layers. I’m working from a box of super generously donated scraps, and I didn’t always take the time to look at what weight the fabric was - I just went by feel, thick vs. thin. From the forend back:

- The forend tip has two thinner layers, I think 3k each. This area shouldn’t see a whole of stress/impacts, and the thinner fabric contours over the tight radius better.
- Where the forend cap meets the straight portion of the forend, the layers overlap, giving strength to the front sling lanyard hole.
- The main section of the forend is two layers, one thick and one thin. I want to say one 3k and one 12k? Then the barrel channel is made up of two thick (12k?) layers. I think this is mainly what makes the forend so rigid.
- The action area of the stock has all the inletting structure covered earlier, and the same thick and thin layers as the forend on the outer skin of the stock. I was originally planning to put extra layers here, but didn’t feel it was necessary after the second layup.
- The grip-to-inletting area junction, down through the grip, and back through the wrist all have 3-4 layers of thinner (3k or maybe 6k) fabric. I used thinner carbon to wrap the contours better, and did extra layers at alternating fabric orientations because these areas have the smallest cross-sections, and need to be very stiff.
- The butt section has the same one thin and one thick layer as the forend. Towards the end of the butt there are some extra pieces of thin 3k fabric, but solely for the purpose of building up dimensions to match the recoil pad.

Overall, I’m very happy with the stiffness. Would I put the bare stock spanning between two logs and jump on it in the middle? Probably not. I think it’s more than adequate, but not ridiculously overbuilt, which achieves the strength and weight I was after.
 
Top