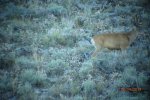
Digiscoping Basics?

Tilzbow

WKR
Joined
Dec 25, 2012
Messages
447
Location
Reno, NV
I'm wondering if there's a good thread or article on the basics of camera setup for digiscoping. I can take okay pictures without vignetting, know about using the timer to reduce movement and the really basic stuff so more specifically I'm looking for advice on camera settings that should be used for different conditions. I've got Sony RXII and a Leica 20x50 w/85mm.

Thanks!
 

Cindy

FNG
Joined
Jun 14, 2013
Messages
86
I think that there are only a couple things you need to work with.
White balance settings for sun conditions, shade, clouds, or direct sunlight.
ISO or the cameras sensitivity to light. Most digiscopers use an ISO of 400 or more.
But, the higher the ISO, the more noise you are likely to get.
Shutter speed. Higher shutter speeds are usually more desirable, but shutter speed is usually limited by the conditions.

If your shutter speed is not fast enough and you are getting blur from the wind moving the scope, or the animal is moving, you may have to increase your ISO in order to be able to increase your shutter speed enough to get rid of the blur.

Personally, I always start with white balance, set it to the light conditions that you have.
Then I set ISO. I try to set it as low as possible. Sometimes that is 800 or 1600. But I love it when its 100 or 200.
Then I adjust the shutter speed until the image looks good. I look at the number if its 1/125 or more, I am usually good to go. If the shutter speed is 1/30 or 1/80 I may not get sharp images.
So, I go back to ISO and adjust up one setting. Then go back to shutter speed and adjust it until the image looks good again. Same thing, evaluate the number.

Its an experience thing.
When you start out, you will not know what settings work. But with trail and error, you eventually will get to the point where you can look at the conditions, and say to yourself, "I need an ISO of _______ and that will give me a fast enough shutter speed.
It just comes with practice.

The biggest conditions that we digiscopers struggle with are lack of light, early morning or late evening, heat waves distorting images, and overexposure because the camera software is not programmed to understand what is going on when the camera is placed behind a spotting scope.

Not a lot you can do about the first two. You see animals when you see them. Heat waves, mirage, distortion is something that you just have to deal with.
But overriding the camera software manually to get the camera to perform properly is something we can control.
 

Cindy

FNG
Joined
Jun 14, 2013
Messages
86
Ooops, I can not believe I forgot this.
Aperture. Use the lowest aperture setting available. I believe its 1.4 on your camera.
This will open the lens as much as is possible and allow more light to get to the camera sensor.
This is displayed as an F1.4 or F4.0 F5.6 ect.
The lower the number, the more open the lens is.
Set it wide open and just use the other three adjustments to get the pic right.
 

30338

WKR
Joined
Jun 2, 2013
Messages
1,994
We've been using the poor man's Meopta adapter on my zeiss with an iphone. It actually works pretty darn well and is very cheap. Another option for someone wanting to mess around with a spotter and an iphone.
 

maverick

Lil-Rokslider
Joined
Apr 5, 2012
Messages
193
Location
Oregon
What Cindy said + shoot in RAW mode and use an editor like lightroom to adjust your pics to your liking. I have the original RX100, it's a great camera. I tend to use video mode more than pics though.
 

Cindy

FNG
Joined
Jun 14, 2013
Messages
86
I want to preface this by stating that I AM NOT AN EXPERT. I DO NOT KNOW EVERYTHING and if you do not agree with the things in this post, I apologize in advance for offending your delicate sensitivities.
Also, there are many people out there who know more than me, have more experience than I do. I would invite you to add to this, I would love to learn from what you have discovered.

There are two parts to this.

Gear basics, and Settings basics. If you already have your gear, skip to settings. If you are looking to get into digiscoping and need to get set up, read both. It may help you find the right gear.

Digiscoping set up basics.
The gear.

You have a scope.
Depending on the size and quality of the scope, the images seen through the scope will be of a certain level of quality.
If your scope delivers a certain level of quality to your eye, you should be able to capture this same level of quality with a camera.

Second step, choose a camera.
The camera is the part of the digiscoping set up that actually captures the end result.
The camera should be chosen based on several factors.
The use of the pictures taken.
Equipment already owned.
Size and weight of the camera.

If you desire a high level of quality that would allow you to print your photos at a size of 18 inches X 24 inches, you may need to consider what makes one camera better at this than another.
If you simply text your photos to friends, to be viewed in smaller formats, a large photosite camera may be overkill.

What you will get into is the world of camera sensors.
Warning, don’t get caught up in the mega pixel phenomenon.
Photosites are the tiny light sensitive spots on a camera sensor that gather information and create the photo.
The size of your photosites are determined by how large the sensor size is, and how many photosites they cram onto that sensor.

Why does this matter?
Larger photosites are capable of better dynamic range, better low light performance, create images with less noise, and capture more accurate information.
These things all determine quality.

So, if you would like to use you cell phone camera, you should know that the sensor in the cell phone is very small.
Even though it may have a large mega pixel count, the large mega pixel count simply means that each photosite on the sensor is smaller in order to fit more photosites on the sensor.
This will effect the quality of the image.

Sensor size comparison chart.
View attachment 17730

This may not matter to you, based on your intended use of the photo.

If you do want to increase your options, you can select a camera that has a larger sensor, and good size photosites.

After you understand the importance of sensor size, and its relation to mega pixels, you can begin to look at the cameras user adjustments.

A camera with a wider range of adjustment or even better, fully manual controls, will allow you to increase the quality of the images you capture.

Typically cell phone cameras have very small sensors and limited controls. You can get more control with many apps.
Point and shoot cameras typically offer a wide range of sensor sizes and megapixel ranges. They have increased levels of control with some models offering full manual control.
Point and shoots are most common and have the widest range of adapter options.
DSLR cameras typically have even larger sensor sizes, and the most manual controls.
They are typically the heaviest and bulkiest options, with the least adapter options.

Why does this matter?
Automatic settings on the camera are run by a program.
When the camera is built, the engineers take into account the lenses and the sensor and the processor and the programs that run the automatic photo modes are programed to understand the situations the camera is likely to encounter.

One thing that no camera has programmed into its auto mode is digiscoping.
When you put that camera behind the spotting scope lots of things happen and the cameras programming tries to use its rules to choose the best settings to use to deal with its new conditions.
The problem is that the program has no rules to help it understand the spotting scope.
So, the more controls you can manipulate, the better the odds you will be able to help the camera get the best result.


Third step find an adapter.
You have a scope.
You know what you want to do with your photos and have a camera that will allow you to do that.
Now its time to get the camera behind the scope.
The best adapters are the ones that allow you to attach your camera to the scope quickly, and with repeatability.
Aligning the camera with the eyepiece and positioning the camera the same distance from the eyepiece should be easy to do.
You want to be able to look through the scope, slip the camera into place, take a picture, and slip the camera back off. Animals tend to move so ease of use and repeatability make a big difference when choosing an adapter.
There seems to be countless options in the adapter world.
Choose one that works best with your specific scope, and your specific camera.

One item to consider for cell phone digiscopers is the frequency of cell phone changes.
lots of people update their phones every two years.
As the companies change the phone widths, thickness, and heights, the adapter you choose may no longer work with your new phone.
You should be aware of this when choosing an adapter.
You may want a universal style adapter. You may be fine with buying a new adapter with phone changes.
Also consider the photo file sizes and data plan limits.
Sending lots of photos may cause unwanted charges on your bill.

The bottom line is that you should choose a camera that meets your needs.
Then find the adapter that works best with your scope/camera combination.

Then learn how to use the camera controls to get the best results.


Digiscoping basics.
Camera control.

Regardless of your scope and camera type, you will likely find that you will get better results by manually adjusting the camera settings.

For cell phone users, there are many applications that can be bought to give you more control over your cell phone camera.
There are some apps that are marketed as “digiscoping” apps. These are not always the apps with the widest range of adjustment.
Look at photography apps that give you the most control over your specific camera.
However extensive or limited the adjustments, using the adjustments will help you get better images.

For point and shoot and DSLR camera users, understand your cameras processor.
The sensor on your camera interacts with the light waves to capture the image, the processor is the computer that converts the signals into data.
Its the brain that does the organizing.

These types of cameras come with software programmed into the processor.
If you use your camera in the auto modes, the processor programming is trying to find the optimal setting combinations to get the best image.
The digiscoping problem is that the scope tends to confuse the processors programming because there are now two lens systems in front of the sensor, the camera lens and the spotting scope lens.

So, since you have given your camera processor a situation that the software has no programming to help it understand, you usually will get poor image quality due to settings selected by the processor software.

This is usually seen in your images as overexposed images with washed out colors and a soft look to the edges.

Some of you readers just had a light come on. Those are your images! Good news, now you know whats causing it.

So, lets fix it.

Its going to get technical and its going to long. I will try to be as basic and clear as I can.

You camera has some settings that will allow you to improve your images.
First, lets talk about aperture.
This is simply the size of the hole in your camera lens.
Your spotting scope has a front end that is a certain size. Example 80mm. Your camera has an adjustable opening. This is called aperture.
You will want to let as much light as possible through the scope and then through the camera lens.
To do this, you need to open your aperture.
The aperture setting is displayed in a F value. Example, F1.8 or F4.0, F5.6, F11, F32.
The larger the F number, the smaller the opening in the lens is.
Set your camera F value to a small number.
This will open the lens as much as possible and let more light in.

You also have a setting called white balance.
This is a setting that compensates color quality based on the type of light that is around.
Very few of us will ever digiscope indoors. So the settings for florescent light we wont want to use.
But, you will see a big difference in the colors in your images if you use the shade, clouds, and direct sunlight settings.
If you take an image under sunny skies with the cloud cover settings, you will find that the image is not the same as the actual conditions.

This is the first setting I will set.
If I know its going to be clear sunny skies all day, I will set this before I go out.
If I encounter an animal sitting is a shaded area, I will switch it to the shade setting.
Same for cloud cover.
This really does make a difference.
Try it and watch the image on your screen change.

Now you have the software set to the correct type of light, you will want to look at the handshake between ISO and shutter speed.

With your aperture open, you are getting lots of light. This will help.
You now need to use that light to get enough of on the sensor. We are talking about exposure time and the effect of the ISO setting.
This is where it gets kind of technical.

ISO is the cameras sensitivity to light.
In low light, you can raise your ISO, making the camera more sensitive to the low light conditions. The side effect of high ISO is usually noise that is displayed as grain in your pictures. This is where having larger photosites, which are less prone to noise, comes in to play.
You need a high enough ISO to get a fast shutter speed, but not so high that you get lots of noise.
So, the shutter speed is the time that the shutter is open and the light is hitting the camera sensor.
The longer it is open, the more likely your images are to have camera shake from wind, or the subject move, or some other factor cause blurred images.

The ISO and shutter speed work hand in hand to control the light.
Here is the long and short of it. Knowing where to set these only comes with experience and practice.

The more you try it, the more you get a sense of where things will need to be.

The best advice I can give you is to set your ISO at 400 to start with. Then adjust your shutter speed until the picture is not too light, or too dark.

If your shutter speed is too slow and you get motion blur, increase the ISO to the next level and then increase the shutter speed until the image is not too light or too dark.

If you are not getting motion blur, drop your ISO to 200 and adjust the shutter speed to get the exposure correct, and see if you get blur.

I try to use the lowest ISO setting I can get away with. Lower ISO numbers generally give better results, as long as the shutter speed is not so slow that the images are blurred.

ISO 400 seems to be a good place to start learning from.

Thats about it for the basics of camera settings that we digiscopers use all the time.
But, there is one other camera dilemma that we should discuss here.
The DUAL FOCUS issue.

New digiscopers often struggle with getting images in focus.
We have been discussing camera adjustments that deal with the capturing of the light waves.
But, there is also the focusing of the camera and the focusing of the scope.
If one is out of focus, trying to get the other one in focus is maddening.

So, first focus your scope with the camera off the scope.
Then place your camera on the scope.
Now, if your camera is equipped with an infinity focus setting or a manual focus setting, you are in luck. You can use the auto focus and hope it gets it right, or you can go manual and adjust the camera focus to match the scope focus. Or you can set the camera focus to infinity focus and let the lens try to get everything in focus all the time.
Cell phone cameras generally have no options here.
A screen tap tells the software where to try and autofocus.

Here is the tricky bit.
In focus to your eye may not be “in focus” to the camera.
So, when the camera is properly focused on the image coming through the scope, the image may not be in focus in the picture.
Why? Its the dual focus problem.
Everyones vision is different. Have you ever taken over your buddies spotting scope to see what he is looking at and found that the image was not in focus?
It was in focus to his eye, but not to your eye.
Same goes for your camera. You look through the scope and focus the scope to your eyes liking. then you put the camera up to the eyepiece and try to focus the camera lens to your eyes settings, not to the camera lenses needs.

Most people have never thought of a camera lens in this manner but it makes sense when you think about it.

So, you get the scope close to focused with your eye.
then place the camera on there and try to focus as best you can. But to get those super sharp, crystal clear digiscoped images, you may have to tweak the scopes focus a little bit to fine tune it.
Then you may have to slightly tweak the cameras focus again to get even sharper.
This is why non autofocus options are nice. You can manipulate each focus with a hand and get the dual focus mechanisms perfectly in tune.
Or take the easy route and set the camera to infinity and just focus the scope. Thus eliminating the dual focus issue.

Some of you may now have had a light come on that said “thats why my images are never in really sharp focus”.

This is a practice issue. I am going to put out a bit warning here.
For new guys, this is super frustrating.
Its slow, its cumbersome, and it often results in the worst thing.... by the time you focused the scope, put the camera in place, adjusted the ISO, set the shutter speed, focused the camera and fine tuned it, the animal has moved out of the scopes field of view.
Then the process starts all over again. Or worse, the animal has gone over a ridge and you gotta tear down, pack up, and you got nothing.

You will only get faster by doing it and doing it some more. the more you do it, the faster and more efficient you will get at it. Also your settings choices will be more accurate the first time and you will spend less time adjusting.
But that will only come with trial and error, practice and more practice.
 
OP
T

Tilzbow

WKR
Joined
Dec 25, 2012
Messages
447
Location
Reno, NV
Wow, more great stuff. I'm going to print this out, study it and play with my camera during my two days of travel!!! I'll even have time to head outside while in Fort Nelson and get seem practice shots taken.
 

vegas hunter

Lil-Rokslider
Joined
Mar 25, 2012
Messages
119
Location
Las Vegas, NV
Great info. Thank you so much for explaining this stuff. Unfortunately the new Olympus TG3 I just bought does not appear to have the ability to be manually focused or the shutter speed adjusted. Since I bought it just for digiscoping that kinda bums me out. I hope the auto settings and adjusting the ISO and white balance will get rid of the "noise", because what you described is exactly what I got on my first outing with it. Overexposed and washed out. Videos are pretty good. I hope I can make it work....
 

Cindy

FNG
Joined
Jun 14, 2013
Messages
86
On the Oly TG-3, your best option might be to use the aperture priority mode. Its the "A" on the dial on the rear of the camera. Upper right.
This will allow you to select the aperture and the processor will select a custom shutter speed based on your aperture selection.

Try playing with that.
The TG-3 has a good aperture. if you stay in the "wide" area. F2.0 F2.8 and F8.0
The "tele" range is F4.9 F6.3 and F18

Its a good plan you have.
Put it in "A" mode, select a lower F number, then adjust your ISO.
Auto focus should work fine.
Looks like you have two whitebalance settings that digiscopers would use. Cloudy and sunny. Unless you digiscope indoors or underwater.
 

Matt Cashell

Administrator
Staff member
Joined
Feb 25, 2012
Messages
4,570
Location
Western MT
I am with Cindy. On the TG-3, I would set it to aperture priority (this is actually a nice setting for digiscoping that many similar cameras do not have) and set the aperture to the widest (lowest f/number) setting I can with the lens zoomed to eliminate vignetting. Then set the ISO to the highest setting you find delivers acceptable levels of noise.

This will allow the camera to select the fastest shutter speed possible. Faster shutter speeds lead to more digiscoping keepers, IME.
 

Cindy

FNG
Joined
Jun 14, 2013
Messages
86
Vegas,
Lots of folks have this issue.
Its probably the biggest issue with digiscoping.
When I started I was mega frustrated because I thought my images were always out of focus.
No matter what I did, I could not get them in focus.
It wasn't focus that was my problem, it was exposure.

I ran outside and digiscoped a couple pics a few minutes ago.
The pics highlight the issue.

IMG_9226-1.jpg

IMG_9228-1.jpg

Its just a quick and dirty example, but I changed nothing between these two photos except the exposure.
I made no adjustments to any focus on the scope, on the camera, nothing.

The top image looses all its detail around the thin branches, and the heavy branches have the finer detail washed out of them due to over exposure.
 
Last edited:

vegas hunter

Lil-Rokslider
Joined
Mar 25, 2012
Messages
119
Location
Las Vegas, NV
Tg-3

Just back today from a scouting trip. Definitely seeing the differences in the pics by adjusting the settings and appreciate all the help. I only wish it told me what the settings were when i get home and view the pics on the computer! Very happy withe vids I'm getting with this setup, except....
I'm finding I am still getting vignetting with the TG-3 at its max 4x optical zoom. If I try to zoom on the subject with the spotter it instantly gives me the black hole effect. Attached a pic that shows what I'm getting. Not the clearest (dang settings!) but the buck is posed from the middle to the edge of the pic so it shows well what I mean. I think I may have to discuss this with Reggie at Tines Up to get his opinion also.
 

Attachments

  • P8140103.jpg
    P8140103.jpg
    96.9 KB · Views: 106

Cindy

FNG
Joined
Jun 14, 2013
Messages
86
I believe the reason that you get the eye relief showing back up as you zoom is because the hole in the eye piece gets smaller as you zoom the scope.
This is the same reason that on higher power you loose light.

Seems to be a problem related to the cameras position to the eyepiece.

So, what is your scopes eye relief?
If you scopes eye relief is 18mm, your camera lens needs to zoom to within 18mm of the lens, just like you have to place your eye at the right distance to the eye piece. If you pull your head away, you will get the same black ring that your camera sees.

Your tines up adapter may be holding your camera too far away from the eye piece.
The tines up adapter has enough room between the eye piece and the camera body for a lens to extend out from the camera when zoomed.

Your TG3 lens does not protrude from the camera body when you zoom, so, your lens does not close the distance to the eye piece like other point and shoots.
This is due to the sealed lens for waterproofing.

You are not the only one having this problem.

I would bet that your camera lens is about an inch from the eyepiece and does not get closer when zoomed.
Your scopes eye relief may want the lens more around 1/2 inch to 3/4 inch when on the lowest scope power.
When you zoom the scope, if your camera is too far from the eyepiece, you will just make the eye relief circle worse, as the hole in the eye piece gets smaller.

So, do me a favor, remove the tines up adapter and just hand hold the camera in front of the eye piece.
Have the camera zoomed to 4X and the scope on its lowest setting.

Move the camera by hand forward and backward until you get rid of the black eye relief ring.
Once its gone, have someone take a quick measurement between the scope eye piece and the camera lens.

That is where your camera will need to be positioned with the adapter on it.
If your adapter will not allow you to put the camera this close, you may have to modify your adapter or, get a new adapter that will allow you to position the camera that close to the scope.

I this does not fix your issue, let me know.

Actual photographic vignetting is caused by the shape of the scope, or camera lens.
The front being larger, the rear being smaller in diameter.

Draw a pyramid.
Measure the distance from the center base or the pyramid to the point.
Measure the distance from the outside base to the point.
The outside leg is longer than the canter leg right?
This is what causes photographic vignetting.
The light coming from the long leg at the edges takes longer to get to the sensor.
The light at the center comes faster since it travels a shorter distance.
Thus, more light gets to the center of the picture and less light gets to the edges of the picture.
It causes the center of the picture to be at one level of exposure and the outer edges of the picture to be less exposed, since the light took longer to arrive at the sensor.
99.9% of digiscopers have an eye relief problem that causes the black ring you see.

If you have your camera lens positioned at the proper eye relief, you may have actual vignetting.
Its unlikely that you will see vignetting all the time.

Anyways, try some of this stuff and let me know what you find.
If you are seeing photographic vignetting caused by the shape of the scope, there are a couple things we can do to make it less of a problem.

I assume that you just have an issue with your tines up adapter not allowing you to get the camera lens close enough to the eye piece.
But, I have been wrong before.
 

Matt W.

WKR
Joined
Mar 2, 2012
Messages
2,316
Location
Puerto Rico
On the Oly TG-3, your best option might be to use the aperture priority mode. Its the "A" on the dial on the rear of the camera. Upper right.
This will allow you to select the aperture and the processor will select a custom shutter speed based on your aperture selection.

Try playing with that.
The TG-3 has a good aperture. if you stay in the "wide" area. F2.0 F2.8 and F8.0
The "tele" range is F4.9 F6.3 and F18

Its a good plan you have.
Put it in "A" mode, select a lower F number, then adjust your ISO.
Auto focus should work fine.
Looks like you have two whitebalance settings that digiscopers would use. Cloudy and sunny. Unless you digiscope indoors or underwater.
Does this differ much on the TG-2? Same concept? Thanks!
 

hawkhunts

FNG
Joined
Apr 6, 2014
Messages
34
Lots of good info. I just received a new tg-3 and an adaptor from Reggie at Tines Up. I just installed the adaptor on the camera and will try it out some this weekend, but this quick read will save me lot of time trying to find the right set up info.
 
Top