Any standing seam metal roof installers?

Joined
May 3, 2017
Messages
46
Location
North Dakota
Did this on a 12/12.
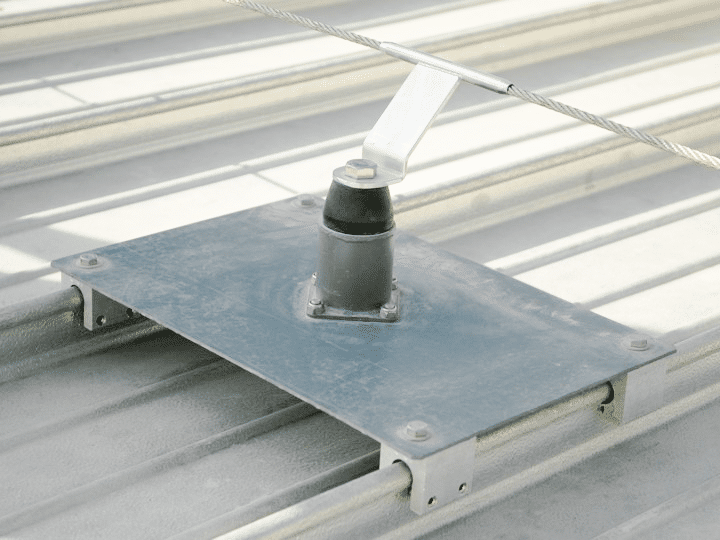
Screw angle iron teeth to 2 sections of aluminum ladder, attach foam insulation under teeth and ladder to space it out from ridge cap you should be able to slide cap right underneath the ladders and teeth then just leapfrog the 2 ladders as you attach the cap, make sure to use tek-5 screws if that's what the structural steel drillers are still called, think I weighed about 220 when I did this and it held
 

*zap*

WKR
Joined
Dec 20, 2018
Messages
7,238
Location
N/E Kansas
We used to use special ladders with raised rungs and a big hook at the top, they came in sections with hook and without. They bolted together. Used them mostly to repair big slate roofs. We also attached roof brackets to strips of metal and nailed the metal into the roof and roofed over them with the brackets below the bottom of that row of roofing.....cut the metal off later to remove the bracket....that was also mostly on slate roofs...If I was going to do a steep pitch metal roof I would get me some hook ladders...

 
Joined
Jan 26, 2021
Messages
1,557
Location
Oregon
Did this on a 12/12.
Screw angle iron teeth to 2 sections of aluminum ladder, attach foam insulation under teeth and ladder to space it out from ridge cap you should be able to slide cap right underneath the ladders and teeth then just leapfrog the 2 ladders as you attach the cap, make sure to use tek-5 screws if that's what the structural steel drillers are still called, think I weighed about 220 when I did this and it held
This is a good idea, I'll be implementing if i need to in the future
 
OP
weekender7
Joined
Jun 3, 2018
Messages
820
Location
North Carolina
Working on the roof today, not the ridge cap but a part called an end wall. It's for the transition from the upper level to the lean-to. Under the eves, in order to install the Z bars that the end wall connect to, I had to lay down on the lean-to metal to get up under the eves. I put down a piece of rug to lay on. The surface temp of the metal was 164 F. Hotter than blue blazes.
 
Joined
Sep 4, 2016
Messages
49
Location
Monroe,wa
def90, I wish I could but you just can't do it that way. You can do the first 10' section like that but then you are where I am today, stuck. The next section has to fit in or on the previous section as a 6" overlap. So you have to have the 2nd section slid onto the Z bars from the far end and you can't set on the new ridge cap, it won't hold any weight.

I am an architectural Sheetmetal journeyman.


Are you clipping the ridge onto “z” so no fasteners are exposed? Or screwing into the the seams?

Are you working alone?

Is the ridge notched for a 6” lap or are you laying hem over hem and caulking?

6” lap is a lot, 4” is pretty standard here in the Seattle area, as long as the lap is being installed with prevailing winds/driving rain in mind, a 2” lap can be done.

What gauge is the ridge cap ? Obviously attaching a rope to it is too much for the cap to support, but a rope layed over it, with something like rigid insulation or something similar should be fine.

I’ve hooked rope to the bumper of a truck and ran it up and over a ridge for a tie off point. Not osha approved haha, but it worked.

Your roof looks good, good job!


Sent from my iPhone using Tapatalk
 

DanimalW

WKR
Joined
Feb 9, 2020
Messages
391
Did you look into the cost of renting a lift? My local equipment rental place rents tow behind, articulating lifts for $240/day for 50 ft reach. That’s peanuts compared to the material cost of your roof. Fastest, easiest, and safest way to get the job done in a day.
 

Hootsma

Lil-Rokslider
Joined
Feb 16, 2014
Messages
263
Location
Memphis, Tennessee
I’m not sure if your still dealing with the ridge cap or not, but if you are, my suggestion regarding the ladder on slope is detailed below with pictures.

Your going to need an extension ladder with the offset arm bracket attached similar to this one:
eed921f228bc8fcc2c2ca52f4bb96b49.jpg

Place the ladder parallel to the SSMR slope and setting on the lower roof like shown in yellow in the picture below where the top of the ladder is just below the ridge line. You’ll need some blocking attached to the lower roof at the feet of the ladder to keep the ladder from kicking out from under you. If you have more than one ladder like that and a helper you can just leap frog down the ridge with the helper moving the ladder you aren’t using down the ridge. You’ll probably want something on the feet of the bracket arms to keep from dimpling the pan of the panel.

e12d9773b60f6178e2ad41a3c8e46acb.jpg
 
OP
weekender7
Joined
Jun 3, 2018
Messages
820
Location
North Carolina
Jakebarnsts,
Trying to clip in so no fasteners exposed, but the company I bought from suggest pop rivets on 12" centers and I may have to do that.
I have a 74 yr old helper two days a week.
I am notching the ridge cap to except the overlay, I can do 4 inches instead of 6".
28 ga.


DanimalW,
I bought a 45' lift thinking it would do the job but it won't, Neither would a 50'. The lifts have supports that extend out on the corners keeping the center of the lift at least 10' from the house. It says it is 45' I was thinking it would be plenty to reach the peak but it won't extend straight out 45'. Maybe 45' high but the reach is only 20' and 10' of that is used just to get to the house. I was really disappointed after I had bought the lift and found out it's limitations.

I use this lift almost everyday. It is awesome for working on the gable ends of the house. It will reach the peak at the gable end easily, it just won't do that in the middle of the house like I thought it would.

wXeOEVn.jpg


cnBzZgi.jpg


Hootsma,
Those top panels are 13' 10" and the bottom panels are 14' 10" so that ladder would have to be a long one. Also, you would face challenges when you had to work the ridge above the doomers as your ladder would be blocked off by the doormer angle.

I really appreciate the ideas being shared here guys, THANKS for taking the time to help me.
 
Last edited:
Joined
Sep 4, 2016
Messages
49
Location
Monroe,wa
Another technique, rather than popping/flexing onto the z-clips would be to set the clips to where you can slide 10’ on at a time, it can be a nightmare to slide it on though. The 28ga should flex enough to “snap” onto your Z clips and come back to its shape.

I understand access is the challenge. Another idea might be a rope to the top rung of a ladder up and I’ve the ridge to an anchor. 28ga should handle that, but to be safe I’d put some rigid foam/insulation to help the rope fly over the cap rather than lay on it. And carpet under the ladder to avoid scratches.


Sent from my iPhone using Tapatalk
 
Joined
Sep 4, 2016
Messages
49
Location
Monroe,wa
b4842db380ae675c8d724a5ea2286929.jpg

I would think a lift like this would allow access. You’d be on your knees working through the bars, but I feel like it might work as long as you have access from the ground to position it. Might be like 200$ - 300$ a day unfortunately.
 

Nealm66

Lil-Rokslider
Joined
Jan 14, 2020
Messages
241
Location
Western Washington
When I did my roof, I screwed a big p hook thing in at both gable ends and ran a strong rope from peak to peak. Then I attached a clevis with a rope to that. Then I used rock climbing gear, harness and ascender. It was 12/12 pitch and 4 big dormers and it sucked but couldn’t afford to pay someone
 
OP
weekender7
Joined
Jun 3, 2018
Messages
820
Location
North Carolina
Jakebarnts, that lift looks promising. $460 a day plus the insurance and delivery, comes in a $1000 a day for the first day and $460 a day after that.

Hootsma, that's a good idea, yes I can use as a tie point.

Nealm66, do you have a pic of what you used to attach the rope to or can you make a sketch of it and send it to me?

dtrkyman, that may be the smartest thing but I have been trying to do as much as I can myself to save funs to pay for the house. I knew there would be some stuff I couldn't do but I didn't think a metal roof would whoop me lol.

Got some more metal on the lower level in the back today. Still haven't jumped on the ridge cap yet.

lGkI80W.jpg
 
Last edited:

Nealm66

Lil-Rokslider
Joined
Jan 14, 2020
Messages
241
Location
Western Washington
It seems like a lot and I remember the stress but it’s worth it. The 12/12 killed my ankles after a few hours. I felt 100% secure at all times with my system. I did already have all the gear because I owned a tree service for 25 years. Guessing the gear I had would run about $500-600.
 

Pgidley

FNG
Joined
Dec 1, 2018
Messages
85
Location
Thunder Bay, Ontario
Ours is a 10/12 which my wife and I did ourselves with hidden fastener. The cap was maybe the most physically challenging part. I straddled and shimmied backwards as I screwed it down. My legs were screaming by the time I got to the end. Once you start getting screws in it becomes a lot more rigid, so you'll have a bit of something to hold onto. On the far end I left 2 panels off which I was able to reach from the ground with a ladder and screw down later on, and I had my harness anchored there, and also the nice grippy underlayment to get up and down to the peak. If I fell I would have slid down to the eaves, but I felt pretty secure.

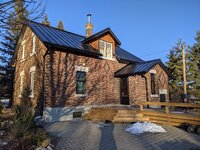
It was a big job for me at 35, but glad I got it done while my knees and ankles still work well. Finishing restoring the rest of the old wood windows this summer, in the photo here just the two in black are done.

PXL_20201201_205703005.jpg
 
OP
weekender7
Joined
Jun 3, 2018
Messages
820
Location
North Carolina
Pgidley, I wish I was still 35. I am 66 with one fake knee and a partially fused ankle on the same side. It is a challenge for me to get up and going on the 10/12. My 74 year old helper (2 days a week) does better than me.
 
Top