Another DIY Stove

SHTF

WKR
Classified Approved
Joined
Feb 4, 2013
Messages
5,097
Location
Colorado
You can use a step bit to cut clean holes in metal.

image_11970.jpg

Thanks man. This is what Ive been looking for. since My Holes are cut can I use that to clean it up or am I pass that point? Bbrown I like yours a lot. Looks almost exactly like the Ed T. Great work man.
 
OP
bbrown

bbrown

WKR
Joined
Mar 9, 2012
Messages
2,945
Location
Laporte - CO
Thanks man. This is what Ive been looking for. since My Holes are cut can I use that to clean it up or am I pass that point? Bbrown I like yours a lot. Looks almost exactly like the Ed T. Great work man.

Those drill bits are pricey but work well - another option is using the smaller sanding stones for the dremel. Worked a lot better that I expected.

Thanks for the kind words fellas.
 
OP
bbrown

bbrown

WKR
Joined
Mar 9, 2012
Messages
2,945
Location
Laporte - CO
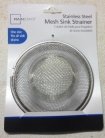
Another thing I forgot to post was the spark screen. In all our larger wood stoves for the big wall tents we have had better luck with the spark screen at the top of the stove pipe in lieu of at the stove - seems to draft better and get clogged less.
I picked up this little guy in the same section as the burner covers for a whopping $.97 and cut the metal ring off and push it in the end of the stove pipe.

7f7396b2-0849-46b1-ad3e-4279feda5599_zps3ac5c8b8.jpg

Not sure its really needed just a bit gun shy about sparks and the silnylon tent material.
 
Last edited:
OP
bbrown

bbrown

WKR
Joined
Mar 9, 2012
Messages
2,945
Location
Laporte - CO
And one more of everything all broke down ready for a trip. Gonna check out a army surplus store for some kind of bag or storage container.
photo3_zps677ee04f.jpg
 
Last edited:

colonel00

WKR
Joined
Jun 19, 2013
Messages
4,769
Location
Lost
Picture fail again :D

Yeah, a good set of step bits are pricey. However, for someone needing limited use, Harbor Freight to the rescue.

Depending on what size holes you need to make.
http://www.harborfreight.com/3-piece-titanium-nitride-coated-high-speed-steel-step-drills-91616.html
http://www.harborfreight.com/2-piece-titanium-nitride-coated-high-speed-steel-step-drills-96275.html

SHTF, I think they would clean up your previous holes alright but bbrown's suggestion of a dremel is a good option too. Also, for the future, you can use hole saws but that might also have issues with very thin metal.
 
Last edited:
OP
bbrown

bbrown

WKR
Joined
Mar 9, 2012
Messages
2,945
Location
Laporte - CO
Picture fail again :D

Yeah, a good set of step bits are pricey. However, for someone needing limited use, Harbor Freight to the rescue.

Depending on what size holes you need to make.
http://www.harborfreight.com/3-piece-titanium-nitride-coated-high-speed-steel-step-drills-91616.html
http://www.harborfreight.com/2-piece-titanium-nitride-coated-high-speed-steel-step-drills-96275.html

SHTF, I think they would clean up your previous holes alright but bbrown's suggestion of a dremel is a good option too. Also, for the future, you can use hole saws but that might also have issues with very thing metal.

Really both of them? All were taken with the same camera phone - I don't get it. Any why do they show up fine for me?

Good point about Harbor Freight - a lot of those "only need once in a while" tools can be had there for pretty reasonable. Definitely not for everyday use though.
 
OP
bbrown

bbrown

WKR
Joined
Mar 9, 2012
Messages
2,945
Location
Laporte - CO
I think one thing about drilling these thinner metals is going slow with good sharp bits and stepping up in size instead of jumping right to the desired size. You can see where I got in a hurry on the vent holes on mine.
 

SHTF

WKR
Classified Approved
Joined
Feb 4, 2013
Messages
5,097
Location
Colorado
Yeah I got a Harbor Frieght less then a mile from me. 1 of my Top 3 all time favorite stores. Wife hates going there with me. She can barely drag me out of that place. I will give that a shot. The outside holes look alright but man its a mangled steel mess on the inside. IM definitely all about function over the looks though. But im worried about getting cut on one of the pieces that didnt come off when I drilled so I will definitely check those bits out.

I tried to use the Dremel with the stone it just grinded down my stone bit to nothing. I wish that would of worked for me but yeah wasnt happening.

Thanks again fellas for the advice. Exactly what i needed.

I did cut my stove pipe hole out with the dremel cut off wheel that worked well. But I gotta make the hole a bit larger so my pipe fits in it. Still a tad bit small. I was testing with my Ed T Stove pipe collar that is 3", I hope I get lucky and get the right amount of draft. That seems to be where a lot of folks struggle when making DIY Stoves.
 
OP
bbrown

bbrown

WKR
Joined
Mar 9, 2012
Messages
2,945
Location
Laporte - CO
The outside holes look alright but man its a mangled steel mess on the inside. IM definitely all about function over the looks though. But im worried about getting cut on one of the pieces that didnt come off when I drilled so I will definitely check those bits out.
Next time you have your stove apart take a smooth face hammer to it on the concrete floor of your garage - helped tame some of those little sharp points on mine.
 

SHTF

WKR
Classified Approved
Joined
Feb 4, 2013
Messages
5,097
Location
Colorado
Ruck and brian we will have to put something together for a camp trip after the holidays. Get some Tipi stove action going. =-)
 
OP
bbrown

bbrown

WKR
Joined
Mar 9, 2012
Messages
2,945
Location
Laporte - CO
Sounds good - I still need to get a stove jack sewn in by John at Bearpaw but I am hoping to have that done here soon.
 

colonel00

WKR
Joined
Jun 19, 2013
Messages
4,769
Location
Lost
Hopefully you can get the photo issue cleared up. I would love to see it in action. I assume you are trying to upload direct from your computer or phone? Have you tried uploading to a site like photobucket?
 

SHTF

WKR
Classified Approved
Joined
Feb 4, 2013
Messages
5,097
Location
Colorado
Yeah you got em Brian. Looks awesome. Now get yourself a heavy duty pullout type bag to put it all in. That is almost exactly like my Ed Setup even broken down.

For the legs. Ed has welded in a nut 2 in front and 2 in the rear pan I can take some photos for you when I get home if it would help you out. He uses 5 inch type bolts that are really skinny and he has them facing outwards from the stove in front and back for stability. You can just do 4 holes in the bottom lip of the front and rear facing trays. Then 2 nuts on each Leg to hold it in place.

If any of that made sense to you that is =)
 
OP
bbrown

bbrown

WKR
Joined
Mar 9, 2012
Messages
2,945
Location
Laporte - CO
I actually looked at how he did those and it seems simple enough but I am not sure I want to cut the stove body to fit around the legs. Does it still seal up well enough with those cuts?
I kind of like how Ti Goat uses thicker wire for legs and I can get that from work for free but still end up putting holes in the body.
Still tinkering a bit on this but honestly I am not sure legs are really even needed. Rocks are plentiful, probably more sturdy and weigh nothing in my pack although trying to find and digging them out in snow could suck.
 

colonel00

WKR
Joined
Jun 19, 2013
Messages
4,769
Location
Lost
I like the idea of keeping it simple until you find you truly have a need. The only time I could see it causing an issue is if you were on snow and the heated rocks caused thawing which could cause shifting and water in the tent. Also, if you do add legs, I would highly suggest 3 legs. It is much easier to get things to balance on three legs instead of four unless you allow them to be adjustable and you are very precise.
 
Top