Work Bench Build

Joined
Jul 20, 2023
Messages
331
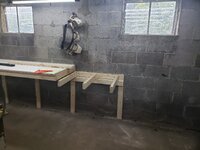
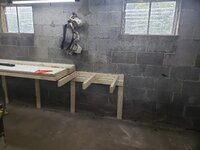
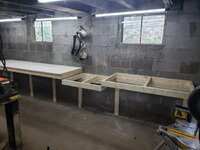
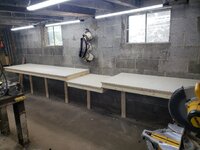
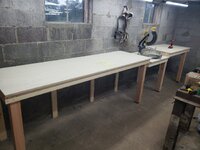
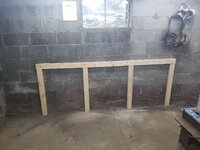
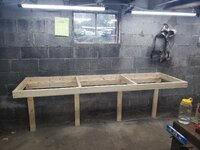
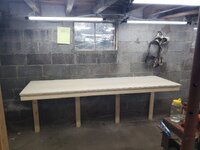
Figured I would share this, by no means do I know what I'm doing (screws on the front of the bench being a prime example haha). Looked at some pictures and gave it a go, 16ft L x 30in D x 36in H. The saw fits perfectly level with the bench! Also, due to the slope of the basement foundation, I decided to use adjustable feet that could "lean" with the slope on the 4x4 legs (also figured it could help with any potential water). Still need to decide if I'm going to secure the top from the bottom or maybe use dowels and glue.. also need to choose a finish, leaning towards Danish oil.

Anyhow all in all it has been a fun project!

And yes, feel free to make fun of the Black and Decker tools, my buddies have been on me for that lol! Guess I'm cheap, 10+ years old and still do the trick!
20240724_154205.jpg20240724_183931.jpg20240724_190738.jpg20240725_160032.jpg20240725_160032.jpg20240726_115536.jpg20240726_130644.jpg20240730_194143.jpg
 
Joined
Jun 21, 2019
Messages
2,556
Location
Missouri
Nice work! Good thinking dropping that middle section down so your saw deck sits flush with the surrounding benchtop.

You could use a Kreg jig to drill pocket holes in the 2x4 frame then run screws up into the plywood from below. That would give you a clean-looking benchtop (no fasteners showing) that's also easily removable if you ever needed to change something.
 
OP
Subliminal1
Joined
Jul 20, 2023
Messages
331
Thanks guys! Appreciate the input and great thought on the kreg jig. I was thinking of running horizontal 2x4 to screw from the bottom, but I have wanted a kreg jig and now may be the perfect excuse haha

Any recommendations if I eventually want to do reloading or bow work on the table?

I was thinking of inserting a track to help as hold and stop boards. But might not be the best idea if I have guns, reloading eqpt, bow on the table
 

Burnsie

WKR
Joined
Feb 3, 2017
Messages
307
Location
Illinois
I built a new work bench a couple years ago with a 10 foot section of butcher block top I was given.
The best thing I did was have an almost 2" overhang/lip on the bench top. Makes it easy to clamp stuff down to the bench when needed - its my 3rd and 4th hands.
Yours looks great, wish I had room to build my miter saw into the top like you did.
 
OP
Subliminal1
Joined
Jul 20, 2023
Messages
331
I have an 1.5" overhang... again my lack of experience shows as I was going for 3" but didn't take into account the thickness of the "facia" 2x4 lol

Thanks for the input guys! looking forward to figuring out next steps
 

waitup

FNG
Joined
Jul 23, 2024
Messages
16
Location
NC
Are you going to double up the plywood? The track is nice for a stop, but you have to route 2/3 of the thickness of the ply to get the track flush with the top. Also, I would put a solid wood edge on it to protect/hide the plywood layers, and I would put laminate on the top for a more durable surface if possible.
 
Joined
Apr 9, 2012
Messages
1,880
Location
Fishhook, Alaska
That looks pretty solid.

The only thing I like to do on a workbench build is to rip 5/8" plywood in half and screw/glue it together to make a 1 1/4" thick x 24" wide laminated top. It gives me a sturdier mount for a heavy vise and resists the leverage of a reloading press better.

I've have used a couple different finishes. Current one is three coats marine spare varnish, but I've also used "Floor Paint" from Home Depot with excellent results. Floor paint is flexible and very scuff resistant. Makes cleanup of spills easier.

All mine also have an undershelf for at least half of it. I build those with 2x3 framing so they aren't quite as thick.
 

Geewhiz

WKR
Joined
Aug 6, 2020
Messages
2,575
Location
SW MT
Nice work space. I made a very similar bench in my old garage with the step down for the miter saw and boy was that handy.
 
OP
Subliminal1
Joined
Jul 20, 2023
Messages
331
Are you going to double up the plywood? The track is nice for a stop, but you have to route 2/3 of the thickness of the ply to get the track flush with the top. Also, I would put a solid wood edge on it to protect/hide the plywood layers, and I would put laminate on the top for a more durable surface if possible.
Great call, will need to decide what I do there.

That looks pretty solid.

The only thing I like to do on a workbench build is to rip 5/8" plywood in half and screw/glue it together to make a 1 1/4" thick x 24" wide laminated top. It gives me a sturdier mount for a heavy vise and resists the leverage of a reloading press better.

I've have used a couple different finishes. Current one is three coats marine spare varnish, but I've also used "Floor Paint" from Home Depot with excellent results. Floor paint is flexible and very scuff resistant. Makes cleanup of spills easier.

All mine also have an undershelf for at least half of it. I build those with 2x3 framing so they aren't quite as thick.

Thank you, Good to know on the press and interesting on floor paint and love the undershelf with 2x3's.
 

Beendare

WKR
Joined
May 6, 2014
Messages
9,034
Location
Corripe cervisiam
Nice work! Good thinking dropping that middle section down so your saw deck sits flush with the surrounding benchtop.

You could use a Kreg jig to drill pocket holes in the 2x4 frame then run screws up into the plywood from below. That would give you a clean-looking benchtop (no fasteners showing) that's also easily removable if you ever needed to change something.
Or use a bead of subfloor adhesive…its stronger than the wood itself
 
Top