This is what I use on all scopes I mount. Used to mount all the scopes for a LGS before we moved. I got some nice tips and a good bonus cause we would sell more scopes with me mounting them using my fixture from Holland Shooter Supply.
Prep : Mount everything and find the proper eye relief on the scope for the primary shooter both standing offhand and prone on lowest and highest powers of the scope. Make sure the rings wont block anything and that the bolt handle doesn't hit anything. Mark the eye relief on the scope using blue painters tape on the scope tube where it touches the back of the rear ring. Mark where the scope rings go on the rail if there are multiple positions to place it. Remove the scope, the scope rings, and torque the rail screws to the appropriate level for the screws used.
Step 1: Place the gun in the fixture. Point the gun in the direction of the plumb line you will use in step 4. Remove the bolt from the gun if itnis a bolt action and you want to do a quick and dirty bore sight before you finish. Level the action (not the rail or the stock) in the fixture using the screw jack.
Step 2: Check the level on the rail. See how it compares to the action. You might need to remove the rail and clean the surfaces or remove a burr (screw holes sometimes need a slight chamfer due to manufacturing imperfections) to get a solid flush level fit and rarely did I bed a rail to get it to fully contact but some like to do that. If the rail is within 1/2 bubble of plumb, I call it good enough but most are usually closer.
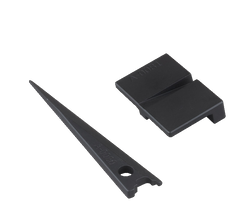
Step 3: Mount the scope rings where they were previously fitted. Torque ring to base screws to proper torque specs based on manufacture and fastener type.
Step 4: Place scope in rings at correct eye relief previously located. Place ring caps on and insert ring cap screws. Start screws but stop before they make any contact. Using a plumb line (one is included in the kit or a level can be used to make a permanent line on the wall if this is being done all the time in a business) align the vertical line of the reticle with your plumb line. Once you have a good vertical alignment with your vertical witnesses line, start tightening the scope caps. Use good tightening technique to avoid twisting the scope out of level while tightening each side evenly. Torque your screws appropriately.
Step 5: While the gun is still in the fixture and everything is still level, install your bubble level. I personally don't like to "center" the bubble on the level. Seems like you can get a lot of cant on a rifle while still remaining "level". I choose a side and align the bubble to the line on that side. I like the inside line personally.
Step 6: If you want to do a quick and dirty bore sight, look down the barrel of the rifle from the action to the muzzle and align the vertical witnesses mark with the center of the bore. Don't move the rifle and adjust your left and right on the scope to match the mark. If you have the ability to see something 25 to 50 yards away, you can adjust the up and down but I've found that just getting the left and right close will get you on paper at 25 yards for an initial sight in.
Now you are ready to give the client their gun back and they can hit the range. It will have taken about 10 minutes to complete the entire process. Check the eye relief again from low power and high power both standing and prone to verify it is correct and in the eye box. Over 50% of people would tell me that I mounted their scope crooked.

I would tell them to look at their level and it would always be off. If they had not purchased a level, I would take the scope off, remount it the same way but add a level clamped to the barrel (designed for leveling firearms) and have them look again. Most people hold their rifles out of plumb offhand and that is why they miss shots or hit animals poorly on top of being unpracticed from those positions. These same people are often great shots from prone due to using a level and trusting it to be right and not their eye.
Anyway, I hope this helps. If you are interested in the fixture I use you can find documentation on it
here. And you can purchase it
here.
Jay
 www.shortactionprecision.com


