So, I thought I would post an update. I build a couple saddles this past year. I have only owned and packed with llamas for a year now so I am not an expert but I want to share what I learned. This summer I used them about twice a week for short 3 mile hikes (with weight) until the fall when I used them for a 10 day hunt. The saddles seem to be holding up pretty well. Since they are working well I hope this can be useful to other people. There are better designs out there but I think it is pretty good and adaptable. I looked at a lot of different designs before I decided to make these. I got a lot of good advice from people on this forum and talked to a few commercial packers. A great resource was the archives of the The Backcounty Llama magizine
https://packanimalmagazine.com/read.php. They had meticulous reviews of different saddles and talked about how saddles fit and how to properly distribute weight. The basic design is similar to the Timberline saddle from Rocky Mountain Llamas. Mine cost about $120 to $160 to build each and lots of time to make. You could do this cheaper depending on what components you use. You can buy RML's for $250 so you don't save that much building your own and you get their experience. The pros of mine are, I used the components I wanted, I can repair these, and make them fit an individual.
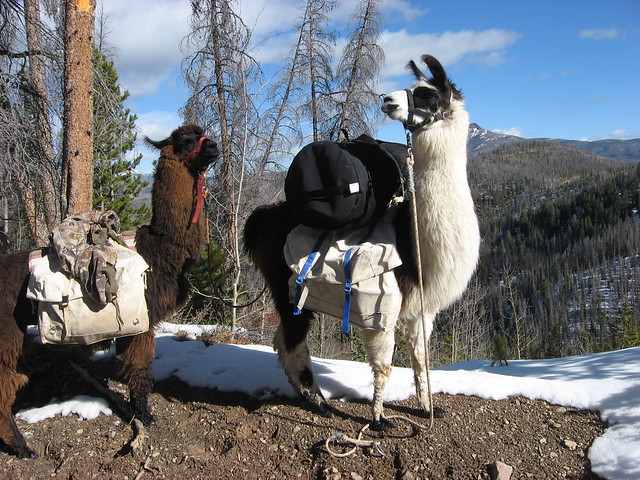
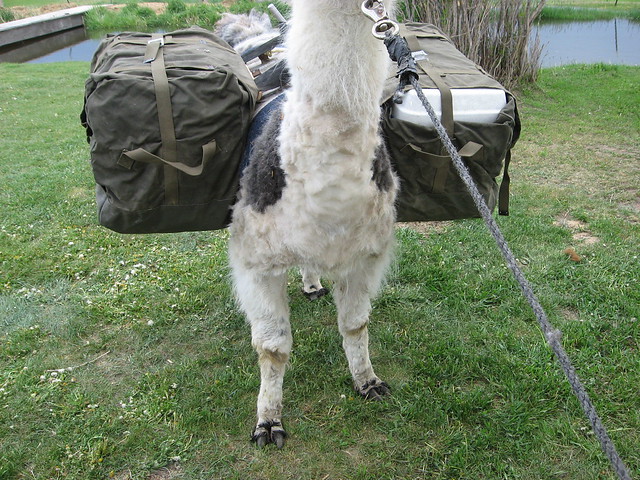
For panniers a friend gave me two military surplus bags and I looped some webbing through them and added buckles. They work ok. I also bought a set of the Timberline panniers from Rocky Mountain Llamas, and really like them.
Here is the information on the saddles. When selecting what wood to use, try to find the best hard wood you can. Laminating wood together would also be stronger. I think hickory would be great. I used poplar because it is what I could find and is supposed to be resistant to splitting.
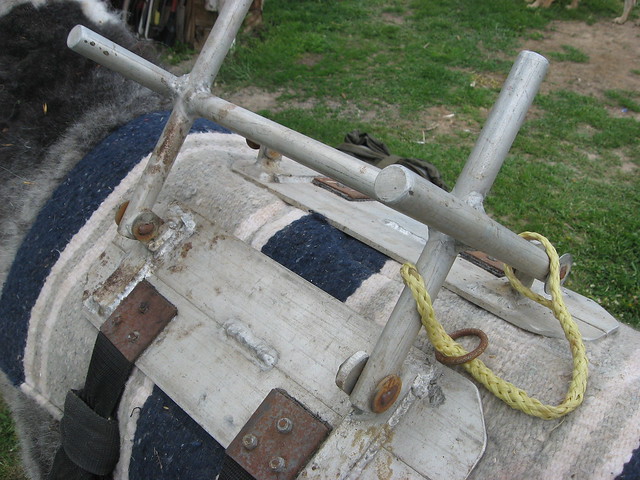
On mine the bars are ½" thick and 14"×4". I cut the corners off and rounded the inside edges. From what I found, people recommended making the bars have enough surface area that you do not exceed 2 lbs per square inch with the load you are putting on the llama. They are made to have the pivot point about 2/3 off the center of the width of the bar toward the llamas back. It is not centered in the middle of the bar.
For crossbucks I used 1 ½" ×1 ½" poplar. (Note, different types of wood come in different actual dimensions even thought they may marked as a specific size) I coated the wood with alteast 3 coats of an outdoor polyurethane. The length of these can be changed to fit different llamas. It just needs to clear the spine. It seems like having about 3" between the bars when they pivot and rest on the llama's back usually clears the spine and keeps the bars resting on the meaty part of the back. You probably want to take some measurements of you llama and expect to make extra crossbucks to test different fit.
I used ¼" × 1 ½" aluminum U channel for the pivot bracket. You could use steel and you can used different dimension channel, it just has to match the dimensions of your crossbuck board and allow them to pivot.
For the cross brace I used aluminum angle fastened with stainless screws under the crossbuck.
For the crossbuck hardware I used ¼" stainless bolts and lock washers. For the bars I used ¼" stainless screws with rounded heads and counter sunk them so they would not create pressure points.
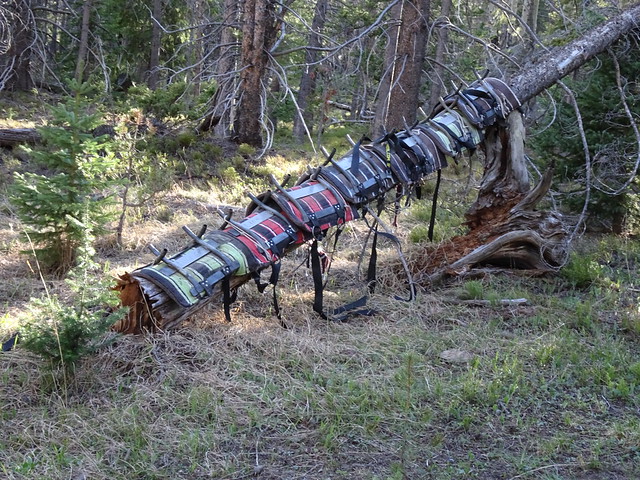
I used 2" webbing to connect the cinches then made my own as well as the breast collar out of 2" webbing and ½" felt.
I prefer the cinches I made rather than the horse cinches. Mine seem more comfortable, are cheaper, and are lighter.
I used adhesive closed cell foam used in kayak seats on the bars. You can use varying thickness to fit your llamas back. You can also shave the foam to fit the llama's back.
Amazon.com : NorthShore NSI Minicell Foam with 3M Peel and Stick Adhesive (12" x 12" x 1/2") : Sports & Outdoors
www.amazon.com
For a way to string llamas together, I used a bungie cord looped through a brass ring then looped around the crossbucks then zip tied in place.
Here are some of my photos.