Kibler Woodsrunner .54 Kit Assembly

Broadhead

FNG
Joined
Apr 4, 2019
Messages
61
Location
Denver, CO
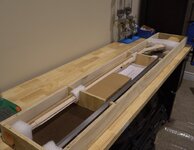
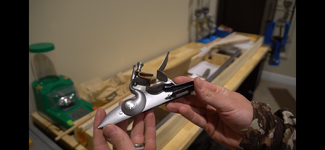
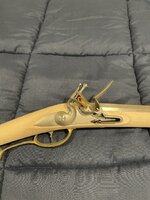
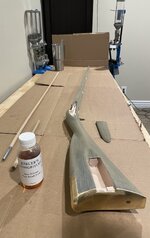
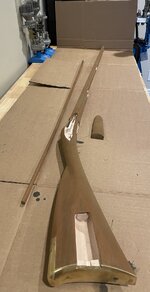
I just received a Kibler Woodsrunner kit in .54 caliber. Everything appears to be top notch quality and very well packaged. Ordered standard maple stock and am impressed with the curl and grain throughout. I've watched all of Jim's videos online and have taken detailed notes throughout. I ordered iron nitrate for the wood stain but have not decided on wood finish or metal finishing solutions. Does anyone have additional tips or tricks they've used while putting their kit together, things to bear in mind, or wood and metal finishing recommendations?
 

mgray

FNG
Joined
Jan 5, 2018
Messages
86
Location
Spring Green, WI
I’d like to know how it turns out. I’ve got the itch to try and build one of these, just not sure if I’m patient enough for all the detail work. Good luck with the build!
 
OP
Broadhead

Broadhead

FNG
Joined
Apr 4, 2019
Messages
61
Location
Denver, CO
The assembly has been extremely easy. Kibler's videos are extremely helpful, and I got it assembled in a couple of hours. No sanding or finishing of parts was needed at all, other than filing a few pins and the sights to fit. Now need to take everything apart and start sanding.
 

EdP

WKR
Joined
Jun 18, 2020
Messages
1,164
Location
Southwest Va
The iron nitrate, historically referred to as "aqua fortis," is a good choice if you want a dark brown stain. It will darken with age/sunlight exposure. Maple doesn't take oil base stains well. Water or alcohol base stains penetrate the wood much better.
 
OP
Broadhead

Broadhead

FNG
Joined
Apr 4, 2019
Messages
61
Location
Denver, CO
Yeah, I love the look of the iron nitrate so that will be my starting point. I was going to use the Permalyn Sealer for the wood finish.
 

FrontierGander

Lil-Rokslider
Joined
Jan 19, 2020
Messages
271
Location
CO
Go slow, be patient, be smart if unsure, ask for help along the way. Take pictures of the "problem " area to get the best help response.
 
OP
Broadhead

Broadhead

FNG
Joined
Apr 4, 2019
Messages
61
Location
Denver, CO
Update on finishing materials: I gave Kibler a call to discuss options for metal finishing. They recommend the JAX Black Darkener for all metal pieces and JAX Brown for all Brass pieces. I am going to go that direction for the metal/brass. After reviewing many different sites for stock finishing, I've decided to go with Jim Chambers oil finish. I called Jim's shop to order the finish and they're closed for two weeks due to a shop move to a different state. Not sure what that's all about but hopefully no change in the product(s).
 
OP
Broadhead

Broadhead

FNG
Joined
Apr 4, 2019
Messages
61
Location
Denver, CO
One lesson I've learned already is the rear sight looks like it needs to be filed down more than it actual does and/or a file removes more material with one swipe than I expected. Hit it with a couple swipes of the file and took off too much material. I could probably take a punch and flare out the material to fit snug but a lot of folks say the stock sight is too low and Kibler offers a tall sight that I ordered to replace it. A learning experience none the less.
 

wyodan

WKR
Joined
Jan 11, 2013
Messages
729
When do we get to see a pic of this? I wouldn't mind seeing progression pics either, but really want to see your final product.
 

2Stamp

Lil-Rokslider
Joined
Oct 7, 2014
Messages
222
Location
Wyoming
I have barrels I've left "in the white", rust browned, cold blued, and a rust blue I once did on a percussion ML barrel. Essentially you use a good rust brown solution (works best if you induce moisture to get a good rust brown going, scrub the rust scale off, then repeat), do that a couple times to get a good even rust brown color. Then, you submerge the barrel in a trough with boiling water and leave to 20-25 min if memory serves. Finished product is a very durable dark finish that doesn't have the high gloss shine of other bluings (of course that also depends on how polished the metal is when you finish it).
 

Stalker69

WKR
Joined
Apr 12, 2019
Messages
1,747
Pictures of your progress, would be greatly appreciated. I want one, but I want a hawken style, Kibler don’t offer it. Like seeing how others are doing theirs though.
 

30338

WKR
Joined
Jun 2, 2013
Messages
1,894
Kibler is rolling out a Hawken kit in a year or two. Probalby no lefty but a buddy has several very nice Kibler kits he has done. Like to see a finished pic too.
 

Stalker69

WKR
Joined
Apr 12, 2019
Messages
1,747
Kibler is rolling out a Hawken kit in a year or two. Probalby no lefty but a buddy has several very nice Kibler kits he has done. Like to see a finished pic too.
That’s what I’ve heard, not sure I have 2 years though.
 

30338

WKR
Joined
Jun 2, 2013
Messages
1,894
One lesson I've learned already is the rear sight looks like it needs to be filed down more than it actual does and/or a file removes more material with one swipe than I expected. Hit it with a couple swipes of the file and took off too much material. I could probably take a punch and flare out the material to fit snug but a lot of folks say the stock sight is too low and Kibler offers a tall sight that I ordered to replace it. A learning experience none the less.
If you ever want to burn some black powder, I'd like to see that rifle in person sometime. Have a range I bet we can get on just east of town.
 
OP
Broadhead

Broadhead

FNG
Joined
Apr 4, 2019
Messages
61
Location
Denver, CO
Here’s a few progress photos showing unboxing, assembly, and staining with iron nitrate.
 

Attachments

  • IMG_3421.jpeg
    IMG_3421.jpeg
    158.2 KB · Views: 16
  • IMG_3422.png
    IMG_3422.png
    991.1 KB · Views: 14
  • IMG_3398.jpeg
    IMG_3398.jpeg
    326.1 KB · Views: 15
  • IMG_3396.jpeg
    IMG_3396.jpeg
    451.1 KB · Views: 14
  • IMG_3411.jpeg
    IMG_3411.jpeg
    222.7 KB · Views: 15
  • IMG_3413.jpeg
    IMG_3413.jpeg
    197.5 KB · Views: 15
OP
Broadhead

Broadhead

FNG
Joined
Apr 4, 2019
Messages
61
Location
Denver, CO
For those that plan on building a kit, I would not recommend using files or coarse sandpaper to polish the brass unless there is a lot of machine marks you need to get off. I started with a file and 80 grit and spent more time getting those deep cuts out than I did anything else. I would recommend starting with 150 grit sandpaper wrapped around a file, then progress to 220, 320, and 600 grit sandpaper. Granted, I'm not going for a glossy shine since I'll be adding patina anyway but I think the sandpaper route saved a lot of time. I'll post some brass photos once I'm finished with it all.
 
OP
Broadhead

Broadhead

FNG
Joined
Apr 4, 2019
Messages
61
Location
Denver, CO
If you ever want to burn some black powder, I'd like to see that rifle in person sometime. Have a range I bet we can get on just east of town.
That would be awesome! I'm probably a little over a month out from finishing since I have to wait on the wood oil and find time to finish.
 

jayhawk

WKR
Joined
Apr 2, 2022
Messages
452
These guns were typically finished “in the white” meaning that they cleaned the metal then left it. No bluing or browning.

However, a good look is to progressively file/sand the metal to a polished appearance. Then apply a cold blue solution and rub it back with a very fine scotch brite pad. this makes it look grey and helps tone down the shiny metal
 
OP
Broadhead

Broadhead

FNG
Joined
Apr 4, 2019
Messages
61
Location
Denver, CO
These guns were typically finished “in the white” meaning that they cleaned the metal then left it. No bluing or browning.

However, a good look is to progressively file/sand the metal to a polished appearance. Then apply a cold blue solution and rub it back with a very fine scotch brite pad. this makes it look grey and helps tone down the shiny metal
The JAX metal darkener is supposed to do just that. The rifle will be used for hunting, so I don't want it shining out in the woods. That's the same process Kibler uses for his rifles as well.
 
Top