Nrolson2002
WKR
I really like the outdoorsman bino adapter system. I have a vortex bino adapter but find screwing it in and out of bino’s kind of annoying. I wanted to buy the outdoorsman bino adapter but with just purchasing a new set of bino’s I’m kinda strapped for extra money right now. So my brain got to thinking, I can use what I have to make something similar!
I started off by taking the vortex bino adapter and removing the screw in part. Really easy just hold the black round spacer and unscrew it.


Next I cut the rod portion off where it meets the handle or screw part. Try to cut it as close to flush as possible to give yourself more rod to stick out of your binos.

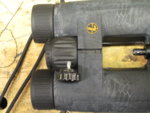
Next I drilled and tapped the top of the adapter to 10-32 threads. I tried to center this as vertical and in the middle as I could.

I went to the hardware store and picked up a 10-32 threaded screw with a knob handle. I think I paid just over $2 for it. I cut the threaded portion shorter so it didn’t stick up as much out of the adapter. Then I threaded it on.

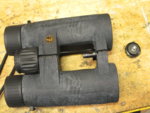
Screw the threaded rod you cut off the handle from into you binos.

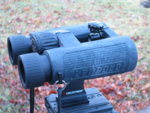
Now put the rod into the adapter and tighten the new knob you threaded and you are done!! Works great.

Thanks for looking!! The whole thing cost me less than a few dollars. Can’t wait to get the new Mavens and try the adapter out.
Sent from my iPhone using Tapatalk
I started off by taking the vortex bino adapter and removing the screw in part. Really easy just hold the black round spacer and unscrew it.


Next I cut the rod portion off where it meets the handle or screw part. Try to cut it as close to flush as possible to give yourself more rod to stick out of your binos.

Next I drilled and tapped the top of the adapter to 10-32 threads. I tried to center this as vertical and in the middle as I could.

I went to the hardware store and picked up a 10-32 threaded screw with a knob handle. I think I paid just over $2 for it. I cut the threaded portion shorter so it didn’t stick up as much out of the adapter. Then I threaded it on.

Screw the threaded rod you cut off the handle from into you binos.

Now put the rod into the adapter and tighten the new knob you threaded and you are done!! Works great.

Thanks for looking!! The whole thing cost me less than a few dollars. Can’t wait to get the new Mavens and try the adapter out.
Sent from my iPhone using Tapatalk


