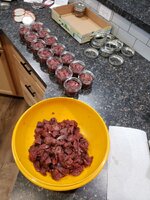
Other than the extension offices, does anyone have any good resources for what can and cannot be canned safely/developing personal recipes? I have a pasta sauce I like to make, generally I’ve just froze it in the past, but would like to store it not needing power if possible. My thought is if I pressure can it per the time and temp of other pasta sauces then I should be good, but I have no real idea if that’s the case or where I could find info for that.
Navigation
Install the app
How to install the app on iOS
Follow along with the video below to see how to install our site as a web app on your home screen.
Note: This feature may not be available in some browsers.
More options
Style variation
You are using an out of date browser. It may not display this or other websites correctly.
You should upgrade or use an alternative browser.
You should upgrade or use an alternative browser.
Canning Resources
- Thread starter mstei4
- Start date
ResearchinStuff
WKR
ball's blue book is a great guide. There are also FDA recipes online.
This is also a good resource for approved recipes.
CatskillDraht
FNG
- Joined
- Jun 1, 2023
- Messages
- 9
If you are new to pressure canning, I would suggest getting the Ball blue book as the above poster said. Great way to get into it safely. Also youtube is great..
After that you can learn to color outside the lines. Most pasta sauces are pretty good to go, unless you are putting thickening agents in them, or cheese, etc. Good luck, Have Fun!
After that you can learn to color outside the lines. Most pasta sauces are pretty good to go, unless you are putting thickening agents in them, or cheese, etc. Good luck, Have Fun!
- Joined
- Feb 24, 2023
- Messages
- 2,406
I started canning this year too. So far I have a cabinet full of bread and butter pickles. I want to try canning some venison when season rolls around. I've heard it's spectacular.
It's very good, and super easy. I went on a canning binge last winter and tried all kinds of recipes, I think raw pack is the best and most efficient way to go. Add some jalapeno slices if you like a little heat, and you'll learn you can go a little heavy on the seasoning, the canning process tames the salts down big time.I started canning this year too. So far I have a cabinet full of bread and butter pickles. I want to try canning some venison when season rolls around. I've heard it's spectacular.


SuperDUECE22
WKR
- Joined
- Aug 20, 2019
- Messages
- 1,249
canned venison is absolutley amazing, love using it for stroganoff, tacos & a whole lot more.
- Joined
- Feb 24, 2023
- Messages
- 2,406
I'm really going to have to up my game. Looks like I'll need to tag out again this year. Luckily we have a limit of 5 again this year.
Any good canning recipes and spice combos? I assume you're cooking it a bit longer in the canner than just the standard canning process?
Any good canning recipes and spice combos? I assume you're cooking it a bit longer in the canner than just the standard canning process?
That's insane, I get 1 deer and 1 elk. Have to choose my weapon type and can hunt that season only. Seasons are only 1-2 weeks, ridiculous.I'm really going to have to up my game. Looks like I'll need to tag out again this year. Luckily we have a limit of 5 again this year.
Most canning recipes are super simple, raw pack you fill the jar with cubed raw meat, 1 tsp of non iodized salt or bouillon cube, and pressure can. Hot pack you brown or sear the meat first, add salt, fill with boiling broth, pressure can. Both are typically 75-90 min for pint/quart. Both are good, but from there you can mess with seasonings and salts. I've used Johnny's instead of regular salt and it is good, I also plan to try some with my pot roast mixture which is equal parts au jus mix, french onion soup, and ranch dressing mix. Jalapenos and onions are also both good additions.Any good canning recipes and spice combos? I assume you're cooking it a bit longer in the canner than just the standard canning process?
Sccritterkiller
WKR
- Joined
- Apr 8, 2019
- Messages
- 2,172
The ball book and canner that works over an open flame. I use my turkey fryer burner with my canner...keeps the house from getting hot when processing all the stuff we get out of the garden in late summer when it's already Africa hot here.
- Joined
- Feb 24, 2023
- Messages
- 2,406
I will try it all out. Thank you. Your pot roast comment made me think about the Mississippi pot roast recipe. If you haven't tried it, you need to. Super simple and it's so good.That's insane, I get 1 deer and 1 elk. Have to choose my weapon type and can hunt that season only. Seasons are only 1-2 weeks, ridiculous.
Most canning recipes are super simple, raw pack you fill the jar with cubed raw meat, 1 tsp of non iodized salt or bouillon cube, and pressure can. Hot pack you brown or sear the meat first, add salt, fill with boiling broth, pressure can. Both are typically 75-90 min for pint/quart. Both are good, but from there you can mess with seasonings and salts. I've used Johnny's instead of regular salt and it is good, I also plan to try some with my pot roast mixture which is equal parts au jus mix, french onion soup, and ranch dressing mix. Jalapenos and onions are also both good additions.
Yep, huge fan of the ol MPR. I like to add a little broth to it, but yeah that's where I got that seasoning combo.I will try it all out. Thank you. Your pot roast comment made me think about the Mississippi pot roast recipe. If you haven't tried it, you need to. Super simple and it's so good.
CatskillDraht
FNG
- Joined
- Jun 1, 2023
- Messages
- 9
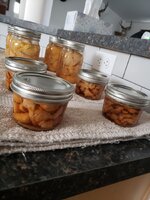
That is some good looking stuff! I agree, raw pack is most efficient. I used to make a lot of canned meals to go, stew etc, but now I mostly can meat, cubed and ground, and then use it to whip something up when needed. What are you using those half pint wide mouth's for? Lunch on the trail? they look cool.It's very good, and super easy. I went on a canning binge last winter and tried all kinds of recipes, I think raw pack is the best and most efficient way to go. Add some jalapeno slices if you like a little heat, and you'll learn you can go a little heavy on the seasoning, the canning process tames the salts down big time.
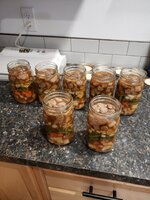
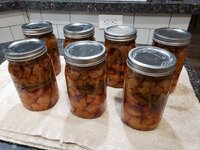
View attachment 577022View attachment 577014View attachment 577018View attachment 577011
Yep just snacks, honestly I just grabbed those to start with in case I messed something up it wouldn't be a huge loss. Turns out they're a very convenient size for making a sandwich or just eating for a quick lunch.That is some good looking stuff! I agree, raw pack is most efficient. I used to make a lot of canned meals to go, stew etc, but now I mostly can meat, cubed and ground, and then use it to whip something up when needed. What are you using those half pint wide mouth's for? Lunch on the trail? they look cool.
Tips for beginners from a mildly-advanced beginner:
Take the time to understand the canning process. When you do your first pressure-canning recipe, which is necessary for all low-acid foods (tomato sauce recipes are high-acid and use simpler water bath canning), don't think its like making stew were you just start cooking, set a timer, and go mow the lawn. You really need to be watching the canner for the entire time, making sure you are at or above the target pressure for at least as long as the recipe requires. If the pressure goes below target, you pretty much need to start the process time over from zero or plan on storing your jars in the fridge until you use them. Canning when done right gets rid of botulinum bacteria (which are present everywhere) and other bacteria before they can propagate in the food. The nefarious thing about botulinum is that they are very hard to kill and a botched canning job just gets rid of their competition, leaving a perfect environment for them to thrive. And don't forget that botulism can be deadly, and is caused by toxins that the bacteria release, not the actual bacteria. So if you botch a canning job and just plan on cooking the hell out of the food after it sits on a shelf for a while, you might kill the bacteria, but the undetectable toxins will probably still be there.
So as a rough idea, if you are canning some meat or fish, you will be pressure canning. You will probably spend an hour sanitizing your jars and lids and prepping the meat. You will spend another half hour packing the meat, cleaning jar rims with vinegar, and getting the canner up to a boil and venting steam for the required time. Once venting is done, you probably have another 90 minutes of processing time, and this is when you have to watch that gauge and adjust your heat to keep above that target pressure. So set aside at least three hours if not longer.
Canning recipes should be tested by a University Extension or other USDA-approved resource. There are some valid gripes about USDA practices these days, but the science around canning is well-established.
Ball Blue Book is a great resource for trusted recipes, but there are many additions and they rotate the recipes periodically. So if you see an older edition at the used bookstore, you might want to grab it. Also, the recipes are a bit minimal so, again, it is important to understand the process of canning before you start.
DIY recipes: One of the shortcomings of canning is that using home equipment is just not suitable for many common ingredients. A lot of people home can brown bread and flour-thickened soups and do just fine. But are you willing to risk killing someone for the convenience? I'm not. Making your own recipes is not totally out of the question, but you should always use a trusted recipe for the starting point and you really need to understand the process and which ingredients do what to the recipe. If you aren't 100% sure, just follow an trusted recipe. Last year, I found a University Extension that had an online recipe generator where you could add ingredients and it would produce a safe recipe for it. I did not bookmark it and now I cannot seem to find it anywhere.
Lids: Throw old lids out. Old unused lids will probably work, but new ones are cheap. You worked hard to secure the food and prepare it, don't let a 25 cent lid ruin it or make you sick. Old unused lids can be used for refrigerated jars, but use new, fresh ones when canning. And always toss used lids from canned food. Bands are a little more forgiving, but they are cheap too, so throw any out that are corroded or bent.
Tools: Lots of canners available, some pretty pricey. I have a big Presto aluminum canner. I like it because it is cheap and works. I have replaced the gauge twice now, and the gauge is readily available and cheap. Jars and lids can be found in most supermarkets and hardware stores. The other main tools are a canning funnel, jar lifter and lid lifter. These are all cheap and make life easy.
My wife wants to start canning, we have never done it. Besides the blue book listed above, if we want to do large batches, which equipment is recommended? Not looking for cheapest, looking for easiest to use and best.
Any other books or sources of info?
Any other books or sources of info?
ozyclint
WKR
AndrewD mentioned some great info. From what I have read, the destruction of the spores require higher temps than the bacteria . It's then the spores that create the bacterial activity later on and that require the high heat provided by the pressure. The bacteria only create the toxins in anaerobic non acidic environments which is exactly what you have inside a jar of non acidic food.
- Joined
- Feb 24, 2023
- Messages
- 2,406
I use a big ass presto pressure cooker. You'll need the obvious mason jars, rings, and lids. Odd ball canning stuff like funnels and additives like pickling lime... etc. All in all, compared to the stuff we do l, it's got a pretty cheap barrier to entry.
Similar threads
Featured Video
Latest Articles
- TT#62 Brian Barney Hunting Bulls without Calling
- Hoyt Alpha AX-2 SD Review
- Kuiu Kenai vs Outdoor Vitals Vario Hooded Jacket Review
- Hoyt RX-9 Ultra Review
- Hunting Vampire Bucks & Building an Optics Kit
- Darton Sequel ST2 35 Review
- TT#61 Gear and Skills for Success with Aron Snyder
- Vortex Viper Shotgun Enclosed Micro Red Dot Review
- Howard’s Total Vise Legacy Bow Press
- Tcams, Point Creep, Scouting, & The Hunt Source Podcast
