nnmarcher
Lil-Rokslider
- Joined
- Jun 11, 2019
- Messages
- 225
I recently added some hip vents to my Prana Zions and they came out pretty well so I thought I'd share since I see many people talk about adding them to Sitka pants. There are a few comments floating around the site about this, but I didn't see a specific thread in the DIY Gear Modifications forum.
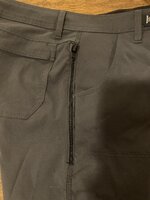
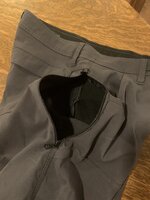
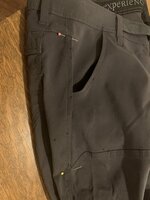
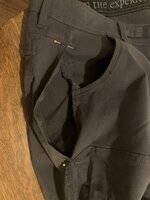
- Start by measuring how long the zipper will be. In my case I went from a seam at the hip down to the top of a cargo pocket on the opposite pant leg from these pictures.
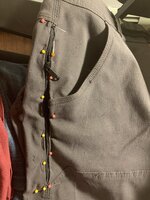
- Put pins in at the top and bottom to mark your start and end.
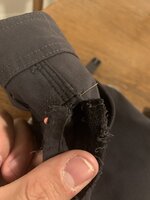
- Use a seam ripper to rip out the seam between your pins. Be careful not to rip/cut the fabric. Clean out as much thread as possible.
- Since the seam was overlapping, I made four small (¼”) cuts, one at each end of the flaps, to fold in and make a rectangular opening for the zipper to sit in.
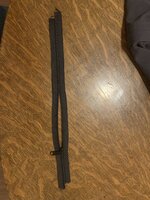
- Cut your length of zipper to be about 2” longer than your final length so it is easier to work with.
- Separate the zipper a couple inches, but don’t open it completely, and insert your slider such that it closes the open end and is in the middle with the entire zipper closed.
- A trick for this can be separating the entire length of zipper and offsetting one side to be ~½” taller than the other. This helps me insert the zipper a little easier. You’ll need to zip the entire length together, zip the slider off the end, and do the above step, just with offset pieces now.
- Lay your zipper inside the open seam and position it so that you have roughly equal tags extending above and below the opening. Maneuver the flaps you cut to lay on the zipper outside the teeth.
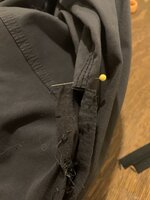
- The back side of the pant (In the below picture, the left side) is a little easier to fold over and begin pinning the pant material to the zipper. I didn’t aim for any specific distance, just got it to where I thought looked good.
- The front side of the pant (with the pocket) is a little harder to fold over due to the extra material. This took quite a bit of finangling and is an area I would like to improve.
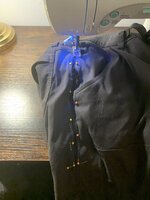
- Once everything is pinned, start sewing. I started at the top and stitched across the zipper to lock it in place. As long as your zipper teeth are plastic, you can go straight over them, just take it slow. I backstitched across the entire width of the zipper before continuing.
- Make sure your needle is in the down position, lift your presser foot, and rotate your pants 90 degrees so you can sew down the length of the zipper.
- I took a small (2” long) piece of grosgrain ribbon and stitched it in at the top of the zipper to make a little loop that my slider will sit under when the zipper is closed (seen in completed pictures below)
- Once you get about halfway down your zipper, you might run into your slider. If it is in your way, lower the needle, raise the presser foot, and move the slider behind the presser foot out of your way.
- Work your way down the zipper removing pins as you go. Once you get to the bottom, put your needle down, lift your presser foot, and rotate 90 degrees again to go across the bottom. Repeat to go up the length of the zipper.
- Trim off excess zipper coil and grosgrain inside the pant and singe with a lighter to prevent it from unraveling.


