Skattergun
FNG
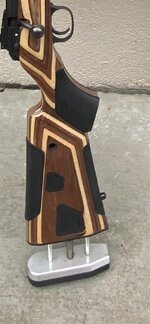
have a customer that wanted to build out a rifle that he and his daughter could both use, here is how it turned out. il also include a brief step by step
first cut the stock down and evaluate what's on the inside, most carbon stocks don't have much of anything of substance on the interior to fasten to, so i fit and epoxied some walnut into both the cut stock and the remanent.
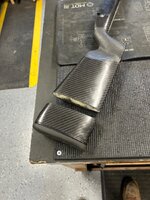
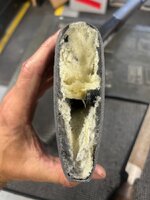
Not sure how long this flush cup would have held in there, but it might surprise you I guess
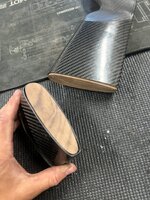
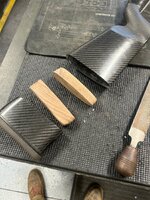
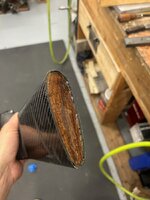
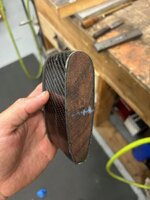
After the epoxy cured, I was able to flatten each face and install metal machine screw inserts, (don't have a picture of that right now)
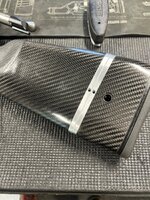
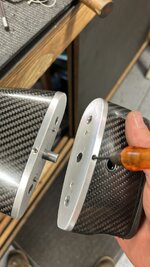
next I build three aluminum plates and attached one to the stock and the remanent and then one to a separate recoil pad. these were then ground to fit. I used set screws as an alignment dowels that prevent rotation along with a 3/8" rod in the center to set screw the piece in place.
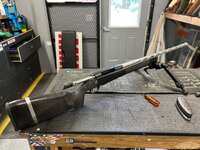
not shown but the center 3/8" pin now how dimples for the set screws to tighten into. and then re installed flush cup into the walnut, should be good now. so with one set screw you can change from 12" LOP to 14" turned out pretty nice. Rifle is a Tikka t3 6mm creed with a 22" Ace barrel diamond fluted.
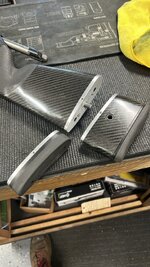
first cut the stock down and evaluate what's on the inside, most carbon stocks don't have much of anything of substance on the interior to fasten to, so i fit and epoxied some walnut into both the cut stock and the remanent.


Not sure how long this flush cup would have held in there, but it might surprise you I guess


After the epoxy cured, I was able to flatten each face and install metal machine screw inserts, (don't have a picture of that right now)
next I build three aluminum plates and attached one to the stock and the remanent and then one to a separate recoil pad. these were then ground to fit. I used set screws as an alignment dowels that prevent rotation along with a 3/8" rod in the center to set screw the piece in place.
not shown but the center 3/8" pin now how dimples for the set screws to tighten into. and then re installed flush cup into the walnut, should be good now. so with one set screw you can change from 12" LOP to 14" turned out pretty nice. Rifle is a Tikka t3 6mm creed with a 22" Ace barrel diamond fluted.


