Muley Buck
WKR
Hahahaha!!Way too classy. I suspect you had the help tidy up a bit. You most likely sip single malt scotch and smoke a calabash pipe as well.
Follow along with the video below to see how to install our site as a web app on your home screen.
Note: This feature may not be available in some browsers.
Hahahaha!!Way too classy. I suspect you had the help tidy up a bit. You most likely sip single malt scotch and smoke a calabash pipe as well.
I built it. I took my time on it, about 3-4 times a week I'd spend a couple few hours on it. Somewhere between 4-6 weeks. At the time it was something positive I could focus on, it was a divorce project.Very nice! Did you buy or build this bench??
Well dang....you guys put me to shame but I'm going to post these anyway so maybe some guys can feel a little better about themselves in comparison!
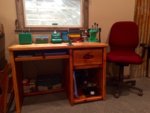
Here is my reloading room and gear storage area after I completed it:
View attachment 174976View attachment 174977
And here it is in use:
View attachment 174978
I made that top by laminating 2x4s together... lots of glue, lots of clamps! I put them through my table saw to get a flatter top then hit it with a belt sander to finish it after it was all glued up. I've used the butcher block stuff from lowes for cabinet tops and really like it too... I'll bet it would work perfectly for a bench!Well done, this looks like something I could realistically build and have it be functional. What butcher block did you go with? I am looking at one from menards, Ive already purchased one for the wife on one of her projects. It stained up really nice.

How did you support the 2x boards on the wall? I see the brackets on the inside by the corner but what did you use on the outside ?
I don't know how he did it but when I build shelves like that, I use a Kreg jig and drive the screws straight into the adjoining studs.
I probably didn't need the brackets in the corners, but I like to overdue stuff.
Each of those 2x12s has two 5/8 inch threaded rods about 10 inches long that I sunk into the studs in the wall. I drilled corresponding holes into the 2x12s with my drill press to make a floating shelf. It was something I was playing around with and I like how it turned out. I did it again in my mud room for storage shelves and really like the look.
Sent from my SM-G960U using Tapatalk
How do the Rosa Rita beans shoot for you? I tried them a few times on my large bores but found they shot dirty and had a lot of ES issues. (Sorry I could not resist a little stupid humor).
Sent from my iPhone using Tapatalk

I built it. I took my time on it, about 3-4 times a week I'd spend a couple few hours on it. Somewhere between 4-6 weeks. At the time it was something positive I could focus on, it was a divorce project.
Well thank you, I do appreciate that. My intention was to build one that would last my lifetime and then some. This is where I got the plans for it. I did alter it some. Mine is 8' long instead of 6' like the plans call for and I opted for an open cabinet design along with a little different shelf configuration.I bet it took some serious time. Looks great! That's my goal of what my next one will look like. Did you get dimensions and specs from somewhere or came up with all of that yourself as well?
Well thank you, I do appreciate that. My intention was to build one that would last my lifetime and then some. This is where I got the plans for it. I did alter it some. Mine is 8' long instead of 6' like the plans call for and I opted for an open cabinet design along with a little different shelf configuration.
Right on man! Take your time, think it through and it'll turn out great!Thanks for the link! if my comes out half as nice as yours did I'll be in good shape.

