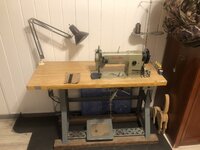
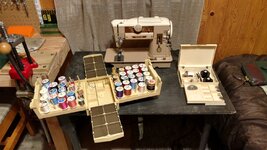
New Sewing Machine Setup

WoodBow

WKR
Joined
Jul 21, 2015
Messages
1,886
Edge binding reinforces the seam, protects the stitches, and prevents raw edge fabric fraying. It also gives a polished professional look. Not necessary but recommended.

Absolutely make the main part ouf the bag out of one piece of fabric.

Sent from my SM-G975U using Tapatalk
 
OP
H

Hootsma

Lil-Rokslider
Joined
Feb 16, 2014
Messages
263
Location
Memphis, Tennessee
I was trying to find a ‘how to’ video on seaming fabric with the use of grosgrain. I’ve never done it before and I’m not sure of all the steps involved. I haven’t found a helpful video yet on that process, but what I did find was a video from Sailrite about 3 common canvas seaming techniques. One of those techniques was the full flat felled seam. This seam type doesn’t require grosgrain, has no raw edges exposed, is waterproof and retains 100% of the fabric strength thru the seam according to the Sailrite guy. This seems like an easy and great way to stitch together a heavy duty camp bag seam. What am I missing here? What’s the disadvantage/s to this method for my project?

The Sailrite guy also mention using a hot knife to cut the canvas so the edges will be melted and not unravel. Will a hot knife work on 500d Cordura? Is it worth it to have one?
 

WoodBow

WKR
Joined
Jul 21, 2015
Messages
1,886
Flat felled is very labor intensive. Much more sewing. But yea it is a great seam and will work. That is what is used on shelters.

Yes a hot knife will cut cordura. It will cut just about any synthetic fabric. I personally use a soldering gun that i sharpen the tip on to be more blade like. This is not something that i personally do on cordura projects but its the only way to go on ripstop type materials that unravel easily with an unfinished edge. Most cordura is coated, but you can buy it either way. They coating is what waterproofs it. It also almost entirely prevents fraying.

To do a grosgrain binding you use an edge binder attachment. It folds the grosgrain and lays it along the seam as you sew. You can also do it manually. It isnt a lot of fun bit it works. I use the small black metal binder clips to hold it along the seam to be sewn. Just time consuming. You can get cheap edge binders on ebay that work pretty good.

Sent from my SM-G975U using Tapatalk
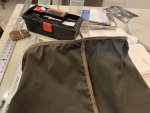
 
OP
H

Hootsma

Lil-Rokslider
Joined
Feb 16, 2014
Messages
263
Location
Memphis, Tennessee
I like the pros of the flat felled seam and I don’t mind the extra work for what seems to be a superior product. If I go with a single piece of fabric for the sides and a rectangular patch for the bottom, it seems like stitching the sides to itself would be pretty straight forward. My only concern is using this stitch to attach the bottom to the sides. I’m having a hard time visualizing how that’s going to work. I’ll probably have to do a mock-up on scraps to figure it out before I tackle the actual bag. It seems in that case, the grosgrain method might be easier.

I saw several threads in the DIY section where folks were using the binder clips to hold material together. I plan on doing that and I’ll also be getting some of Sailrites 3/8” basting tape to help out as well.

I hadn’t considered the PU coating on the Cordura to act as a edge fraying preventative. I may still get the hot knife even though it’s $140 because it would make a lot of the other things I plan on doing easier.

For the grosgrain method, you basically stitch the two pieces of material together with a 1/2” seam allowance, then wrap the edges with 1” grosgrain and stitch through the grosgrain and your seam allowance with the stitch line being between the first stitch line and the seam allowance edge of the fabric?

Does it help to iron the grosgrain in half before trying to binder clip it to the fabric edge?
 

WoodBow

WKR
Joined
Jul 21, 2015
Messages
1,886
I would use more like a 3/8 seam allowance on the first seam so the grosgrain will fully hide it.

Yes it helps immensely to pre iron the grosgrain. You can rig up a system where you have the iron face down on a towel and you are just slowing pulling the grosgrain under it. Modern irons have a time out feature after being face down for so many seconds, so be aware of that.

Sent from my SM-G975U using Tapatalk
 
OP
H

Hootsma

Lil-Rokslider
Joined
Feb 16, 2014
Messages
263
Location
Memphis, Tennessee
Got it! I'm ordering everything I'm going to need and hopefully I'll be able to get started next weekend. Thank you for all the help and guidance. I'll keep y'all posted once I get started and how it turns out.
 
OP
H

Hootsma

Lil-Rokslider
Joined
Feb 16, 2014
Messages
263
Location
Memphis, Tennessee
On all my packs with grosgrain covering the seams on the interior, the pack panels are stitched together first without the grosgrain and then the grosgrain is stitched on afterwards with it's stitch line being between the original stitch line and the cut edge of the fabric in the hem. This means that the original stitch line is bearing all the forces subjected to that seam. Would it make sense, from a structural standpoint, to stitch the panels together first, like before, only with a 1/4" hem width. Then stitch on the grosgrain with a 3/8" hem width, so that the main structural hem line is reinforced by the grosgrain?

Also, I noticed on my Seek Outside Paradox bag and my or OR 55L Durable dry sack, that they have a strip of thin flexible plastic lining half the top opening. This gives the opening edge a little rigidity and body for rolling the bag closed. What type of plastic is this and wheres the best place to go to find it? Is this how ya'll would recommend finishing the roll top portion of the bag?
 

WoodBow

WKR
Joined
Jul 21, 2015
Messages
1,886
Yes you could do the hems like that.

I use webbing to stiffen the top edge of roll tops.

Sent from my SM-G975U using Tapatalk
 

nodakian

WKR
Rokslide Sponsor
Joined
Aug 24, 2017
Messages
646
Location
Dickinson, ND
My technique is to plan a 1/2” seam allowance, sew it at 3/8” give or take, trim edges to about 1/4” so they are clean and even, then add ribbon.
 
OP
H

Hootsma

Lil-Rokslider
Joined
Feb 16, 2014
Messages
263
Location
Memphis, Tennessee
I got all of my supplies towards the end of the week and got to it on Saturday. By the end of the evening, I was almost done, I just had to do the roll top portion of it, and my machine started malfunctioning. I was tired and a bit frustrated, so I quit and left it to this morning.

Apparently I jacked up the timing on it. I watched a few YouTube videos and got it squared away and finished it up.

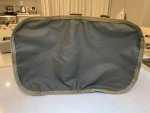
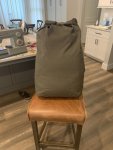
The shape and size of the bag came out exactly how I wanted it to after a couple of missteps. The stitch lines and seems however are pretty horrendous. One of the major mistakes I made and was a significant source of the frustration was not listening to y’all and using the back stitch instead of a standard straight stitch. 2 layers of Cordura and 2 layers of grosgrain were just too much for the little machine when using the back stitch. It would work fine sometimes and look great and then others it’d look good on the top but the back side would be a rats nest.

Although the stitches look like total crap in some areas, I think it’s still structurally sound and will serve its purpose well. I learned a lot from this little adventure, thanks in no small part to y’all’s help and advice, and I’m looking forward to the next MYOG project.
 

Attachments

  • IMG_1609.jpg
    IMG_1609.jpg
    266.1 KB · Views: 60
  • IMG_1610.jpg
    IMG_1610.jpg
    242.1 KB · Views: 60
  • IMG_3124.JPG
    IMG_3124.JPG
    186.3 KB · Views: 60

Explorer

FNG
Joined
Dec 28, 2018
Messages
69
My sewing machine is a similar model to yours and I think it is a great machine. I just sew every now and then for a hobby. I sewed 6 panniers made of 1000D and balistic nylon. In the corners of the panniers where folds were, I sewed through 12 layers of the fabric and the machine was fine. No, the machine can't do that every day all day, but for the hobbyist it will probably do all you need.
I went through some of the same things you mentioned and after I figured out what I was doing, I realized that when something wasn't working it was probably my fault. After a while, I figured out it is pretty reliable machine.
 

Explorer

FNG
Joined
Dec 28, 2018
Messages
69
Part of the issue is the foot pedal being pretty touchy. I worked it bare foot to help with the feel, but some times, when the machine is struggling, you have to feather it to get it going and it could quickly get away from you and take off.
I had the same issue. It ran like a chain saw, wide open or nothing. The foot pedal snaps apart and there is a screw that adjust the speed in response to the the foot pedal position. They come set pretty fast. I set mine all the way down and can go really slow if I want. If you floor it, it will still go faster than I ever could. Slowing it down makes the mid range more precise as well.
 

450

Lil-Rokslider
Joined
Mar 1, 2015
Messages
181
My sewing machine is a similar model to yours and I think it is a great machine. I just sew every now and then for a hobby. I sewed 6 panniers made of 1000D and balistic nylon. In the corners of the panniers where folds were, I sewed through 12 layers of the fabric and the machine was fine. No, the machine can't do that every day all day, but for the hobbyist it will probably do all you need.
I went through some of the same things you mentioned and after I figured out what I was doing, I realized that when something wasn't working it was probably my fault. After a while, I figured out it is pretty reliable machine.
Do you have any pictures of your panniers? What size pannier’s did you make? Thanks
 

nnmarcher

Lil-Rokslider
Joined
Jun 11, 2019
Messages
237
What’s a good machine to be on the look out for if getting started?
One of the popular machines I've seen for hobbyists is the Singer Heavy Duty 4423. I have one and like it a lot. My first machine was a little plastic thing I picked up off Craigslist for $50 and used for 8 months before upgrading. If you can find one on CL, there's a chance the owner may show you how to get it fired up if you don't know.
 
Joined
Nov 15, 2022
Messages
12
One of the popular machines I've seen for hobbyists is the Singer Heavy Duty 4423. I have one and like it a lot. My first machine was a little plastic thing I picked up off Craigslist for $50 and used for 8 months before upgrading. If you can find one on CL, there's a chance the owner may show you how to get it fired up if you don't know.
Thanks
 

nodakian

WKR
Rokslide Sponsor
Joined
Aug 24, 2017
Messages
646
Location
Dickinson, ND
Wow. I like this setup.
Thanks. It was really handy for how I was working back then. Later that year I got a Sailrite Fabricator industrial machine and switched things around for more efficiency. It has probably cut 25-30% off production time.
 
Top