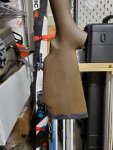
My Kimber Montana Tinkering

Joined
Apr 30, 2016
Messages
33
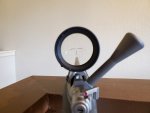
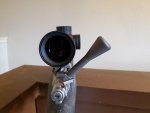
Thank you. I’ll check it out. I have a Nightforce on my Kimber 308 Montana and the bolt handle clearance is tight as you said.DBA6038A-9A0D-4919-A285-7149E3D94357.jpeg
 
Joined
Apr 30, 2016
Messages
33
They only thing I’m worried about is the Cerakote on my gun. Getting the new bolt handle to match and if there is a risk of chipping the existing Cerakote on the bolt trying to remove the bolt handle. I think a fluted tactical would be pretty cool.
 
OP
Marbles

Marbles

WKR
Classified Approved
Joined
May 16, 2020
Messages
4,601
Location
AK
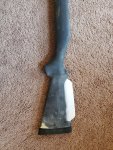
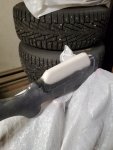
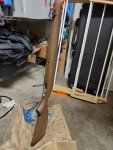
I decided to build up the comb to give me a good cheek weld. I thought about a kydex riser, but just don't like how they look.

To make the syntactic foam I used West System 105 resin with 207 hardener--I used the 207 because I also plan on using this to clear coat the painted stock. I mixed this at about a two thirds epoxy to one third microballoons by weight, this was about 60% microballoons by volume. Basically, after adding 14.0 g of microballoons to 42.8 g of mixed epoxy I then kept adding microballoons until it was the consistency of sticky bread dough.

The first batch I mixed was slightly too small and I tried to do a 50/50 mix by weight. This is way to many microballoons and before I added them all in I had to stop as it was the consistency of playdough and no longer sticky.

20200917_042939.jpg
Having mixed more than was needed, I decided to use it all and sand it down later. The saran wrap let me work it into shape pretty easily and I found it needed some needing to work epoxy out of the mix and onto the stock.

20200924_140608.jpg
After sanding. It should be noted that it was much easier to sand with four days of curing than with two. Even so, it is still harder than sanding pine wood.

20200925_081148.jpg
Today I just added a layer of fiberglass. While the syntactic foam is tough, and the fiberglass is overkill from a durability perspective, it covers several air bubbles in the syntactic foam that would have needed to be filled before painting. That, and I have always been a fan overbuilt.

Total weight added to the stock by the syntactic foam after sanding was 23.9 g (so I sanded off 27 g). Of course I will update with the weight added by the fiberglass layer once it is finished.

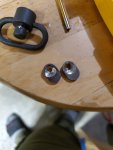
I like the Bat Machine action screws. The salt bath nitride finish on top of a stainless steel screw is nice and unlikely to corrode. However, what I really like about them is how deep the hex is cut.
20200924_140737.jpg 20200924_140750.jpg
The Bat Machine screws have a lower profile head than the Kimber screws and sit below the surface, especially the rear screw (pictured above). This does not bother me, and I even like it. However, I can see how it might bother someone else.
 
OP
Marbles

Marbles

WKR
Classified Approved
Joined
May 16, 2020
Messages
4,601
Location
AK
The fiberglass adds 9.0 g before final finish work. So total weight for cheek riser will be under 32.9 g or 1.16 oz. This is assuming I don't add another layer of fiberglass along the top. I sanded the syntactic foam about 1/8 inch low to allow for the thickness of the fiberglass and could end up needing slightly more height.

The action will have to come out of the stock for cleaning now.
 
Joined
Apr 30, 2016
Messages
33
The fiberglass adds 9.0 g before final finish work. So total weight for cheek riser will be under 32.9 g or 1.16 oz. This is assuming I don't add another layer of fiberglass along the top. I sanded the syntactic foam about 1/8 inch low to allow for the thickness of the fiberglass and could end up needing slightly more height.

The action will have to come out of the stock for cleaning now.
 
OP
Marbles

Marbles

WKR
Classified Approved
Joined
May 16, 2020
Messages
4,601
Location
AK
Thanks.

I just added more fiberglass to the comb, it was still a tad too low and the single layer was flexible over the air pockets in the foam.
 

Magnett

FNG
Joined
Jun 2, 2016
Messages
24
Thanks.

I just added more fiberglass to the comb, it was still a tad too low and the single layer was flexible over the air pockets in the foam.
Hi Marbles, thanks for all the information. So, are there 2 layers of fiberglass over the top of the comb? It looks like one layer was between the comb and the synthetic foam.
 
OP
Marbles

Marbles

WKR
Classified Approved
Joined
May 16, 2020
Messages
4,601
Location
AK
Hi Marbles, thanks for all the information. So, are there 2 layers of fiberglass over the top of the comb? It looks like one layer was between the comb and the synthetic foam.

No fiberglass between original stock and syntactic foam. There are two complete layers on top of the syntactic foam. It is a little less straight forward than that though.

For the first layer, I placed two small (about 1/2 inch wide) strips of fiberglass over the forward spine of the comb to add a little height. I did the same thing again with layer number two. So, the front half of the comb's spine really has six layers of fiberglass cloth, but only two of these wrap down the sides. The sole purpose of the extra material hear was to make up for material I removed while sanding the syntactic foam.

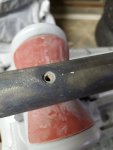
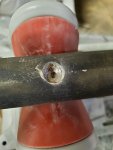
The stock itself is made of fiberglass/kevlar, with the primer removed you can see this pattern at places in the stock. I'm guessing this is what makes it look like there is a layer under the syntactic foam.
 

Magnett

FNG
Joined
Jun 2, 2016
Messages
24
No fiberglass between original stock and syntactic foam. There are two complete layers on top of the syntactic foam. It is a little less straight forward than that though.

For the first layer, I placed two small (about 1/2 inch wide) strips of fiberglass over the forward spine of the comb to add a little height. I did the same thing again with layer number two. So, the front half of the comb's spine really has six layers of fiberglass cloth, but only two of these wrap down the sides. The sole purpose of the extra material hear was to make up for material I removed while sanding the syntactic foam.

The stock itself is made of fiberglass/kevlar, with the primer removed you can see this pattern at places in the stock. I'm guessing this is what makes it look like there is a layer under the syntactic foam.
Thanks Marbles. Makes sense.

Magnett
 
OP
Marbles

Marbles

WKR
Classified Approved
Joined
May 16, 2020
Messages
4,601
Location
AK
I converted the standard sling swivels to QD sockets. Primarily for the flush socket when there is not a sling on the gun. The side benefit is that now the stock is truly sealed against water. Weight wise, I believe it came out the same (within 1 gram). I did sanding to finish up the comb while working on the QD sockets, so I cannot say for certain as this would have removed about a gram. Not including the epoxy and syntactic foam the QD sockets actual came out about 2.2 g lighter than the traditional swivel studs. Of course the QD swivels will be heavier than the standard swivels. I believe (but don't know for certain) that even with the syntactic foam and epoxy the QD sockets come out over 1 g lighter.

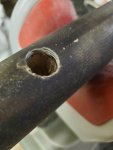
You can see rust on the threads for the standard swivel posts.
20200925_233052.jpg

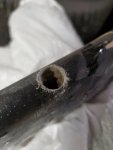
Once down to the threaded metal embedded in the stock it became hard to keep the bit from walking as the metal is not set evenly (I don't have a drill press, so this was done with a hand held drill).
20200925_233541.jpg

Part of the reason for this is that the part is not symmetric, resulting in one side breaking free from the stock while the other side remained attached. It also turns out the threads are open to the foam fill used to blow the stock during molding, meaning water could get into the stock.
20200926_001635.jpg
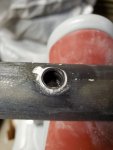
Forend after drilling and tapping. I had to fish the metal part out with needle nose pliers.
20200926_000121.jpg
Butt stock after drilling and tapping. Once again had to fish the metal out.
20200926_000127.jpg
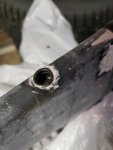
Forend after installing QD socket.
20200926_110619.jpg
Butt stock after installing QD socket.
20200926_110624.jpg

I used the West System epoxy to glue the sockets in. I mixed the epoxy, coated the socket threads (the sockets where soaked in alcohol overnight to remove oils) and spread some epoxy in the holes in the stock. I then took the remaining epoxy and mixed in microballoons to make syntactic foam. I partially filled the stock with syntactic foam to seal the base of the QD sockets and prevent water from soaking into the foam fill of the stock. I then threaded in the sockets and used syntactic foam to fill the gaps to make painting easier. I also used some of the foam to fill small imperfections in the stock. Should be ready to tape and start priming tomorrow (need to let the epoxy cure enough for sanding).
 

ProAlpine

FNG
Joined
Mar 26, 2018
Messages
92
Location
Idaho
Damn! You're going for it with that stock. Good one you. Thanks for posting so many great pics. I'm interested to see your paint scheme and how that turns out.

On the other hand, I had a deep of misfires on my Mt Ascent the other day while shooting handholds and factory loads. I've played around with firing pin spring tension before and I thought I had it dialed, not this...

I read on another forum about Kimber making longer replacement springs, as well as the Wolf spring being too fat to fit. Looks like you got the Wolf spring to work? I called Kimber and said I had read they made a longer replacement spring. The CS lady flat out said, "No". I didn't want to get into it with her so I asked if I could order a replacement spring. She wanted me to send the rifle in but I refused. Hunting season is less than 2 weeks away and I'd really like to get this thing dialed. After putting me on hold for 10 minutes she came back and said I could order one, but shipping may take 2-3 weeks! And, if I hadn't received a ship notification in 21 days then the order has been canceled and I'd have to reorder! Geez... the rumors about Kimber's CS are true... they suck.

I then went and ordered a Wolf spring to try, figuring it would be here sooner. Hopefully this works. I'm getting a little tired of the tinkering and just want to shoot. As soon as I think I've got a reliable rifle, something else pops up... Now I'm thinking about getting a Christensen Arms Ridgeline as a replacement.
 
OP
Marbles

Marbles

WKR
Classified Approved
Joined
May 16, 2020
Messages
4,601
Location
AK
I read on another forum about Kimber making longer replacement springs, as well as the Wolf spring being too fat to fit. Looks like you got the Wolf spring to work? I called Kimber and said I had read they made a longer replacement spring. The CS lady flat out said, "No". I didn't want to get into it with her so I asked if I could order a replacement spring. She wanted me to send the rifle in but I refused. Hunting season is less than 2 weeks away and I'd really like to get this thing dialed. After putting me on hold for 10 minutes she came back and said I could order one, but shipping may take 2-3 weeks! And, if I hadn't received a ship notification in 21 days then the order has been canceled and I'd have to reorder! Geez... the rumors about Kimber's CS are true... they suck.

I then went and ordered a Wolf spring to try, figuring it would be here sooner. Hopefully this works. I'm getting a little tired of the tinkering and just want to shoot. As soon as I think I've got a reliable rifle, something else pops up... Now I'm thinking about getting a Christensen Arms Ridgeline as a replacement.

The Wolff spring is a tight fit and rubs the threads going into the bolt body. I have not shot it with the spring yet, however it passes a function test and I don't notice anything odd when dry firing.

Sorry you are having so many issues. Hope you get it worked out in time to hunt. I'm not terribly impressed with Kimber, but I cannot find a rifle design I like better.
 
Joined
Sep 9, 2012
Messages
2,085
Location
BC
My local gunsmith fixed my Kimber Montana FTF issues with a simple replacement of the firing pin spring. He cut the replacement from some spring stock he had. Eight years later, no issues. He charged me $40 and it took about 20 minutes for him to check our firing pin protrusion, disassemble the bolt, pull the old spring, install the new one and reassemble it. But he had just done another Kimber, same caliber and SN within 10 of mine a few weeks earlier.

Mine had been back to Kimber where they did nothing...said it was OK. I wouldn't mess with their springs or warranty, just get a competent bolt action rifle smith to correct the issue.

On my Montana, the bolt would almost fall open when cocking the firing pin spring (weak spring before the fix). My other two Montanas were fine, stiffer opening to cock the spring, and zero misfire issues. Bet Kimber has a crappy supplier for springs, which appear to be stainless steel, versus black for the local replacement.
 
OP
Marbles

Marbles

WKR
Classified Approved
Joined
May 16, 2020
Messages
4,601
Location
AK
I did end up adding a second layer of fiberglass to provided stiffness over a couple large air pockets in the syntactic foam. Total weight for raising the comb is about 41 g. I did not weigh it in between the final sanding of the comb and painting, so this is plus or minus 1 g.

I chose to use Rustoleum paint as it is reported to be more durable than Krylon, but to take longer drying. I can say it certainly does take a while to dry. The multiple coats of primer and sanding took about a week, and even after 48 hours in a heated garage the primer would still gum up sandpaper rather than making powder. Thankfully my wife is an artist and makes messes, so I could get away with wet sanding in the bathtub. Due to work I was not able to do anything with it for 5 days, which was probably good as this let the primer fully dry.

Between primer coats after sanding.
20200927_000539.jpg

My painting technique still needs work, but considering I have not spray painted anything where finish mattered is over 14 years I'll take it.
20201008_063115.jpg
20201008_074241.jpg
 
OP
Marbles

Marbles

WKR
Classified Approved
Joined
May 16, 2020
Messages
4,601
Location
AK
On the QD swivel weight, my traditional 1 inch swivels were 28.4 g (The Outdoor Connection, Titan), the 1 inch GrovTec QD swivels are 30.4 g. Given that the QD sockets came out 2.2 g lighter than the traditional swivel studs the QD swivels do not add any weight.
 
Last edited:
Top