tx_shooter
Lil-Rokslider
For the baseline; my wife has used the Tikka base tupperware stock a few years now without too many complaints. I hated the stock (and have a few MDT and KRG stocks for my rifles) and have encouraged her to let me swap it for a better stock. She liked the MDT Fieldstock but it is not made in LH for Tikka (MDT come on guys). MDT says to just make the necessary relief cuts for the LH bolt and all is well enough.
I decided to go for it. Short of it; it works and looks pretty good. I used a grinder for the rough work; then a dremel for the smoothing and final fit. I am going to work with a friend to 3D print a block to fill in the RH bolt gap. After this month is done I am putting her NF scope back on the rifle.
Link to the MDT stock for those unaware


The process -
Overall it took maybe an hour with a few fit checks and layouts. I am happy with the results and will need to touch up the paint a little more with something better than a rattlecan. This was something most anyone with a little prep and patience can do until MDT starts selling this model as LH for Tikka. /hint
Prepped with tape for marking and fitting.

After grinding and testing fit.

Final fit with a little paint.

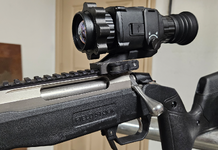
Next is filling in this gap to keep debris out of the trigger group. I will update this thread once it is done.

I decided to go for it. Short of it; it works and looks pretty good. I used a grinder for the rough work; then a dremel for the smoothing and final fit. I am going to work with a friend to 3D print a block to fill in the RH bolt gap. After this month is done I am putting her NF scope back on the rifle.
Link to the MDT stock for those unaware
The process -
Overall it took maybe an hour with a few fit checks and layouts. I am happy with the results and will need to touch up the paint a little more with something better than a rattlecan. This was something most anyone with a little prep and patience can do until MDT starts selling this model as LH for Tikka. /hint
Prepped with tape for marking and fitting.
After grinding and testing fit.
Final fit with a little paint.
Next is filling in this gap to keep debris out of the trigger group. I will update this thread once it is done.