Homemade tipi and pullouts

Ehiggins

WKR
Joined
Dec 15, 2014
Messages
347
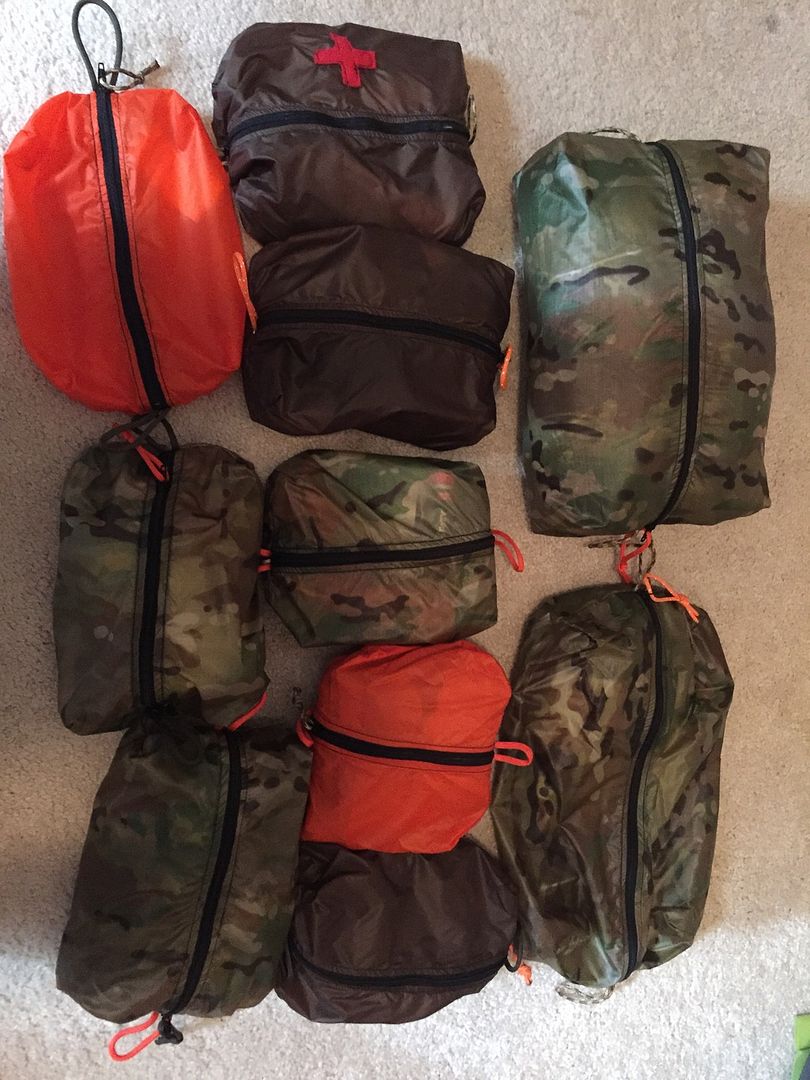
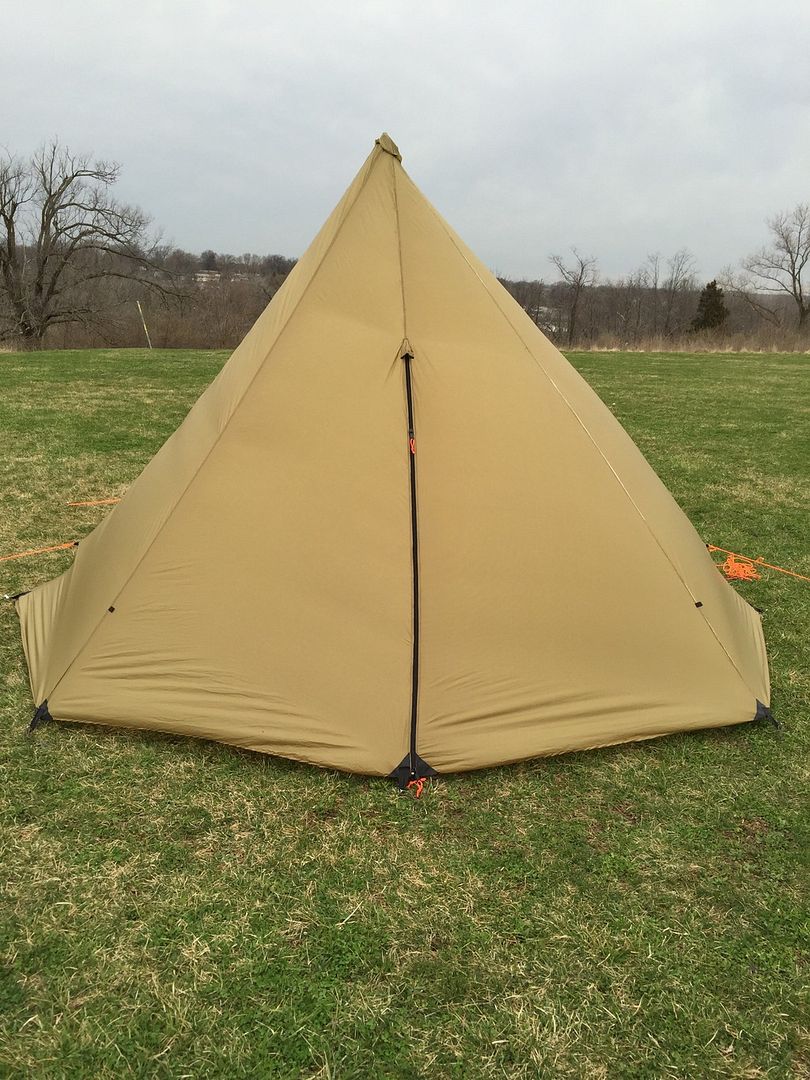
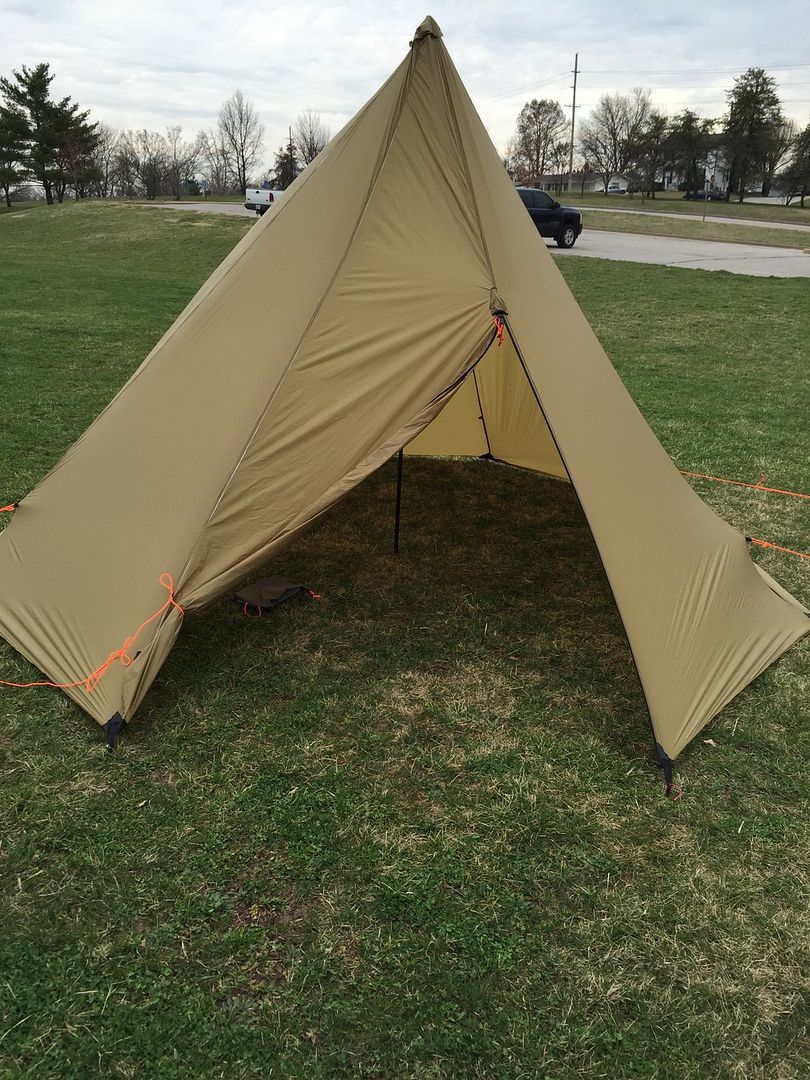
Been doing a little bit of sewing lately so I figured I would post some pictures to maybe inspire a few other people to give it a shot. (It's not that hard) Also as a thanks to those that have posted pictures and inspired me to give it a go.

Also if the pictures don't work let me know. I'm new to this. Thanks


Looks awesome I have been doing some pull outs also and have been thinking of doing a tipi or some kind of tent.. Great job!!
 
The tipi is 96" in center and a little over 12' in diameter. It's silpoly (thanks ripstopbytheroll). Tipi, stakes, pole and stuff sacks come in right at 4 pounds. I'm not trying to be short I just don't know what other details you are looking for so please ask if I missed something.
 
What is the weight of the tipi (pole, stakes, guy lines, etc.)? I'm working on a pyramid tent right now. Finished dimensions will be 9'x9' and 5' high. Is the silpoly any easier to work with compared to silnylon? I haven't put my hands on that fabric yet, but I'm going to order some soon.
 
I'm not trying to be short I just don't know what other details you are looking for so please ask if I missed something.

Oh, just curious on any thoughts you have after completing the project. Things that worked well, things that didn't. Tips for anyone looking to do the same project and things you look back and would do differently now. My big hangup is I still don't have a firm grasp on how the center reinforcement is constructed.
 
Ndbw- The total weight of every is a fuzz over 4 pounds, I don't remember tbe exact number. I thought the silpoly was easier to work with than the silnylon I used for the pullouts. Also the poly doesn't stretch and had a better rip stop grid to it. After working with both materials I'm glad I chose the poly for the tipi.
 
Oh, just curious on any thoughts you have after completing the project. Things that worked well, things that didn't. Tips for anyone looking to do the same project and things you look back and would do differently now. My big hangup is I still don't have a firm grasp on how the center reinforcement is constructed.

One big thing that worked well was using double sided tape to hold the panels together for the first stitch. I don't remeber what it's called but it's about 1/4" water soluble tape. You can see a little bit of it in the pictures (white lines on the seams). It worked much better than pins at keeping things lined up and also allowed the fabric to feed easier on it's on.

The hardest part was managing that much material once it all starts to come together. 15 yards of materal is a pain to keep straight while trying to keep it taught and straight for the stitches.

The cone at the top was a pia. I don't know how the pros do it but I stitched the triangles together up to about 2" from the tip. Then I cut a circle out of the rubber coated nylon I used for the stake reinforcements. Then cut slits in it so that it conformed to a frustum (cone without a point) I made from cardboard. Then stitched the circumference and a lot of reinforcement on it. Put a similar poly layer on the inside and the out but folded it to confrm instead of cutting slits. I hope that makes sense
 
What are the benefits of silpoly versus silnylon?

To be honest I don't know if there are any but I'll try and explain my reasoning for going that route. When trying to decide what to use I had experience with silnylon making pullouts but not the poly. After reading the characteristics of the poly (little to no stretch when wet and listed as more durable/abrasion resistant) it seemed better suited for making the tipi. It was a couple bucks more a yard but the weight was about the I believe so I figured why not. I did find it easier to work with than the silnylon, and since I have limited experience/ skill sewing I think that helped.
 
As I understand it, the benefit of no stretch in silpoly can also be viewed as a hindrance as well. There are times when a little bit of stretch can save a shelter from tearing under adverse conditions. Definitely interested to hear how this material works out in the longer term.
 
As I understand it, the benefit of no stretch in silpoly can also be viewed as a hindrance as well. There are times when a little bit of stretch can save a shelter from tearing under adverse conditions. Definitely interested to hear how this material works out in the longer term.

That was an initial concern I had but the material does have a little bit of stretch to it, just not as much as silnylon. The stretch is most limited when it's being pulled perpendicular to the ripstop grid. The way I cut my panels to minimize the amount of material needed the grid is not lined up so the panels all have a little bit of stretch to them. I get what you are saying though about some stretch being a good thing. I'll keep you posted on how it holds up.
 
My main hesitation with starting a shelter of my own is how to design the cuts with the right angles, lengths, widths, ect. to line up with the next cut and give me the shape that I'm after. Also, cutting large areas of fabric in even a straight line is pretty tough without some commercial type cutter.

How does everyone do their designing and how do you cut the material properly to work together?
 
Where did you get the zippers for the pullouts? And what are they called? I'm having a hard time finding zippers
 
I used Google sketchup for the design work. It's really useful for laying out how to cut the pieces in order to waste the least amount of material. I'd be happy to help if you are interested. Just let me know what shape/size dimensions you are looking for and I can draw something up for you.

As far as cutting I made a triangle frame out of galvanized corner bead so I had a repeatable pattern and used a laser level to make sure the sides were straight. After everything was traced I used a pocket knife and cutting board for the cuts. You don't need to make those perfectly straight if you use felled seams since the edges will be hidden just make sure you measure the seam/stitch width when putting it together.
 
Ehiggins, First, what is your first name?
Second, If you don't mind sharing the sketchup files... I'd love to look at them.
email: [email protected]

Also you mentioned 15yds of material...is that what was required for your tent?
Trying to understand how much fabric is needed, so I can price some out.
I keep toying with sewing a tipi, but I keep chickening out.

So... is a stove jack next?
Mike
Hunt'nFish


It's Eric.

Yeah I'll happily send them to you. I don't have them at work but I can send them this evening if I remeber or at least by the weekend.

I ordered 16 yards planning on having a little left. I think I used about 14.5, but I didn't measure it out at the end.

I was hesitant at first and had a small feeling that Id gotten in over my head once I realized how long the seams were. But it really wasn't bad it just takes some time to stitch the big seams together since they are 120"+. After those the rest is more fun since it's quicker work and you can start seeing it come together. I was so excited I tried to put it up when I only had 4 stake down points done (it didnt go well).

As of now I'm not planning a jack. I'll be in CO in early September this year so shouldnt have to worry about extreme cold too much.
 
Thank you Eric, much appreciated.
Good to know you were hesitant as well and still managed a smash up job.
If you could, share a close up pic of the seam type you used.
Mike
 
Back
Top