Good looking rifle. Parts kit? Nice color, what did you use?
It's been a while since I've built a gun, but a just a couple things that stand out to me, for the future.
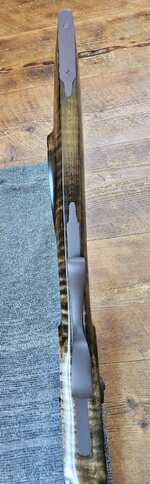
1- left hand side where the forend fits the metal cap. Unless it's just the picture angle, the cap is proud of wood (looks like a little step from cap down to the wood). If you take the wood down too much don't be afraid to file the metal to fit. A smooth transition is more pleasing to the eye. Make the metal and wood flow.
2- The wood on top of the forend at front of the lock. The wood should be a straight line with the top of the lock. Again, flowing lines please the eye. Bringing it down would have also brought the top of the forend down, and eliminating the angle drop down to the forend cap.
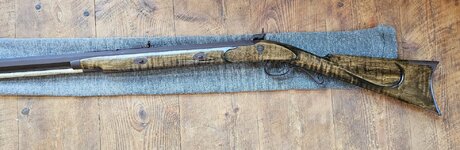
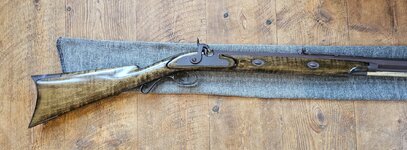
3- It appears the lock molding doesn't match the molding on the other side (the molding on the opposite appears thicker and bulbous compared to the lock side). When I complete the lock molding, I make a paper copy and transfer the lines directly to the opposite side. That way they match.
4- I like the front blade the other way and a lot of original rifles have it that way also. By flipping it you get a steeper angle to look at. Less glare off the blade, easier to define the top in the rear sight.
5- I try
These are minor nit picks, but help make for a fine looking piece.
Hawkins are notoriously hard as far as lines. I've avoided making one. But stock lines, proportions, flow of wood into metal, etc, are universal along all the old guns.

")