nighthawkf-117
Lil-Rokslider
- Joined
- May 27, 2024
- Messages
- 174
Hi everyone,
I'm going to take you all along for the build of my newest backpack this spring. This will actually be version 3 of my backpack, Ive not posted much about these before, but feel I finally have a lot to share for someone looking to do this themself. First a little history about V1 and V2 then Ill get on to V3.
V1:
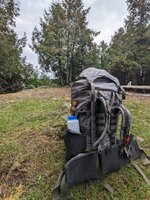
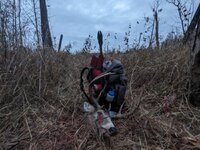
This was actually my third backpack build, the first two being lighter packs with aluminum frames made from tent poles. This was heavily inspired by the EXO pack and used a 3d printed frame which was then wrapped in carbon fiber. This worked ok but was very time consuming and not very pretty. Additionally it was not as stiff as I wanted it to be. However I did pack out a whole quartered whitetail on this frame with no problem. The bag itself was Ecopak EPLX 400. The bag was essentially a single big roll top bag with stretch pockets and the sides and front. The bag worked great and I used the same bag on V2.
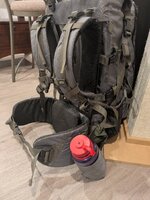
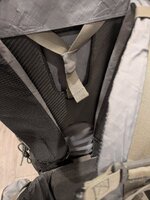
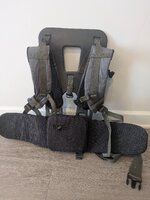
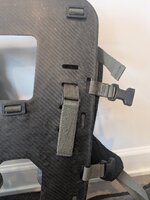
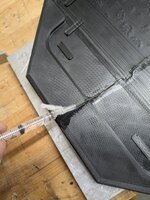
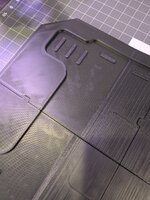
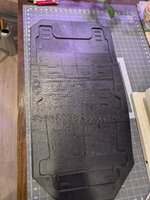
V2: After seeing Kifarus ARK frame I new I wanted to do something similar. I modeled the frame in CAD and 3d printed molds out of ABS. I then painted the molds in Duratec surfacing primer and polished. The frame could be directly fabricated in this mold. Ill go into more detail as I build V3 as the process to create the molds will be the same. This yielded an extremely strong frame. The shoulder straps and hip belt was attached to the frame and buckles sewn on with webbing to attach the bag. As mentioned I used the same bag from V1. This pack worked great and I have lots of miles on it. Loaded up to 65lbs in my recent Idaho bear hunt and carried it without problems. However Ive identified several improvements to make for V3.
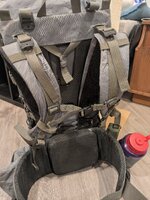
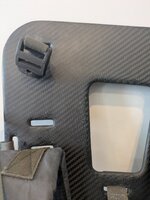
1: The load lifter points on the frame need to be higher in relation to the shoulder straps, this will better distribute weight through the frame when the load lifters are used.
2: When the pack is loaded down and full it has a tendency to swing laterally. This is due to the taper between the top of the frame and the bottom.
3: I found myself wishing I had a way to access the bottom of the bag without completetly unpacking it. I plan to add a large vertical zipper to the front of the bag.
4: The Ecopak has worked great for several years now but it starting to show its age. Im going with a more robust fabric this time around.
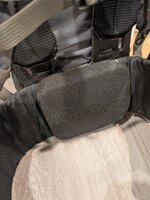
5: The internal foam for the shoulder straps have stretched and worn some over years of use. Ill be using a more robust foam in V3.
Ill go into more details about the design in future posts. The mold design is done and being 3d printed now.
I'm going to take you all along for the build of my newest backpack this spring. This will actually be version 3 of my backpack, Ive not posted much about these before, but feel I finally have a lot to share for someone looking to do this themself. First a little history about V1 and V2 then Ill get on to V3.
V1:
This was actually my third backpack build, the first two being lighter packs with aluminum frames made from tent poles. This was heavily inspired by the EXO pack and used a 3d printed frame which was then wrapped in carbon fiber. This worked ok but was very time consuming and not very pretty. Additionally it was not as stiff as I wanted it to be. However I did pack out a whole quartered whitetail on this frame with no problem. The bag itself was Ecopak EPLX 400. The bag was essentially a single big roll top bag with stretch pockets and the sides and front. The bag worked great and I used the same bag on V2.
V2: After seeing Kifarus ARK frame I new I wanted to do something similar. I modeled the frame in CAD and 3d printed molds out of ABS. I then painted the molds in Duratec surfacing primer and polished. The frame could be directly fabricated in this mold. Ill go into more detail as I build V3 as the process to create the molds will be the same. This yielded an extremely strong frame. The shoulder straps and hip belt was attached to the frame and buckles sewn on with webbing to attach the bag. As mentioned I used the same bag from V1. This pack worked great and I have lots of miles on it. Loaded up to 65lbs in my recent Idaho bear hunt and carried it without problems. However Ive identified several improvements to make for V3.
1: The load lifter points on the frame need to be higher in relation to the shoulder straps, this will better distribute weight through the frame when the load lifters are used.
2: When the pack is loaded down and full it has a tendency to swing laterally. This is due to the taper between the top of the frame and the bottom.
3: I found myself wishing I had a way to access the bottom of the bag without completetly unpacking it. I plan to add a large vertical zipper to the front of the bag.
4: The Ecopak has worked great for several years now but it starting to show its age. Im going with a more robust fabric this time around.
5: The internal foam for the shoulder straps have stretched and worn some over years of use. Ill be using a more robust foam in V3.
Ill go into more details about the design in future posts. The mold design is done and being 3d printed now.


")
