Fast Rider
FNG
- Joined
- Feb 25, 2023
- Messages
- 18
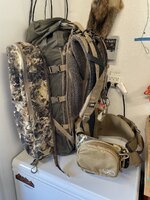
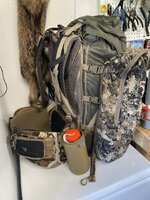
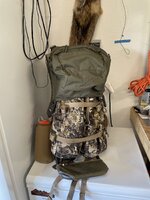
For those of you who currently have an F1 mainframe, this is a fantastic upgrade. The Exo Mtn Gear K4 hipbelt is much more comfortable, doesn’t loosen up, and locks onto your hips. If you’re currently contemplating an F1 mainframe, at their current price point, I would recommend looking at other options (Like the Exo K4). You’ll be at the same price after you complete this mod, but you’ll have a much better system with higher quality components. This mod will run you about $110-$120 with all the hardware needed.
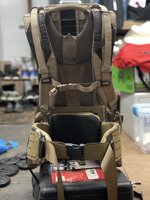
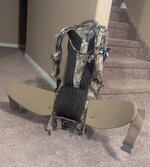
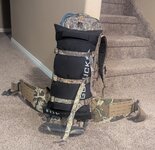
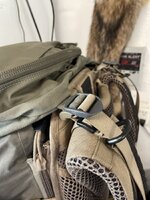
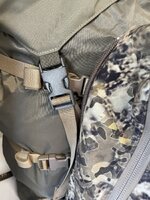
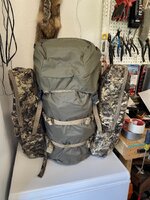
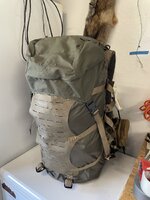
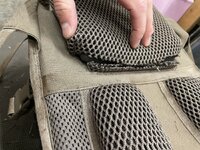
I purchased my F1 mainframe 4 years ago. I’ve packed out many animals and I train with it throughout the year. I don’t go crazy but I’ve had 100lbs on it on multiple occasions. Over time, the lumbar and hip belt padding have become sacked out as you can see in the pic. You can replace the full hip belt, but the lumbar padding is not replaceable, and the material holding the padding, along with the fabric of the mainframe, stretch overtime.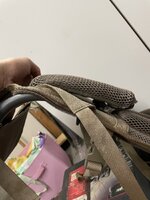
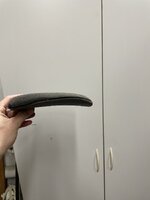
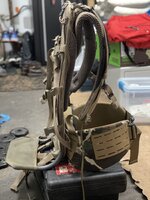
I also feel like the hipbelt is not made beefy enough to handle truly heavy loads as you’ll see where it buckles as it meets the pack.
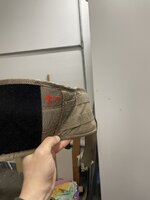
I’ve seen people replace the hip belt with the Exo “K3 for the K2” kit and they’ve said it’s a great option. When Exo came out with the K4 system, I gave that hipbelt a close look. I spoke with Exo, took some measurements, and punched the trigger.
Components needed:
First you need to detach the shoulder strap webbing from the shoulder straps and cut off the entire lumbar pad and fabric right at the seams.
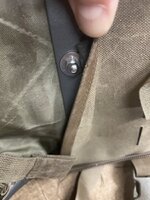
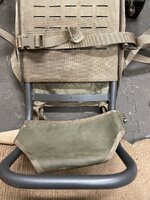
Now pull off the original hipbelt (it’s just Velcro). Ensure your straps that wrap around the load shelf (3 straps) are tight, and the fabric where the load-lifters attach onto the mainframe is tight to the internal frame as well (this is critical so your so-called load lifters remain functional). Pic to show where the hole is on the crossmember.
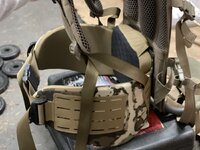
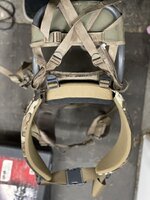
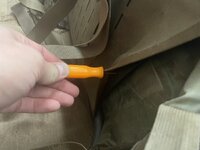
Remove the lumbar pad/pocket from the Exo hipbelt, line up the Exo hipbelt and ensure it is centered and level with the pack and apply pressure to secure the Velcro. From the back/load-shelf side, fold up the laser cut panel slightly to access the mainframe’s aluminum cross support, push the pick through the hole in the mainframe cross support and through the fabric/plastic sheet of the mainframe, and finally through the Exo hipbelt.
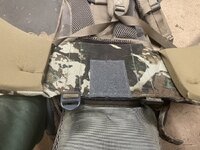
I chased this with a drill bit to ensure the hole was big enough that I could get the bolt through. This final part is a bit challenging but can be done solo - push the bolt with fender washer through the Exo hipbelt and out thru the mainframe crossmember, then secure with the washer and castle nut (I used loctite as well). Snug it down so the plastic panel that’s sewn into the K4 hipbelt starts to flex and match the curvature of the mainframe crossmember. Install the lumbar pad by flexing the hipbelt so you can wrap the Velcro flaps around the hipbelt.
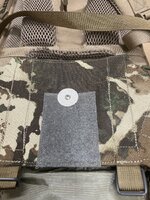
Then attach the shoulder strap webbing and you’re good to go! You now have 2 shoulder strap options - the original or the K4. I utilized the shoulder strap webbing from the K4 hipbelt, and I’m going to add buckles to the original straps and utilize those as a 4th row to help attach gear with. I think this will solve some of my issues with trying to pack boned out meat - the meat would pack down to the bottom and start squishing out the sides underneath the lowest strap. The original shoulder straps will sit a few inches lower than this.
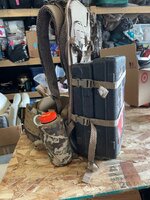
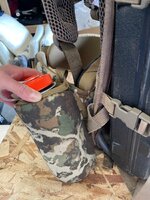
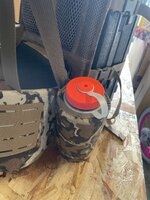
I’m unsure if an Exo K4 Nalgene holder will fit due to the width of the frame, I think it might with a little tweaking but they are a bit pricey so I opted not to buy one. The slick Exo K4 rifle holder could probably be made to work as well.
I purchased my F1 mainframe 4 years ago. I’ve packed out many animals and I train with it throughout the year. I don’t go crazy but I’ve had 100lbs on it on multiple occasions. Over time, the lumbar and hip belt padding have become sacked out as you can see in the pic. You can replace the full hip belt, but the lumbar padding is not replaceable, and the material holding the padding, along with the fabric of the mainframe, stretch overtime.


I also feel like the hipbelt is not made beefy enough to handle truly heavy loads as you’ll see where it buckles as it meets the pack.

I’ve seen people replace the hip belt with the Exo “K3 for the K2” kit and they’ve said it’s a great option. When Exo came out with the K4 system, I gave that hipbelt a close look. I spoke with Exo, took some measurements, and punched the trigger.
Components needed:
- Exo K4 hipbelt in your size and color choice, lumbar pad, and lumbar pocket
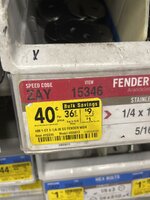
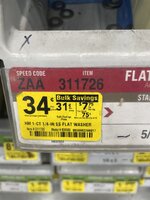
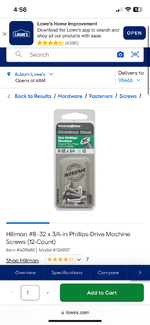
- Parts from Lowe’s with part numbers in the pics:
- (2) Stainless steel washers - 1 large fender washer and 1 smaller washer
- (1) 3/4” 8-32 stainless steel bolt
- (1) 8-32 stainless steel castle nut
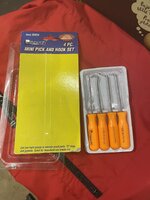
- A small straight pick I got from harbor freight - I picked up this small 4 pack from harbor freight


First you need to detach the shoulder strap webbing from the shoulder straps and cut off the entire lumbar pad and fabric right at the seams.

Now pull off the original hipbelt (it’s just Velcro). Ensure your straps that wrap around the load shelf (3 straps) are tight, and the fabric where the load-lifters attach onto the mainframe is tight to the internal frame as well (this is critical so your so-called load lifters remain functional). Pic to show where the hole is on the crossmember.

Remove the lumbar pad/pocket from the Exo hipbelt, line up the Exo hipbelt and ensure it is centered and level with the pack and apply pressure to secure the Velcro. From the back/load-shelf side, fold up the laser cut panel slightly to access the mainframe’s aluminum cross support, push the pick through the hole in the mainframe cross support and through the fabric/plastic sheet of the mainframe, and finally through the Exo hipbelt.


I chased this with a drill bit to ensure the hole was big enough that I could get the bolt through. This final part is a bit challenging but can be done solo - push the bolt with fender washer through the Exo hipbelt and out thru the mainframe crossmember, then secure with the washer and castle nut (I used loctite as well). Snug it down so the plastic panel that’s sewn into the K4 hipbelt starts to flex and match the curvature of the mainframe crossmember. Install the lumbar pad by flexing the hipbelt so you can wrap the Velcro flaps around the hipbelt.

Then attach the shoulder strap webbing and you’re good to go! You now have 2 shoulder strap options - the original or the K4. I utilized the shoulder strap webbing from the K4 hipbelt, and I’m going to add buckles to the original straps and utilize those as a 4th row to help attach gear with. I think this will solve some of my issues with trying to pack boned out meat - the meat would pack down to the bottom and start squishing out the sides underneath the lowest strap. The original shoulder straps will sit a few inches lower than this.
I’m unsure if an Exo K4 Nalgene holder will fit due to the width of the frame, I think it might with a little tweaking but they are a bit pricey so I opted not to buy one. The slick Exo K4 rifle holder could probably be made to work as well.
Last edited:

