If you’re just coming on,
catch up on my series on building a great backcountry mule deer (and sheep) rifle here:
Part I: Goodbye 7mm Rem. Mag, Hello 270 WSM
Part II: Goodbye 7mm Rem Mag, Hello 270 WSM
Part I: Christensen Arms’ Carbon Summit in 270 WSM
I was back at the range with the Christensen Arms (CA) Summit Carbon Rifle and with only a few days until I had to leave for a high-country mule deer hunt (see that post here: Huntin’ The Pockets- Day 20)

Using my actual chronographed velocity of 3125 fps with the 130 grain Berger Classic Hunter and a 200-yard zero on the main crosshair, the Vortex Long Range Ballistic Calculator (LRBC) predicted my BDC reticle’s hash marks this way:
1st Hash = 293 yds
2nd Hash = 438 yds
3rd Hash = 560 yds
4th Hash = 686 yds
I set up a 4’x4′ target at each of the listed ranges. I was running very low on RL-19 powder and had to limit myself to two-shot groups. This was my first experience with the LRBC and I have to admit I was a little surprised when the groups patterned exactly as Vortex predicted!
I was very happy with the long-range accuracy of the CA Summit Carbon. Keep in mind, this gun is light and consequently harder to steady than a heavy rifle, yet I still saw superb accuracy (for me).
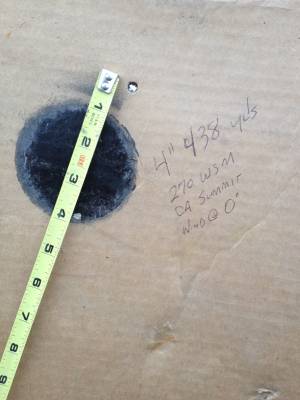
438 yards, 4″ 2-shot Group
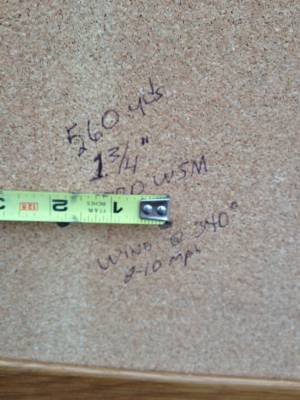
560 yards, 1.75″ 2-shot Group
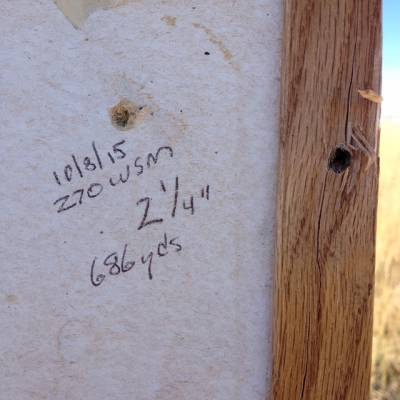
686 yards. Wind was from 90 degrees @ 8-10 mph
I rounded off my yardages to the tens, penned them on the little sticker Vortex supplied, then stuck it to the inside lid of the Butler Creek scope cover. I was ready for the hunt.

I hunted and guided throughout October, carrying the gun about 12 days in that time. I was ecstatic with it’s accuracy and loved packing such a lightweight rifle with magnum performance. The only thing that kept bugging me was the minimal bolt clearance with my Vortex Diamondback HP 3-12x42mm scope.
I found myself having to “think” about clearing the scope with my right pinky when I cycled the bolt. When it comes to big mule deer, seconds count and I was afraid of problems in a tight situation. Embarrassed- and with my hat in my hand- I called Mark Boardman back at Vortex. While I loved the big Diamondback, I needed to see if I could get a smaller eyepiece to increase the bolt/scope clearance.
Mark’s crew promptly grabbed a micrometer and went to work. They said my best option was to switch to the Viper 3-9 x 40mm. Its eyepiece diameter measured 1.57″, 0.12″ less than the Diamondback’s. That should fix the problem. The Viper also weighed 3.8 ounces less so I could gain back some of the weight I had to give to the taller PRI scope mounts I required. Mark had the scope in the mail 2nd day air and it was on my new rifle by the 3rd day. I’d have to carve another range day out to sight in and check my hash marks. The LRBC predicted my hash marks would be the same as I had not changed actual scope height, but I still needed to test them.
I was almost out of RL-19 and had posted on Rokslide’s forum in desperation to see if anyone could spare some. Sure enough, my friend Lath, who’s wife works for Cooper Firearms- another great rifle company- shipped me a pound and refused payment (thanks buddy!) I had enough powder to finish my testing. The weather was breaking from a storm before I had to be to work for the next week.
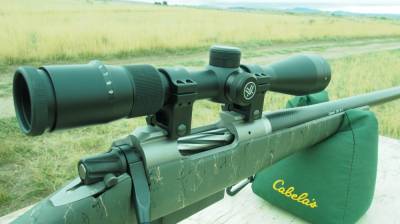
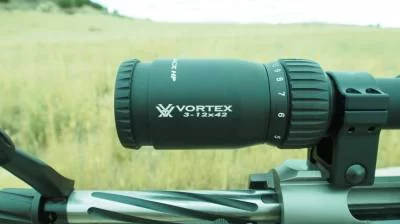
The Vortex Viper (left) saved me 3.8 ounces over the Vortex Diamondback HP (right) at the cost of 3x, 2mm objective, 0.5″ eye-relief and the ability to adjust for parallax (standard on the HP) but the Viper gave me the necessary bolt/scope clearance needed for a fast cycling rifle.
Back at the range, I tested the CA Summit Carbon and found the LRBC was right again: POI hadn’t changed and the groups were still sub MOA! I now had an ultralight sub-MOA gun that could shoot to 700 yards without turrets! (In my 38 years of buck hunting, I’ve never had to shoot beyond 600, so that’s money in the bank).
Even finer, my new set-up tipped the scales at a very light 7 lbs, 3 ozs- a full 9 ozs lighter than my Weatherby, yet still with magnum performance and 7% less recoil than the “heavier” gun. My goal had been to put together the ultimate backcountry mule deer gun- light, fast, accurate to at least 600 yards, and with tolerable recoil in a magnum. The CA Summit Carbon delivered. I was really ready for the mountain this time.
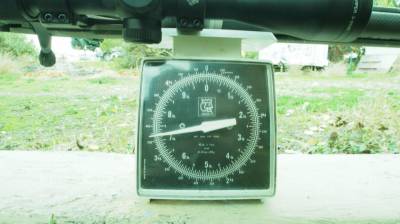
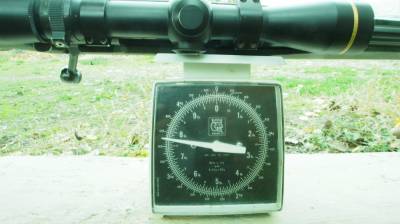
The Summit Carbon tipped the scale at 7lbs, 3 ounces The Weatherby at 7lbs, 12 ounces. Good, but the CA beat it handily
CA Summit Carbon: Notable Features
- Carbon-wrapped Inner Core Steel Barrel
Besides Titanium components, the weight savings comes from CA’s weight-reducing Carbon Barrel Technology. CA was the original in this technology, starting 20 years ago. As their tagline says, “Others Can Only Follow”. The barrel is made up of 30% steel (match-grade 416R stainless steel to a tolerance of +/- .0001.) That inner core is wrapped in carbon-fiber using a proprietary layered design that accounts for the remaining 70%, achieving a balance of lightweight, stiffness, and accuracy. I also noted that the barrel handles heat very well with no POI shift after multiple groups fired (not ready for a new rifle but want a CA Carbon Barrel, upgrade your gun here).
- Muzzle Brake
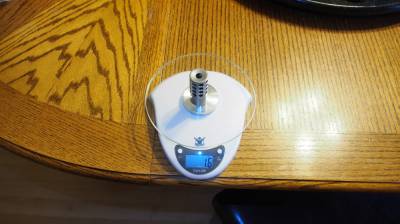
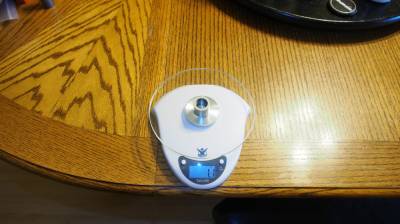
CA offers a Titanium muzzle brake for all the calibers the Summit is offered in (.223 to .375+). Although I chose the 270 WSM and 130 grain Berger Classic Hunter bullets so that I wouldn’t need a muzzle brake, I did test my muzzle brake. I found it did exactly what a good brake does- reduce recoil (I’d estimate my 270 WSM’s felt recoil was in the range of an 8 lb 22.250) and even better, did not change the POI from what the unbraked barrel shot. For my rifle, the brake added a 1.25 inches to OAL and 0.5 ozs over the supplied barrel cap.

- Trigger
I’ve shot many-a-good trigger and the Timney supplied standard on the Summit is among the best. Set at 2.5 lbs, with zero creep, it felt more like 1.5 lbs. I even checked it on my scale as I’d fired prematurely several times the first range session. It was breaking at 2.2 lbs, close to what they said. It took some getting used to.
- Carbon Stock
Available in both Thumbhole and Sporter, I chose the Sporter. Light and stiff, CA Carbon Stocks feature a graphite bed block and glass bedding. They are available in Green w/ Black & tan, Tan w/ Black, Black w/ Grey, Natural Graphite, and Green w/ Black (my choice)
- Drop Box Magazine
I’ve always been leery of detachable mags simply because I’ve experienced a few accidentally eject over the years. The ejector trigger is inside the Summit’s trigger guard and is fairly stiff. In all my range sessions and the 12 days I carried the gun in October, I didn’t experience any problems. While my worries are less, I’d still like more time with the gun to see if a problem arises. The 270 WSM with her fat case and steep shoulder, definitely jump harder into the chamber than a 7mm Rem Mag. So far I did not experience any significant loading or feeding issues over the 75 or so rounds I put through the gun.
I guess the only downside I’ve found so far came to mind as I packed my gear for my November buck hunt. If you think ounce-counting is expensive in the backpacking world, try building a backcountry rifle!
Before I can give my final thoughts on the CA Summit Carbon in 270 WSM, I need to get lined up on a good buck- and that my faithful subscribers is what I intend to do.
Not yet a subscriber? Easy fix. Just “Subscribe to blog” upper right under Fitness/Other so you don’t miss my rut hunt for mule deer posted day-by-day, right here starting tomorrow…
Read about all the techniques I use to find and kill big mule deer in my new book:
Hunting Big Mule Deer, How to Take the Best Buck of Your Life


