 By Jared Bloomgren, Rokslide Prostaff
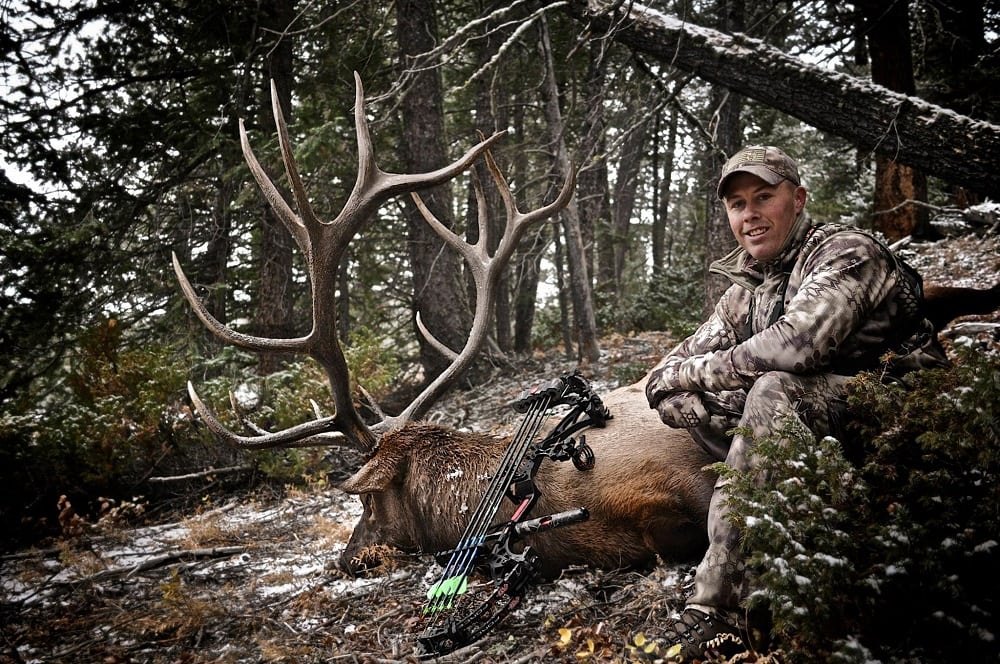
Let’s talk trophy or field photos. What defines a trophy photo? It doesn’t have to be a giant buck or bull to qualify. Every animal is a trophy and each deserves a photo that will go along with the memories that last a lifetime.
I take extreme pride in getting just the right field photo of any animal that I am fortunate to take the life of. When it comes to honoring the animal, it is very important for us as conservationist outdoorsmen and women, to do the honorable thing by taking good quality photos. To me, it’s not just about sharing the photos, it’s more about helping preserve that memory. Each time I look at these photos it blasts me with un-faded memories.
This topic has been covered by numerous facets out there but not quite laid out on Rokslide in an article type submission. We do base a lot of judging of field photos in our various yearly “Best Photo”contests (see Elk and Sheep and Deer) on many of the following criteria. By using these guidelines, it will help you take better trophy photos that will also help fire up those trigger points deep inside your mind each time you look back at the snapshots. Let’s get started!
1. Not smiling
Some just don’t do this regardless of their personality. This is something that I have never quite understood and to me, it takes away from the photo and from the animal. If you are happy of the opportunity you have been given then why not smile? If you are not happy with the opportunity maybe you are doing it for the wrong reason?
I know that all of us have a different demeanor while we take our trophy photos. I know of a couple people who refuse to smile in any of their photos regardless of having a bubbly personality. I have never quite understood that and probably never will. With each animal that I take the life of, there are mixed feelings of emotions. There is a feeling of sadness as well as a feeling of happiness and accomplishment at the same time. I do not take pride in taking the life of another animal but I do take pride in the act of hunting. It can be hard to explain to those that do not understand the act thereof. I am sure many of you can relate.
2. Not honoring the animal
I feel that this can be done in numerous ways. Not just by not showing you are happy but also by comments that you may make in regards to the hunt or to the animal. Here are a few that can really ruin a photo even when the photo is a quality one. It can also ruin the story when you are telling it to others.
-“It’s sure not the one I wanted to shoot. But he will do.” (Then you shouldn’t have shot.)
-“It’s not the biggest animal out there.” (If it was, it would be a world record!)
-“I made the mistake of shooting this one instead of another.” (It happens, don’t cry about it, be happy!)
-“He doesn’t score what I wanted him to.” (If all animals scored what we wanted them to, imagine the beasts that would have been taken over the years! Respect what the animal is and be sure of it before you make that shot. Many get too wrapped up in the “score.”)
3. Tongue hanging out or large amounts of blood and gore
You can take an amazing photo but if the tongue is hanging out it really ruins the photo. This same thing can be said about a large amount of blood and gore present in a photo. Each day we as hunters are targeted by various non-hunting related groups. They search for photos like this and will try to take advantage of us and depict us as savages. They will do their best to exploit the photo. This type of photo only give them fuel and make us look bad. Tuck that tongue in, move away from the gut pile and wipe away what blood you can. Also, there are times when the animal’s nose and mouth may be full of coagulated blood. I have cleaned up an animal before only to find out when I look at the photos that the blood is falling out in the pictures. Those required editing. In these two pictures you can see where the blood was coming out during the photo. It was a great shot and I didn’t catch it until after I was home and offloading the pictures. It required editing to get it cleaned up as in picture #2.


I could have also done a much better job at cleaning the blood from this bull. Although it depicts evidence of a great and effective quartering away shot, it shows too much blood.
4. Sitting on the animal
I cringe each time a see a photo of the hunter sitting on the animal and trying to hold the head up. Even though it may have been a fun photo and the hunter didn’t even think about it at the time, it can really take away from the animal. Find a position that will help you show off the animal and not ride it like a rodeo. Position yourself either closely behind or off to the side of that animal that you are happy at taking. In this photo, although decent, I didn’t like how I was practically lying on the buck.
5. Long arming/sitting too far behind/wide angle lenses
We have all seen many photos where the hunter is trying to make the animal appear bigger by stretching their arms out as far as they can. This often times makes the hunter get the attention because of their goofy and awkward pose. Much can be said about sitting a distance behind the animal as well. Although these can make cool photos, don’t do this to make the animal appear larger than it really is. It’s fine to take these kind of photos but back them up with photos of you next to the animal as well.


In this picture from the 90’s, I show myself evidently stretching out to try and make this massive buck look bigger and it wasn’t needed. I still laugh at my presentation with my “long arming” technique. It definitely could have been a much better picture!

Wide angle lenses have also become a big deal lately it seems. They make width look much greater in the spread of the antlers or horns. Forced perspective is an easy-to-use optical illusion that makes objects appear larger based on their position in the frame relative to other objects. Don’t get me wrong, the pictures can look really cool but don’t do it to make your animal be what it really is not.
6. Over-editing photos
Editing is another aspect in the game that has allowed us to really touch up our photos to make them the best looking that we possibly can. You can use these various programs to edit blood out of pictures which is great! But don’t take it too far and make the photo unrealistic with a grainy appearance, unrealistic colors, a hue around the animal or person, etc…The fakeness again takes away from what is really going on. The more natural the better. Editing the brightness, warmth or ambiance can really make the photo better but too much makes it look terrible.
7. Background
Always be cognizant of the background in which you take your photos. Stay away from pictures of the animal in back of the pickup bed, on the ATV, or hanging in the shop or garage; or worse yet, just a photo of the severed head with the tongue hanging out and vast amounts of blood!! Remember, the anti-hunters are watching. The best photos are those with a great background and that are realistic. At the same time don’t go to extreme measures to pose that animal in a location it obviously wasn’t killed either. The background may be awesome but the realistic aspect is now out the picture!
8. Show the animal
Clear away anything that may hide the animal, particularly the head. Clear brush, grass or anything that is in the way in order to get a good picture of the animal. If that is hard to do, try and prop the animal’s head up and above the growth in order to get a better aspect of that animal. Always be sure there isn’t that one or two pesky blades of grass sneaking in to the picture as well. When these are between the camera and the main focal point of the picture, it can really ruin a good shot. I could have done a much better job clearing the grass from these two pictures.


Also be sure to clean the animal of more than just blood. Clean away non-natural dirt, mud and debris. Much like in this photo, I was irritated that I missed the frozen dirt that was stuck to his third point nearest the camera. Although minor, it bugs me and takes away from the animal.

9. Clothing options
Each time I see an animal taken by a hunter in street clothes, it makes me wonder how the hunt really went down. Sure you don’t need the latest and greatest camo to take animals but…I will never forget one such photo (I wish I could find it) of a guy who killed an enormous mule deer. He looked like he was just heading out on a hot date. His hair was all fixed, fancy polo shirt, blue jeans and white high tops! Something definitely wasn’t right about that photo! How and where did he really kill that beast? The local neighborhood or zoo?!
10. Weapon presentation
This is something you see generally with animals that have a good deal of width or thickness. It seems to be a connection and the rifle or bow ends up stretched across the antlers like a weapon rack back at the cabin. To each their own I guess, but I think it is tacky. I do think that showing the weapon in which you took that animal is very important, though, as most people like to see what you were using. Present the weapon clearly and show it off!
11. Take pictures as soon as you can after the kill
I understand that this isn’t always an option. Taking photos right away after you find the animal is the best. Sometimes it takes time to find an animal and rigor mortis has already set in. Do your best to get that animal to pose as natural as possible. Also, wetting the animal’s nose and eyes with water can help bring back a bit of “life” as well. The photos of the animal splayed out like superman always make me giggle, and of course, take away from the animal again. Many times, these pictures can be seen in the front lawn at home. Again, not natural background.
12. Teaser photos
Sure, it’s fun to post just a tine or a base as a tease, and I have been just as guilty as most. But these really have become more of an annoyance than just showing the whole animal right away. It’s “popularity” has been wore out and people now just really want to see the “real deal.” It has become annoying, but I know it will continue! Ha!
I also print off my best photos each year and add them to my photo album. I like having more than just digital pictures that are easy for others to look at while at the house.
There are things I like to keep in my pack to help when it comes to taking pictures:
-Water and toilet paper for wiping blood; both of these items come in handy and should be with you anyway. I not only use the water to clean the blood away but also use it to wet the eyes and nose of the animal, making the animal look better.
-A good camera with remote control or timer option if alone. I take hundreds of photos of each animal and often times, I will only find three or four that are the “money-shot.” Take as many varying angles of the animal with various poses. When I have forgotten my remote control to trigger pictures and had to use the timer, it felt like I put on a couple miles running between the animal and the camera hitting the button! It also stirs dust that the flash can pick up and reflect spots into the photo. A remote, or longer timer duration, and stepping softly can eliminate this.
-Tripod for the camera. A must especially when alone. I have had to pile up rocks or branches before when I didn’t have one along with me. That is always a pain and hard to get the angles that you want.
We each owe it to the animal and to the story that we will be telling others about. Sharing memories of the hunt is what we most often do with others. Why not have the best pictures possible to support and back up the story? Trophy photos are what you make of them. Put in the extra time. You will be glad that you did!
You can ask Jared questions or discuss this article here.


