DIY Kifaru Tut Tipi!

Ctalboom

FNG
Joined
Feb 26, 2013
Messages
21
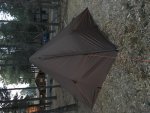
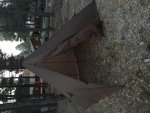
So I have wanted a Kifaru Tipi for 6 years now and finally decided to make my own with some tips from this forum and a few others. I designed pretty much a replica of the Kifaru Tut in Sketchup. (Sketchup is crazy easy and you should use it. Took Ten minutes to scale the tipi to the exact size I wanted and find all my cuts).

All material is from Ripstop by the Roll. I went with their 1.1 oz silnylon which is actually a 1.24oz after it is coated. The cone and reinforcement points are the HyperD 300 Ripstop. The tie outs are grosgrain.

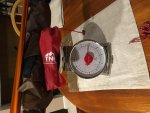
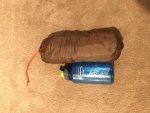
The tipi, 12 msr groundhog stakes, and the center pole all together weigh 3lbs 5oz. I had a different pole but was barely too short that brought the full weight to 2lbs 12oz.

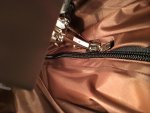
I've never sewed anything in my life and it honestly was not that difficult, took me 4 evenings of 4-5 hours an evening. This thing is seriously amazing- no idea why I waited so long! I also bought an 18" cylinder stove from Lite Outdoors and it is badass! IMG_2479.jpg
IMG_2482.jpg

IMG_2480.jpg

IMG_2468.jpg

IMG_2466.jpg

Also made the stuff sack and two of the sleeping mats for inside. The mats are made of the HyperD 300 Ripstop.
 
Last edited:
OP
C

Ctalboom

FNG
Joined
Feb 26, 2013
Messages
21
Apparently I'm an idiot and can't figure out the pics. But anyways I posted a few more in the original post. The dimensions are 6'9" tall in the center, the sides are square and 8' by 8'. I pretty much replicated the tut but used Sketchup to find the lengths of the triangles etc.
 
OP
C

Ctalboom

FNG
Joined
Feb 26, 2013
Messages
21
View attachment 43901

View attachment 43902

The sleeping mats have grosgrain tie outs on the corners so they can be staked in to the ground to avoid sliding around.

IMG_2483.jpg

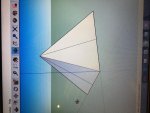
The model I made in Sketchup.

IMG_2475.jpg

Weight with the smaller pole.

IMG_2441.jpg

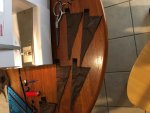
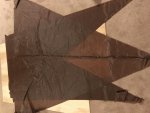
Cutting the triangles and lining them up with binder clips, binder clips are your friend! Use as many as possible! Next big project will be a 12-16 man tipi I'm thinking.
 
Last edited:

Felix40

WKR
Joined
Jul 27, 2015
Messages
1,932
Location
New Mexico
Looks awesome. A 12-16 man will be a big undertaking. Definitely worth it in the money saved though!
 

Hall256

WKR
Joined
Nov 12, 2016
Messages
359
Location
Virginia
So I have wanted a Kifaru Tipi for 6 years now and finally decided to make my own with some tips from this forum and a few others. I designed pretty much a replica of the Kifaru Tut in Sketchup. (Sketchup is crazy easy and you should use it. Took Ten minutes to scale the tipi to the exact size I wanted and find all my cuts).

All material is from Ripstop by the Roll. I went with their 1.1 oz silnylon which is actually a 1.24oz after it is coated. The cone and reinforcement points are the HyperD 300 Ripstop. The tie outs are grosgrain.

The tipi, 12 msr groundhog stakes, and the center pole all together weigh 3lbs 5oz. I had a different pole but was barely too short that brought the full weight to 2lbs 12oz.

I've never sewed anything in my life and it honestly was not that difficult, took me 4 evenings of 4-5 hours an evening. This thing is seriously amazing- no idea why I waited so long! I also bought an 18" cylinder stove from Lite Outdoors and it is badass! View attachment 43892
View attachment 43895

View attachment 43896

View attachment 43898

View attachment 43899

Also made the stuff sack and two of the sleeping mats for inside. The mats are made of the HyperD 300 Ripstop.

That looks pretty good, I am not sure if I would have the skill to pull it off. A question though, how much did all the materials cost you? I am assuming the savings were quite substantial if you are thinking of doing a larger tipi.
 

450

Lil-Rokslider
Joined
Mar 1, 2015
Messages
162
Sketchup file would be nice, if you still have it.
 
OP
C

Ctalboom

FNG
Joined
Feb 26, 2013
Messages
21
I honestly haven't looked at how to share the file but I'll draw something up with the dimensions written on it. Super simple design. Hall 256- I am into it about $150, from Kifaru it is $650. So definitely a substantial savings.

The large tipi is going to be brutal but I gained a ton of confidence after doing the Tut. Honestly was not that bad. There are some other guys on here with more skills than myself that have said the same thing. Just some patience and a mind that functions in 3D is all you really need.

I used my wifes Bernina 131 sewing machine, apparently it is pretty high end but I know nothing about that aspect. It was flawless and made me feel like I knew what I was doing even though I probably still don't haha.
 
OP
C

Ctalboom

FNG
Joined
Feb 26, 2013
Messages
21
Nice job Ctalboom!

What seam did you use on the sides? Did you seal them?

Sent from my LG-V495 using Tapatalk

Thank you! The seams on the sides of the tipi are all flat felled seams. The bottom edges that touch the ground are a a triple rolled hem. The tie outs on the bottom third of the tipi are also flat felled into the middle of the seam that make up the sides of the tipi. I haven't seamed sealed it yet since I just finished it last night. I'll do it tomorrow with a thinned silicone sealant brushed on.
 
Top