FoodSaver GameSaver Deluxe
by Becca Moffat
Many of our friends have big, commercial sized vacuum sealers at home. Although they seemed handy, I was always reluctant to purchase one based on size and cost. Sure, I could see how it would be handy to vacuum seal our own meat and fish at home, but at around $1000 and the size of a small chest freezer, it seemed like an awfully big commitment. I had heard about the tabletop sealers from companies like FoodSaver and Seal-A-Meal, but wasn’t sure how much I would actually use one. Luke purchased our FoodSaver GameSaver Deluxe as a gift for me at Christmas two years ago, and I don’t know how I ever survived without it! The ability to vacuum seal in both bags, jars, or canisters has truly revolutionized the way I buy, cook and store food products. Since I began using our FoodSaver I have yet to throw away a single thing due to freezer burn, and some of our leftovers I have defrosted and eaten up to 6 months after packaging!
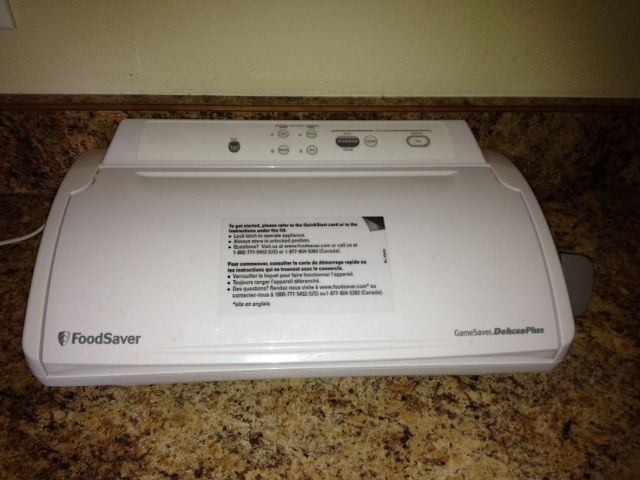
The GameSaver Deluxe model features a built in roll holder and cutter, as well as an easy to clean drip tray. It also features two modes of vacuum control (fast/moist and normal/dry), which means I can even vacuum seal liquids like soup or stew.
Since I am eating alone the two weeks that Luke is at work every month, and also because we are on the go a lot when he is at home, I find myself using our FoodSaver on almost a daily basis. In an effort to eat healthier and maximize our use of game meats I completely stopped buying prepackaged microwave meals like Lean Cuisines, and instead vacuum seal single serving portions of leftovers to take for lunch at work or eat for dinner on nights when we are busy. At any given time, we have in the freezer single serving portions of caribou chili, goat meatloaf with roasted broccoli and cauliflower, Moose roast with mashed potatoes and gravy, sheep curry over rice…you get the picture. To pack my lunch I simply grab a FoodSaver bag out of the freezer along with a microwave safe container and go!
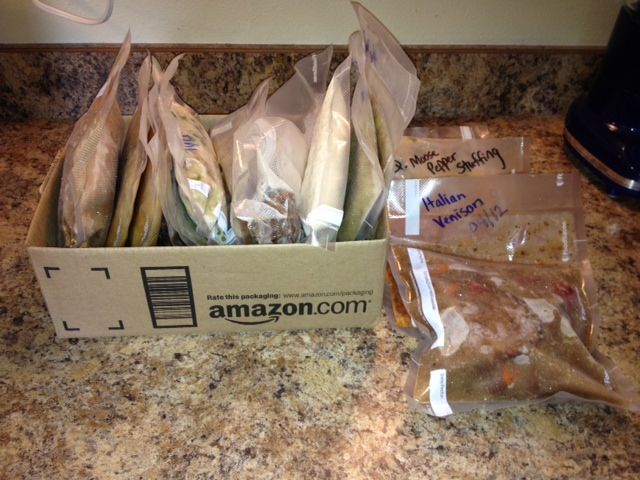
When I am planning meals for trips either to our cabin, or where I will have access to a cooler, I often freeze meals in larger quantities. When we have been out all day hiking, biking or riding snow machines or ATVs it is so great to have dinner prepared already and just warm it up! (It really cuts down on dishes too). Meals can be warmed in the microwave, or heated on the stove by boiling the whole bag in hot water. Fajitas, soups, pulled pot roast with BBQ sauce, stroganoff, spaghetti sauce with meatballs…all of these are items we have successfully frozen and reheated after packaging with our FoodSaver.
The one circumstance where I think we might be better served with a larger, more commercial style sealer is when batch processing large quantities at the same time.
Last summer we processed and vacuum sealed 100 lbs of halibut fillets, and while the GameSaver Deluxe got the job done, it was pretty time consuming since we could only vacuum and seal one package at a time. Also, we did have the device shut down once about half way through due to overheating of the sealing strip, but it only needed to cool for about five minutes before it was good to go again. I suspect a commercial style sealer could have processed our halibut faster, but since we typically have our large batches of game meat processed and wrapped at our local game meat shop, I don’t imagine our household would use a commercial sealer enough to justify the wasted space or expense.
Optional Accessories:
Since the GameSaver Deluxe model features the accessory port and hose, I have been able to invest in several of the optional accessories, all of which I have been very happy with.
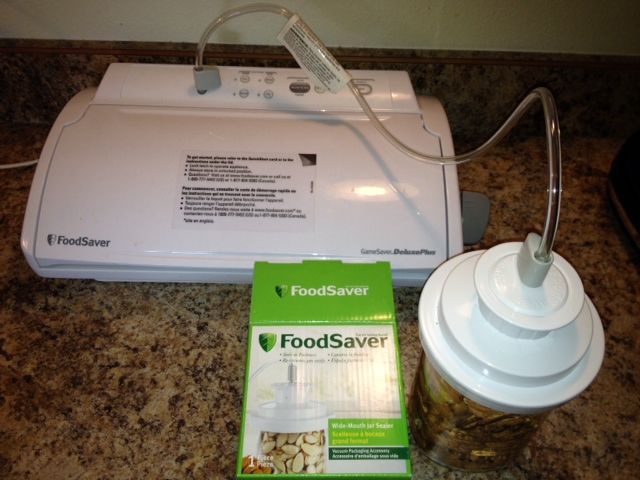
The first is the wide mouth jar sealer (also available in regular mouth). Any item I can put into a wide mouth mason jar (of any size) I can now vacuum seal to ensure freshness. Since we do a lot of bulk shopping at Costco, this has really been handy. I routinely vacuum seal ground coffee, nuts and even cereal into quart size jars to preserve their freshness over time. I just pour the product in, affix the lid, place the lid sealer over the lid and then press the “canister” button on my FoodSaver, and I can hear the air being sucked out. You can tell the contents are well sealed, as it takes quite a bit of elbow grease to get the lids off the jars once they have been sealed. I can easily take out single portions from jars as needed, and just reseal to ensure my dry goods will still be fresh the next time I need them.
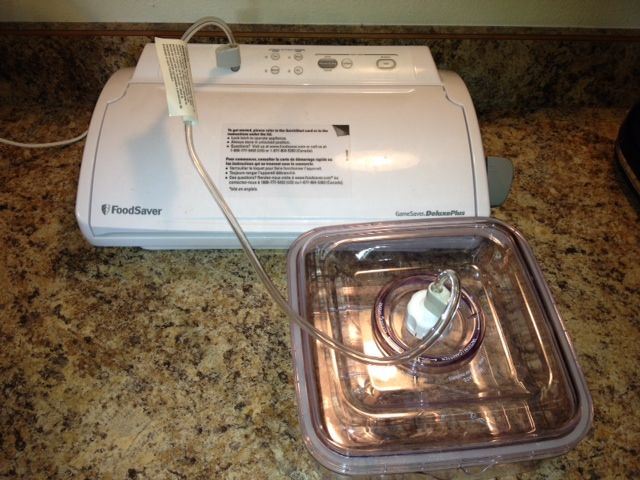
The other accessory that I use quite a bit is the quick marinator. Our life tends to be rather spur of the moment, which often means I don’t decide what I am making for dinner until we start to get hungry. The quick marinator allows me instill flavors to meat, fish, or poultry (which we eat very rarely, since we aren’t much into fowl hunting and we have so much other bounty to feed us) in 15 to 30 minutes, instead of having to marinate overnight or all day. I just put the steaks, or cubes of meat, or fillets, etc. into the marinator, pour my marinade over and then seal using the accessory hose. Sometimes I will open the marinator half way thru the marination time to turn the meat, and then reseal to make sure things are really coated. We have been unable to tell the difference between teriyaki moose steaks marinated 15 minutes in the quick marinator versus overnight in ziploc bags in the fridge. Plus the risk of spillage is much less.
While I know there is a good selection of more commercial style vacuum sealers, and while they work great, they are a lot bigger and more expensive (usually around $1000 or more). Also the commercial sealers usually don’t have the option to use accessories like the lid sealer and quick marinator. At around $150, the FoodSaver GameSaver Deluxe is affordable, takes up minimal space on my kitchen counter, and reliably vacuums and seals all kinds of products for longer term storage. For household use on a near daily basis, the GameSaver Deluxe by FoodSaver is really a great option.


