I covered selecting a gun/caliber, energy requirements, selecting a peep and bullets in Part I and Part II.
For this post, let’s select our powder, cover an accurate loading procedure, and install a scope for load development and/or hunting states that allow them. Then let’s test the Vortex Razor HD LH 1.5-8×32 and Knight Mountaineer to 300 yards.
Powder Selection
We can make this hard or make it simple- I like simple. There are probably 50 or more choices in this category- from brands to pellets to granular to size of grain. I’ve learned that this is the stuff that makes muzzleloading intimidating to some guys. I’ve also learned that too often we’re majoring in the minors if we spend too much time fiddling around with powder choices. So, for the sake of keeping this efficient, in my experience you have two choices in powders, and both will serve you well
First, I like granular powder over pellets. It’s legal everywhere, you can choose smaller increments when developing your load, and I don’t think it takes much longer to load granular over pellets (especially considering you really need to make your first shot count with a muzzleloader anyway- isn’t that the whole idea!) I find that the hunters insisting on the convenience of pellets too often leave accuracy in third place with velocity and convenience in 2nd and 1st place. In my book, it’s unconvenient to miss at high velocity, so I put accuracy first. If you’re lucky enough to have an accurate load (2 inches at 100 yards or less) with pellets, then by all means use them. For the rest of us, let’s take pellets off the table.

Triple 7 is a good black powder substitute- it burns clean enough and I’ve shot incredible groups with it. FFG will ignite just fine in a good muzzleloader using #11, musketcaps (my choice when required) or 209 shotshell primers (if allowed, use them!) You do have to run a spit-patch between shots to keep your loading consistent, but that’s the case with all powders I know of, except one…

Blackhorn 209 This stuff hit the market around the turn of the decade and is probably the greatest advancement in muzzleloading since 209 primers were adapted to the sport. It requires a 209 primer to ignite it, so really it’s only useful in states that allow them.
Besides producing higher velocities than black powder and the substitutes, it burns way cleaner. So clean, you don’t even need a spit patch (in fact, never use a spit patch- Blackhorn 209 is not made to be mixed with water and you’ll have a mess on your hands). This saves you a step in the loading procedure and the good Lord forbid that if you ever need a follow-up shot, you just saved yourself 10 seconds. It cleans up easily with Blackhorn 209 Solvent. Don’t forget about your breechplug, see here for cleaning that important component.
If you’re hunting a state that allows a scope, it’s Blackhorn 209 you’ll want pushing that bullet out there. The extra velocity will get you to the 300-yard mark with energy to spare.
Loading Procedure
Just like centerfire rifles, you have to pay attention to your load. Clean barrel vs. fouled, primer, powder charge, bullet, and seating depth all make a difference.
First, start with a clean gun. Muzzleloaders are dirty and most guys either neglect their guns or just don’t clean them right (that was me in the beginning). I won’t go into cleaning procedure as it’s been covered by the experts for years, but suffice it to say, when you pull the breech plug out of your gun and shine a light down from the muzzle, it should look like a mirror in there. If it doesn’t, clean the gun until it does!
Once at the range, use a shooting journal to track every shot. Each gun will have a personality and you’ll likely find a sweet spot in your shot order where accuracy is the best. My old Khanke shot best under 10 rounds whereas my Knight .45 gets more accurate after about five shots.
Put accuracy over velocity. In many years of shooting muzzleloaders, I’ve found the best accuracy occurs in the 90 to 120 grain (by volume) range. Yet everytime I get an email from a rookie muzzleloader hunter, he’s perplexed why he can’t hit a pumpkin at 100 yards with 150 grains of pelletized powder. After all, the gun was advertised to shoot 150 grains! It will, but very seldom is that where your most accurate loads are. So start at 90 grains and go up in 10 grain increments. When you see a sweet spot, trying varying plus/minus five grains until you find what your looking for: Two-shot, sub 2″ groups at 100 yards. Since we’re going to be shooting out to 300 yards, this ensures your groups are smaller than the vital of a big mule deer buck with room to spare.
I recommend only shooting two-shot groups. In the real world of muzzleloading, your odds of ever getting off more than two shots is very low (and if you do, accuracy might start to suffer from barrel heating anyway.) Muzzloading is a slow process and sticking to two-shot groups saves time and money (good muzz bullets are not cheap.)
This short video will cover the entire loading procedure I use for the best accuracy:
Load Development- Use a Scope!
As I said when I started this series, we’re building an extended range muzzleloader for hunting big mule deer everywhere they live. This means a gun that can be switched between peep sights and scope easily (there’s not a lot of time between draw dates and the early fall muzzleloader hunts and you need to be scouting then, not fiddling with a muzzleloader.) So buy your scope now. Even if you’re not hunting a state now that allows them, you’ll need the scope for your load development. When you draw a tag that allows scopes, just pull it out of the drawer and replace your peep. With the system I recommended in Part II, you’ll be very close to zero when switching back and forth.
Using a scope for load development takes one more variable out of the equation and in my experience, saves time. Once you’ve got a sub-2-inch-at-100 yard group, you can pull the scope and sight your peep. Make sure your scope is installed level for the best accuracy out to 300 yards.
I’m using and recommend the Vortex Razor 1.5-8×32 HD LH scope featuring the G4 BDC reticle for this project:

It’s a scope built for centerfires and muzzleloaders (Rokslide writer Jared Bloomgren just reviewed the 3-15×42 version of this line here). The 1.5-8×32 Vortex Razor is the perfect balance in weight and size at 13.4 ozs. and 11 inches respectively (we don’t need an overweight scope for shooting to 300 yards). It’s clarity is great and after many years of hunting with sub-40mm objectives, I’m not worried about light transmission as it’s a fair trade-off for weight savings. If the LH HD line is too expensive, I’ve loved this scope, Vortex Viper 3-9×40, on my .270 WSM. It’s half the price and should work well on your muzzleloader.
Muzzleloaders are particularly suited to the Vortex BDC reticle system. With the exaggerated arc trajectory of a muzzleloader, hash marks make all the difference in making accurate shots. The five hash marks (subtensions in engineer talk) of Vortex’s G4 reticle are viewed in a clear, simple sight picture. With some practice, you’ll be able to calculate holdover in mere seconds (and mere seconds count in the world of hunting big mule deer.) You don’t need to dial turrets for shooting to 300 yards (or even 600 yards- see why I prefer hash marks over turrets for all rifles for hunting big mule deer here). There’s a video on sighting this scope and it’s performance to 300 yards below.

The Vortex Razor HD LH 1.5-8×32: good performing, lightweight medicine for shooting muzzleloaders to 300 yards
At The Range
A few tips for your first trip to the range:
1) Muzzleloading takes time. I don’t recommend using a busy public gun range where you need to stay in sync with other shooters. Alone in the desert has been the best for me.
2) Use 3’x4′ or 4’x4′ cardboard targets secured to lightweight posts with zip ties for shooting beyond 100 yards. I collect big boxes and make my own. You need a margin of error when working with the arc of a muzzleloader bullet.
3) Shoot early in the day- close to sunrise- and consider that the wind affects muzzleloader bullets more than centerfire (more surface area, lower B.C., and slower velocities). Keep your powder, bullets, and primers shaded. Direct sunlight affects them more than you might think.
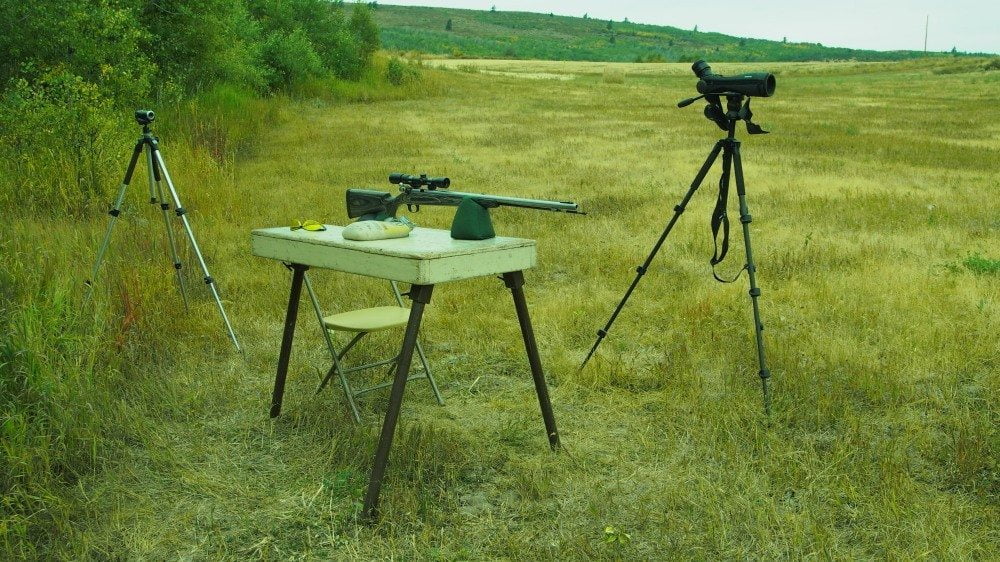
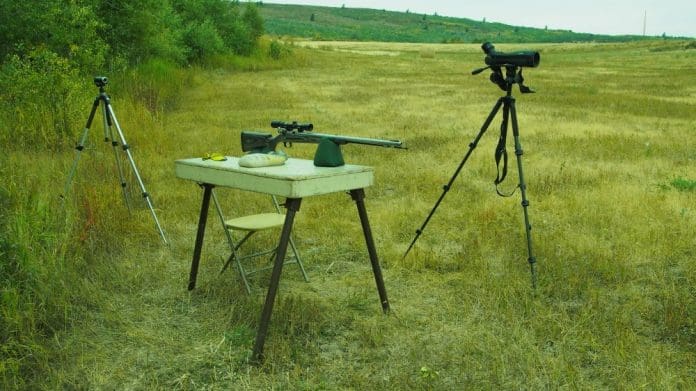
4) Use shooting bags like those shown in the video and lead photo. Don’t touch the forearm or the barrel of the gun- just the front bag. Get a consistent and good cheek weld. Muzzleloader bullets are in the barrel longer than centerfire bullets and your gun needs to recoil the same shot-to-shot for the best accuracy.
5) When developing your load, wait five minutes between shots, especially with sabots which can be melted while sitting in a hot barrel. My friend Cecil Epp waits 15 minutes between shots. He’s more patient than me (and shoots better groups.)
6) To save a trip to the range, estimate your velocity using prbullets.com Ballistics Tables here then you’ll be able to more accurately use Vortex’s Ballistic Calculator, LRBC, to estimate where your hash marks will put a bullet, and where to set up your range targets.
Once you’ve reviewed the “Loading Procedure” video above and developed your accurate load, you’re ready for this next video, “Shooting to 300 yards, Muzzleloader Style”. The load I settled on was 100 grains of Blackhorn 209 behind a 240 grain Precision Rifle Dead Center Conical that clocked in at an average of 2125 fps, and printed 1.25″ groups at 100 yards:
Next post, we’ll take a look at shooting to 200 yards with the XS peep reviewed in Part II.
See part IV here

To learn about the gear and tactics I use, check out my book, Hunting Big Mule Deer








Robby,
What scope rings are you running? Are they quick detach Talley’s? I can’t tell. Thanks…
Brock, they are Weaver rings, non-quick detach, but just a turn of a screwdriver to get them off. Kinda old, but going strong. I’d suggest a quick release system if you know one that functions well.
Comments are closed.