Stove Jack Installation!

Becca

Super Moderator
Staff member
Joined
Feb 26, 2012
Messages
2,037
Location
Wasilla, Alaska
So after years of begging and encouragement by Luke, I finally sewed my own stove jack into a tent today! While I have been sewing for a number of years, my skills are fairly basic and the thought of potentially ruining a good tent had me intimidated. Today I got brave and finally attempted to sew one in on my own instead of paying someone else to do it...while there are some real challenges in sewing with silnylon, I think it turned out ok....


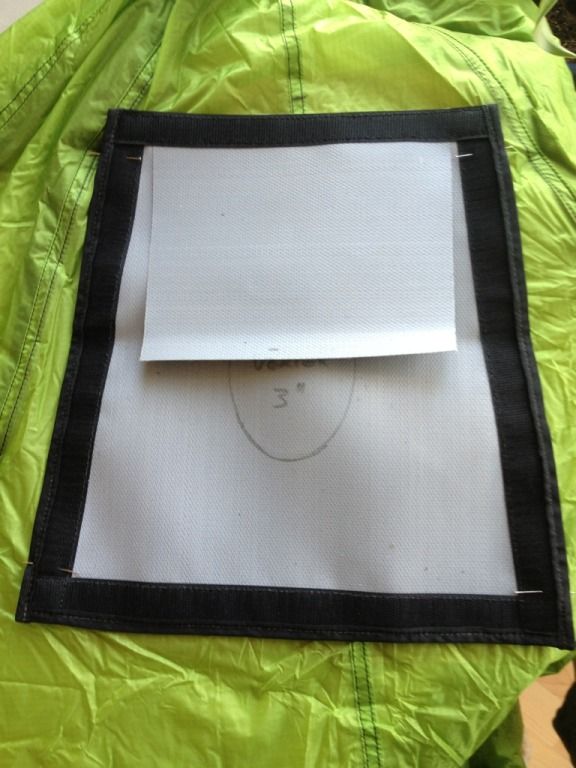
One of the biggest issues in sewing with silnylon is that it's slippery and you don't want to poke too many holes in it using pins the way you would traditionally in sewing. I compromised and used four pins, because I couldn't figure how I would hold the jack in place while sewing it without them and because I planned to seam seal it anyway and figured four more pin holes wouldn't be the end of the world.
10A34661-7A80-46F6-A436-B645E6587B58-5117-00000250887011FA_zpsd898f93c.jpg


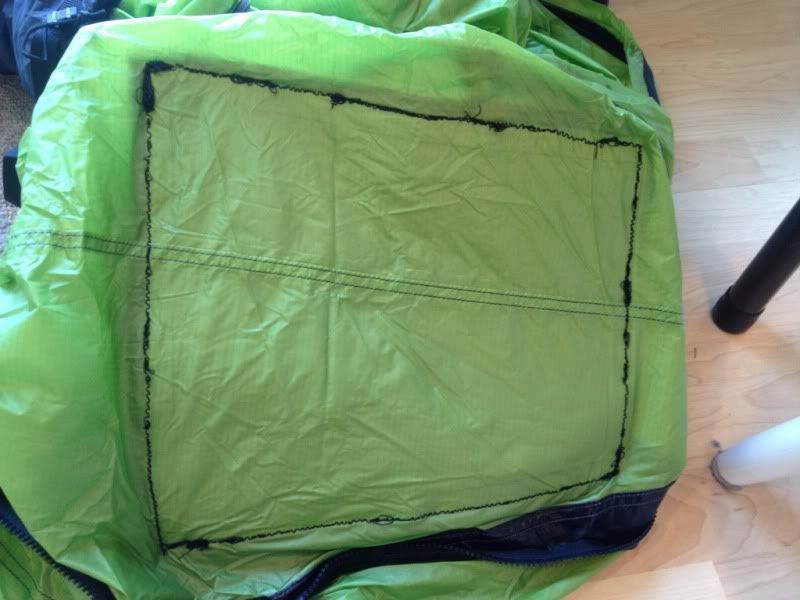
My sewing machine was not thrilled with sewing through the thickness of the jack and Velcro, but it chugged on through and got the job done. Another challenge was in moving the whole rest of the tent around while I was sewing around corners. Luke was a great helper, and worked to keep the main body of the tent out of the way, preventing me from accidentally sewing any parts of the tent together inadvertently. We realized afterwards that the tension on the bobbin was not quite right, so the inside seam isn't very pretty! The error in tension doesn't seem to have affected the tensile strength at all, so we let it ride.
2DD3870F-6B58-4F09-956C-845C1C1D89F1-5117-0000025082B6514C_zpsad2b41b8.jpg


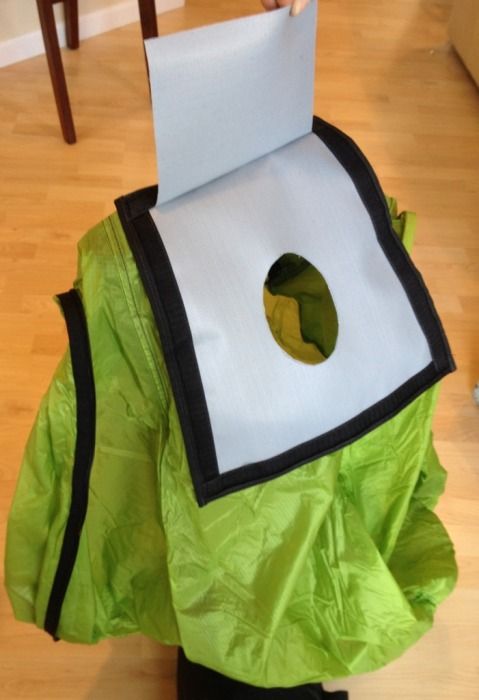
Probably the most nerve wracking part was actually taking scissors to a brand new tent to cut the hole...
0BA64BA6-8F30-4046-9E48-71334DE59999-5117-000002507D054439_zpsac705760.jpg


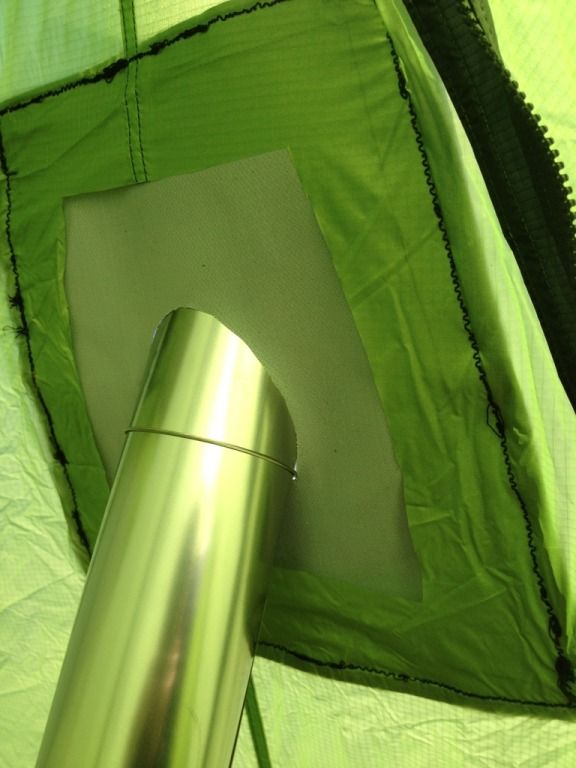
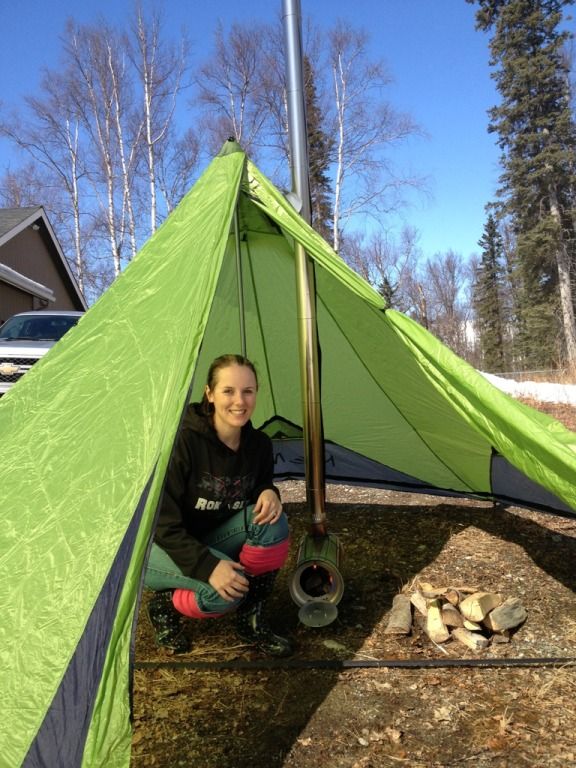
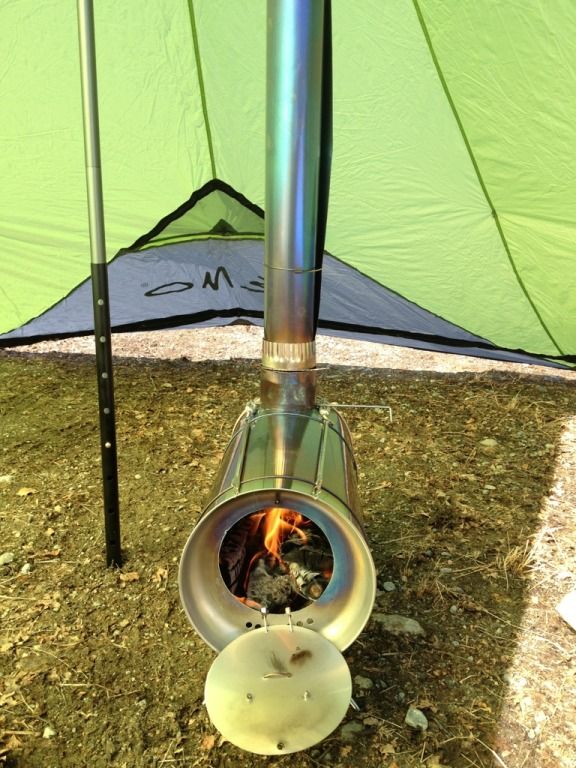
Set it up in the yard to do the first burn on the new stove, and also to do some seam sealing. I was liberal in sealing the seams around the jack....

2B292BF3-DFAD-4D63-BB46-F6299B779328-5117-0000025041334986_zpsadf8703a.jpg


Pretty pleased with how it came out, can't wait to get this set up out in the field for a real test!
5E4EBFB1-5EF9-4A3E-893E-37F8D26978D3-5117-00000250092341E9_zps1650e634.jpg


EF5516AF-7C86-410E-943F-4847F60B9BB7-5117-0000024FFB48A63B_zps0c99767a.jpg
 
OP
Becca

Becca

Super Moderator
Staff member
Joined
Feb 26, 2012
Messages
2,037
Location
Wasilla, Alaska
Thanks guys!


Looks good!

What tent is that?

It's our new Nemo Pentalite 4 we just recieved....it's heavier than our SL5 (something like 52 oz before the jack I think) but its also a little larger at 97 square feet. The five sided design seems a little better suited to a stove, at least at first glance. Figured we could afford the extra weight on trips where we hauled the stove along anyway... Excited to get it out for a real test now that the jack is installed and its seam sealed.
 

MIKEYB

WKR
Joined
Aug 29, 2012
Messages
312
Looks really good becca. I just got one of these yesterday and I'm looking to do the same. I actually pm'd luke about this and the sl-5 recently. I'll post some questions that I have a little latter. I'm a little short on time and I'm celebrating the three tags I just drew in NM.
 
OP
Becca

Becca

Super Moderator
Staff member
Joined
Feb 26, 2012
Messages
2,037
Location
Wasilla, Alaska
Where do you guys get those stove jacks at? I'm interested in trying this on one of my tents

The one I installed was from TI Goat, but couesbitten is correct they are available lots of places. I think we have previously used jacks from seek outside, but those were jacks installed by the company before we recieved the shelter.

I encourage anyone interested in installing one to do a google search. I found quite a bit of info available, as well as plenty if videos....
 

Bighub1

Lil-Rokslider
Joined
Dec 23, 2012
Messages
106
Looks great! You are more courageous than I. Do you plan on using a nest with this setup? If so, which one? Thanks
 
OP
Becca

Becca

Super Moderator
Staff member
Joined
Feb 26, 2012
Messages
2,037
Location
Wasilla, Alaska
Looks great! You are more courageous than I. Do you plan on using a nest with this setup? If so, which one? Thanks

Luke and I will likely use the MLD duomid we already use in our SL5, just to enclose our sleeping area. Otherwise we like keeping the majority of the square footage floorless while still having an enclose and bug proof area for sleeping.

Nemo does make a nest specifically for this tent, I believe it's called the Wedge but its heavier than what we already have and covers more the floor space than we are interested in.
 

Manosteel

WKR
Joined
Jan 24, 2013
Messages
1,391
Location
Alberta, Canada
That looks excellent. Must have been an adventure having to keep readjusting the whole tent around anytime you needed to make a 90 degree turn. just feeding that much material through and around the sewing achine must have been awkward. Did you use fabric glue along with the pins to keep the stove jack in place?
 
OP
Becca

Becca

Super Moderator
Staff member
Joined
Feb 26, 2012
Messages
2,037
Location
Wasilla, Alaska
That looks excellent. Must have been an adventure having to keep readjusting the whole tent around anytime you needed to make a 90 degree turn. just feeding that much material through and around the sewing achine must have been awkward. Did you use fabric glue along with the pins to keep the stove jack in place?

Maneuvering the tent around corners was indeed the worst part! We stuffed the lower 2/3 of it back into the stuff bag, and then Luke kept track of the excess while I did the sewing. At each corner we had to stop and figure out what we were going to do to get the thing turned. I only used the four pins, as we didn't have any fabric glue at home...didn't have too much trouble keeping the jack in place with the corners pinned only, but I bet the glue would have been easier.
 

MIKEYB

WKR
Joined
Aug 29, 2012
Messages
312
Did you seem seal the whole tent? Or did you just seam seal the jack?
 
OP
Becca

Becca

Super Moderator
Staff member
Joined
Feb 26, 2012
Messages
2,037
Location
Wasilla, Alaska
Did you seem seal the whole tent? Or did you just seam seal the jack?

We did the whole tent, as is our standard these days. Many shelters claim to be seam taped from the factory, but after several long nights with steady drips we just seal them all before we take them into the field. I was especially liberal with the sealing around the stove jack, both the seams i put in and over the pin holes I made placing the four pins to secure the jack in place for sewing.
 

luke moffat

Super Moderator
Joined
Feb 24, 2012
Messages
115
Mike,

If we take the time to stake out the tent, you better believe we are seam sealing every seam, not just the stove jack. :D
 

Rockchuck

WKR
Joined
Mar 26, 2012
Messages
344
Looks great! I am in the research stage for a stove jack to sew into my newly acquired sl5. Looks like fun!
 

MIKEYB

WKR
Joined
Aug 29, 2012
Messages
312
If figured you guys did the whole thing. I was inspecting mine and wondered if i should seems seal it all up. The tape on it looked to be done well. But I have experienced tape separating over time with a lot of rolling and folding. The tent in question was a far cheaper make though. Gives me a good reason to set it up.

What about stove placement? When I get around to getting and installing a stove in I was considering the other side of the pole to get it out of the way of the door and entry. What do you think? All personal preference?
 
OP
Becca

Becca

Super Moderator
Staff member
Joined
Feb 26, 2012
Messages
2,037
Location
Wasilla, Alaska
I figured you guys did the whole thing. I was inspecting mine and wondered if i should seems seal it all up. The tape on it looked to be done well. But I have experienced tape separating over time with a lot of rolling and folding. The tent in question was a far cheaper make though. Gives me a good reason to set it up.

Most of the time it won't be an issue and the seam tape will work as advertised. Occasionally you will end up with a spot that leaks...we found ourselves with a pretty decent drip in our SL5 at the place where one of the internal loops (for attaching the optional nest) was sewn into the seam. Doesn't seem like a big deal, but in a heavy downpour it became a steady drip right over our sleeping area. We noticed it on night 3 of an 8 night trek, and spent the rest of the trip trying to divert the water and keep ourselves and our sleeping bags dry. Just easier to seam seal the whole thing, and know that it is water tight.

What about stove placement? When I get around to getting and installing a stove in I was considering the other side of the pole to get it out of the way of the door and entry. What do you think? All personal preference?

I think it is largely personal preference, keeping a coulple of key facts in mind. Because the shelter we wanted to use isn't that large, I knew we needed to keep the stove from getting too close to the side walls of the tent to prevent melting, hence putting it towards the middle. Also, the more of the stove pipe you can have inside the shelter, the warmer it's going to get inside. The center pole of the shelter breaks up the space at that point anyway, so it seemed reasonable to position the stove and pipe close to it. We knew we wanted one side unobstructed for our nest and double sleeping area, and it didn't make sense to have the beds in the way when you try to walk in the door, plus it's easier to pile the wood up in the open doorway. When we were trying to figure out where we wanted the jack, we set up the tent and put the (empty) stove on the floor and then lined up the jack accordingly. we marked the planned placement with a sharpie, before taking the tent down and bringing it inside to start sewing. I am hopeful that we made the right choice for jack placement, but won't be able to say for sure until we get it out in the field next month.
 
Top